You have access to a variety of useful options and settings when using WishList Member to manage members in your site. A single member can be viewed and managed or a group of members can be bulk edited all at once. A number of these options are touched on below including links to more in-depth information throughout the article and at the bottom of the article (including a Video Tutorial).
—
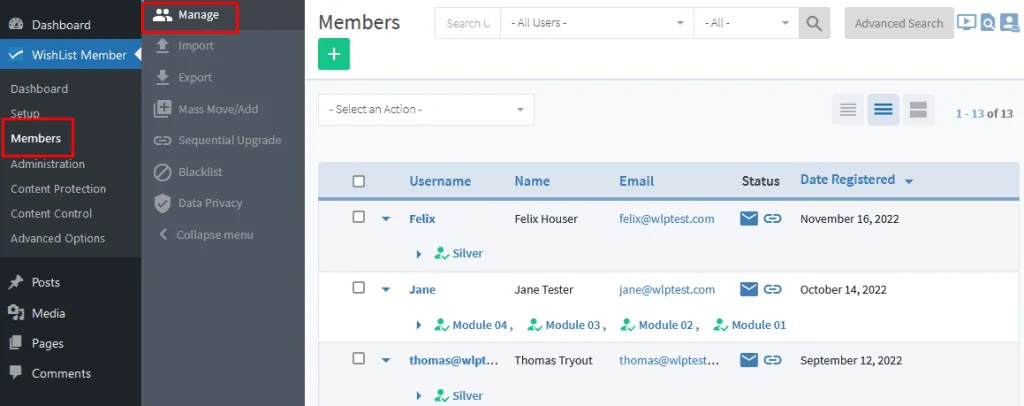
The Members > Manage section of WishList Member is a good place to start. This is where you can add new members, edit existing member accounts, grant or revoke access and more with ease.
—
Members List Views
The first thing you will notice is a list of members with identifying information displayed. This includes their username, email address, any assigned membership levels, etc.
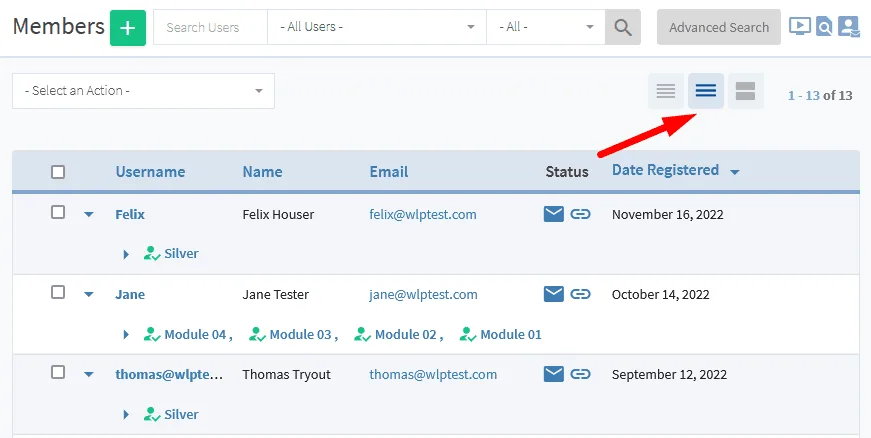
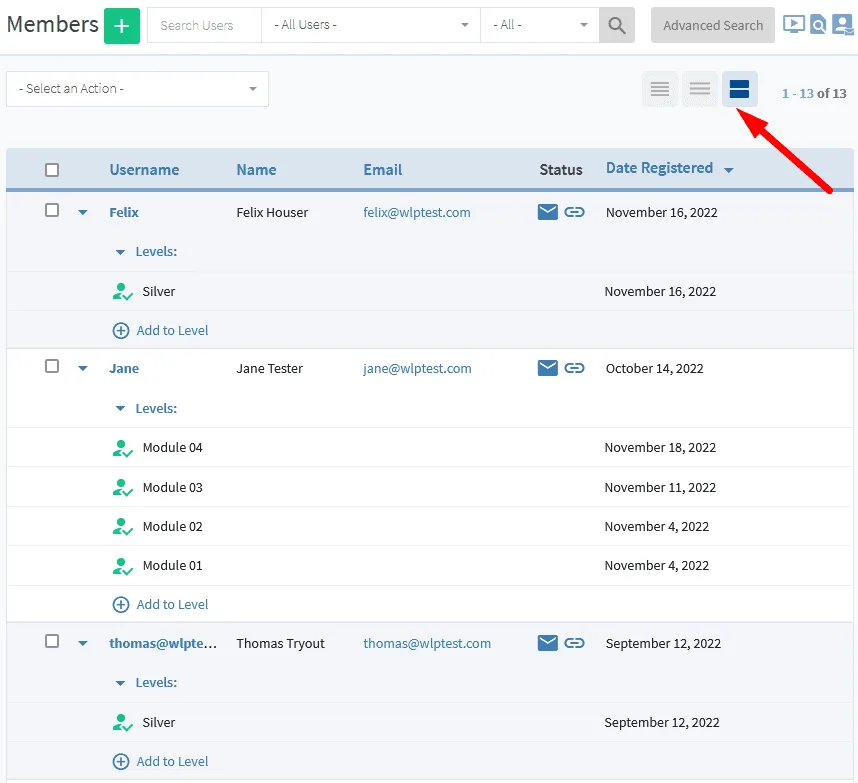
This provides you with an overview of the members in your site at a quick glance. You can control the appearance of the members list by using the Table View icons on the top right of the Members > Manage section. The available views are Minimal, Collapsed and Expanded.

—
The screenshot example below shows the members list with Collapsed view selected. This allows you to see the assigned membership levels for the members.
—
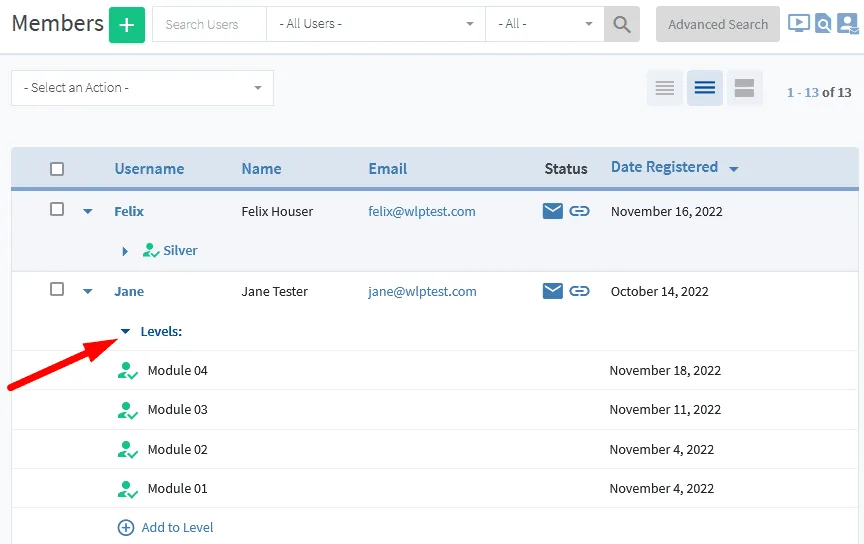
You can click the arrow icon when in Collapsed view to expand and see the individual membership level information for a member.
—
Using the Expanded view allows you to see all the membership level details for all the members all at once.
—
The Minimal view shows the list of members and hides the membership level information. You can use the arrow icon to view individual membership level information for any member on the list.

—
Manually Add a New Member
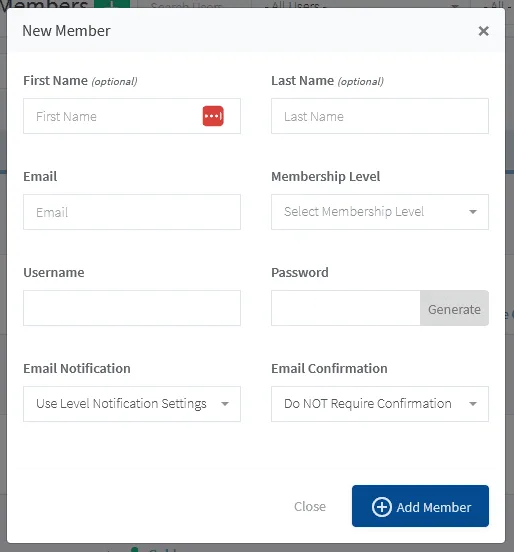
You can add a new member using the green Plus icon on the top left of the Members > Manage section in WishList Member.

—
The New Member popup will appear and you can fill in the fields accordingly. Once you click the Save button, a new member will be created. This can all be done in only a few seconds.
—
More Details Available: Manually Add a New Member to Your Membership Site
Edit an Existing Member
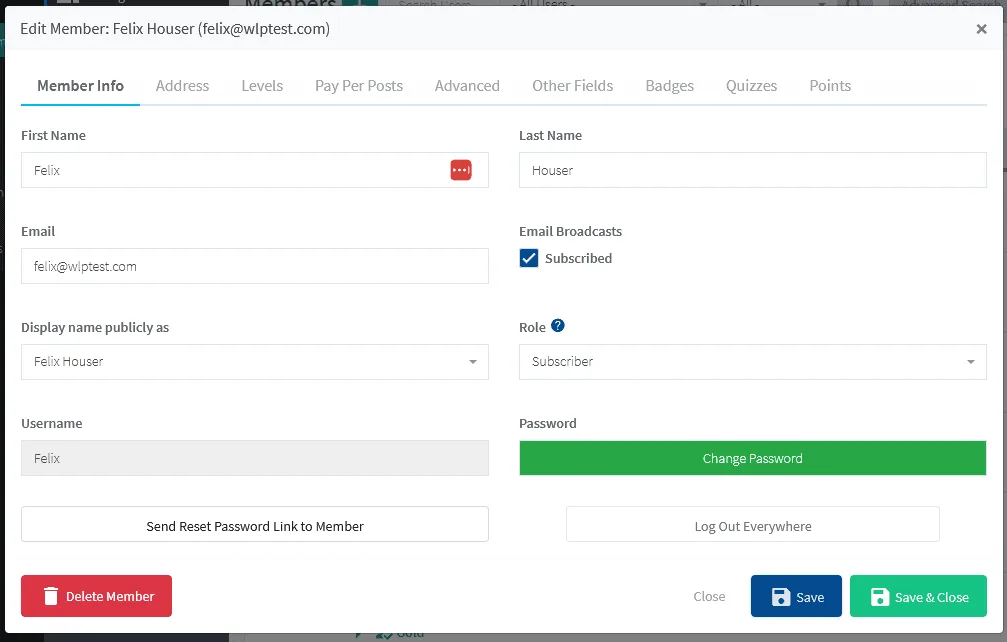
Editing an existing member is also a quick process. You can simply click their username or the Edit (pencil) icon that will appear when mousing over the member on the Members list.

—
The Edit Member popup will appear and you can view or edit any of the available fields in each of the tabs. Once you click the Save button, any edits will be applied. This allows you to make quick edits to a member account at any time.
—
More Details Available: Edit an Existing Member
Search for a Specific Member or Group of Members (including a Saved Search)
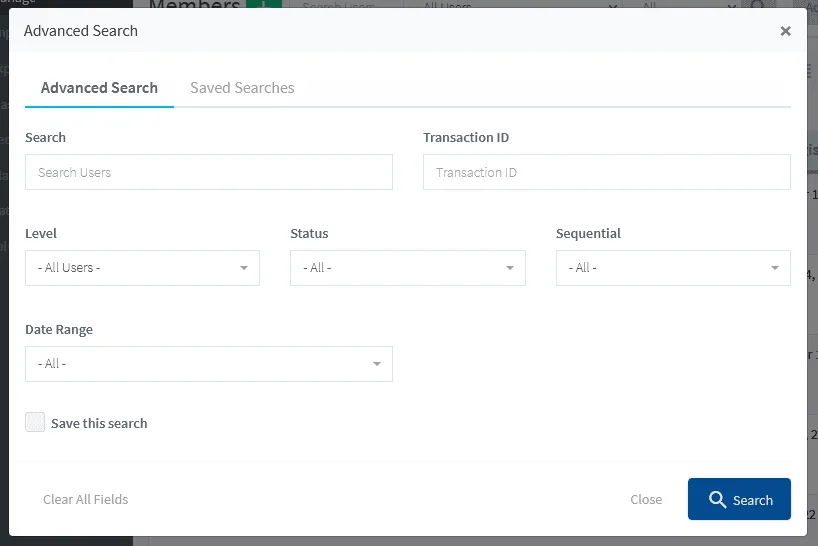
The search bar can be used to look up any members based on typical search criteria like name, email address, status, membership levels and more. There is also an Advanced Search that gives you even more flexibility to find a member (or groups of members) and to also save specific searches so you can easily run them again in the future.

—
Clicking on the Advanced Search button will display the Advanced Search popup. You can select the desired fields to customize your search based on exactly what you are wanting to find.
—
The “Save this search” checkbox can be used to save your specific search criteria and you can run that specific search again with one click in the Saved Searches tab in the future.

—
The screenshot below shows how the Saved Searches tab appears in the Advanced Search popup.

—
More Details Available: Member Searches (including Saved Searches)
Edit Members in Bulk (Multiple Members at Once)
The ability for you to edit multiple members at once means a quicker process when you want to apply the same settings to more than one member at a time. This saves you clicks and time.
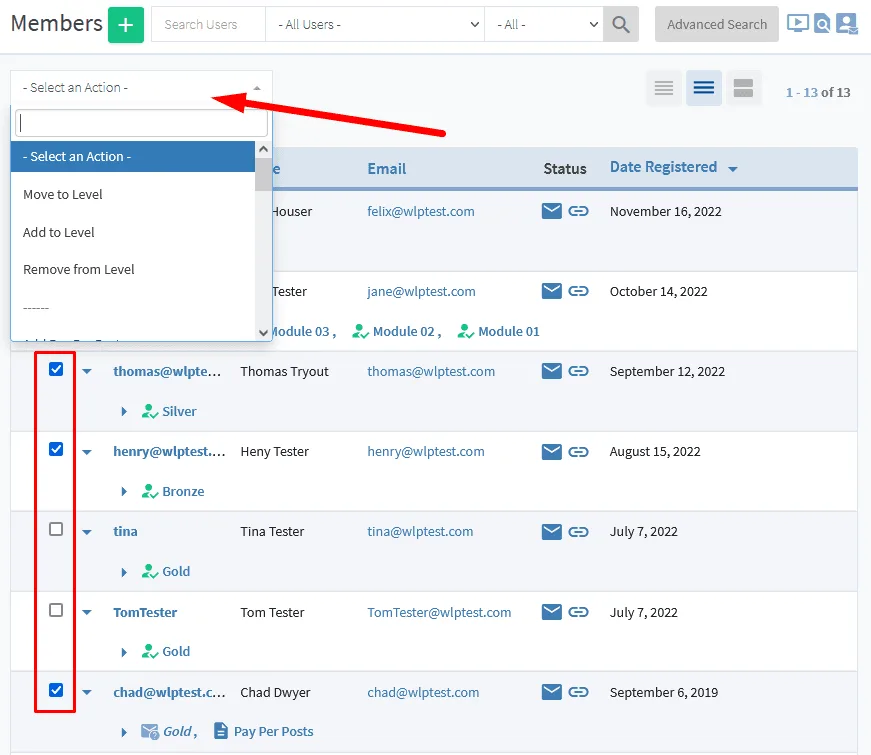
All you need to do is select each member using the checkboxes to the left of their names and then use the “Select an Action” dropdown to apply the action to all the selected members.
The example below shows three members selected using the checkboxes and the “Select an Action” dropdown being used to choose the action to apply. You can add multiple members to a level, remove them from a level, cancel them from a level, and more.
—
More Details Available: Editing Members in Bulk
Membership Level Status (Active, Inactive, Cancelled, etc.)
Members can have different statuses when it comes to the membership level(s) assigned to them. A member may have the Gold level assigned to them with the status set to Active. This means they have access to any Gold content since the level is Active on their account.
But another member may also have the Gold level assigned to them but their status is set to Cancelled. In that case, they cannot access Gold content because the level is Cancelled on their account.
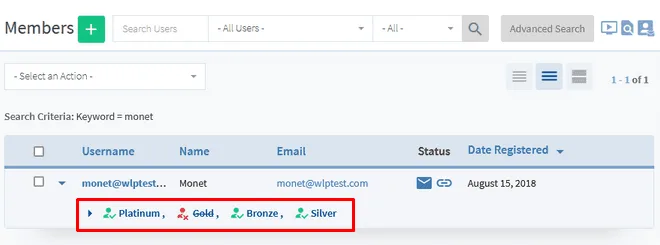
The screenshot below shows a member with four levels assigned to their account. They have an Active status for the Platinum, Bronze and Silver levels and a Cancelled status for the Gold level. The green icon with the check indicates an Active status while the red icon with the x indicates a Cancelled status.
—
—
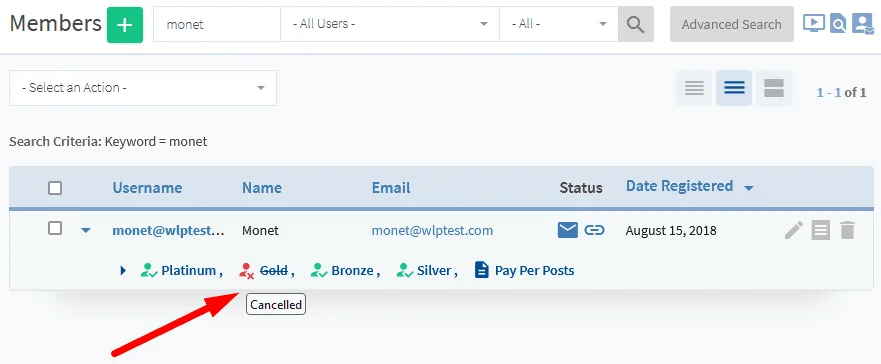
Mousing over a status icon will also display a text box stating the status.
—
More Details Available: Member Level Status
More Details on Specific Member Settings
There are a number of settings mentioned in the above Knowledge base entry and available to you in the Members > Manage section of WishList Member. These are addressed in more details in the articles mentioned below.
- Manually Add a New Member to your site – More Details
- Search for a specific Member or group of Members (including a Saved Search) – More Details
- Edit an Existing Member – More Details
- Edit Members in Bulk (multiple Members at once) – More Details
- Membership Level Status (Active, Inactive, etc.) – More Details
Manage Members Overview Video Tutorial
—
WishList Member Quick Start Guide Series
- WishList Member Quick Start Guide
- Installing WishList Member
- WishList Member Dashboard
- WishList Member Setup Wizard
- Membership Success Checklist
- Create a Membership Level
- Create a Welcome Page – After Registration
- Create a Member Dashboard Page – After Login
- Create Membership Content
- Create a Sales / Offer Page
- Member Login Options
- Courses, Quizzes, Points and Badges
- Manage Members
