
Users can login to your site using any WishList Member or WordPress login option.
This means you can use any of the available WishList Member login methods like the login form mergecode or customizing the WordPress login page. Your members have the option to use their social accounts to login to your site if you are using the WishList Member Social Login Add-on. Any of the standard WordPress login options or plugins can be used to allow for member login.
You can even use a combination of multiple options. Basically, any login method can be used to allow your users to login to your site.
In this article, we are going to run through a few popular methods for logging in.
These include:
- The WordPress Login Page (customized using WishList Member)
- The WishList Member Login Form Mergecode
- Social Login using the WishList Member Social Login Add-on
—
WordPress Login Page – Custom Styling
Let's start with a twist on a classic.
All WordPress sites include a default URL to allow for login. You can view the WordPress login form for your site by adding /wp-admin or /wp-login.php to the end of the site URL.
Example:
wlptest.com/wp-login.php
wlptest.com/wp-admin
This displays a login form that is functional, but it's appearance is fairly basic and displays the WordPress logo.

—
Ideally, this login page could match more with the look and feel of your site and include your site logo.
This is where the twist comes in with WishList Member.
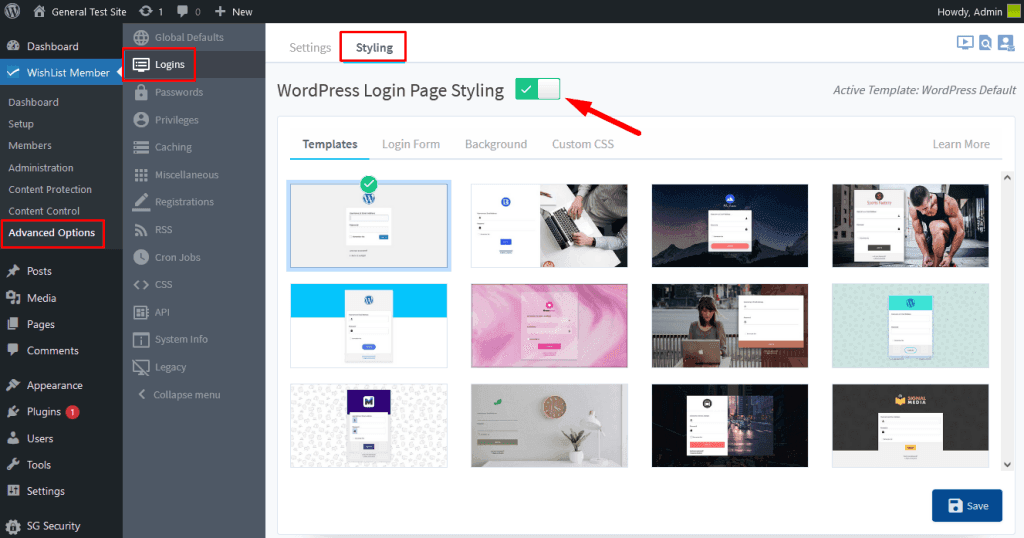
You can customize the appearance of the default WordPress login page in the Advanced Options > Logins > Styling section of WishList Member.
This allows you to select from a variety of templates and make any edits you would like. This can include changing the images, selecting your own colors and adding your own logo.
Once you're done, you will have a customized login form.
—
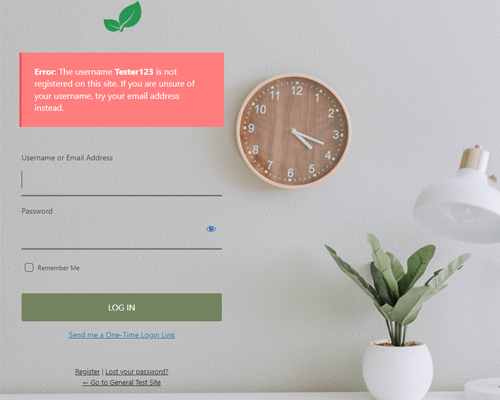
The screenshot example below shows the WordPress Login Page with a template applied. The same login functionality remains, but the appearance has been styled (a background image, new logo, etc.) based on the template used.

—
More details are available in the WordPress Login Form – Custom Styling article.
—
WishList Member Login Form Mergecode
WishList Member includes an option that allows you to easily insert a login form into any page or post.
This is handled by the login form mergecode. You can simply add that login mergecode to any area on a page or post and the site will automatically display the WishList Member login form.
The login form mergecode is available in a couple of formats.
- Standard Login Form Mergecode:
[wlm_loginform] - Login Form Mergecode with Ajax error message option:
[wlm_loginform ajax_login=1]
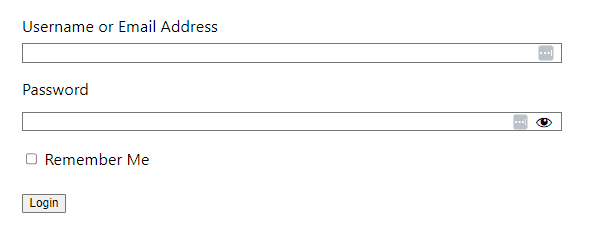
Both formats will display the same login form on the site as shown in the screenshot below.
—
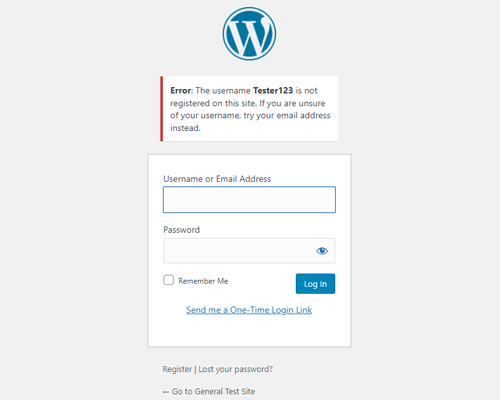
But the error message / redirect that occurs when a failed login attempt happens is different for the two login form mergecode formats.
[wlm_loginform] If the standard login form mergecode option is used, the user will be redirected to the WordPress login page if their login attempt fails.
—
—
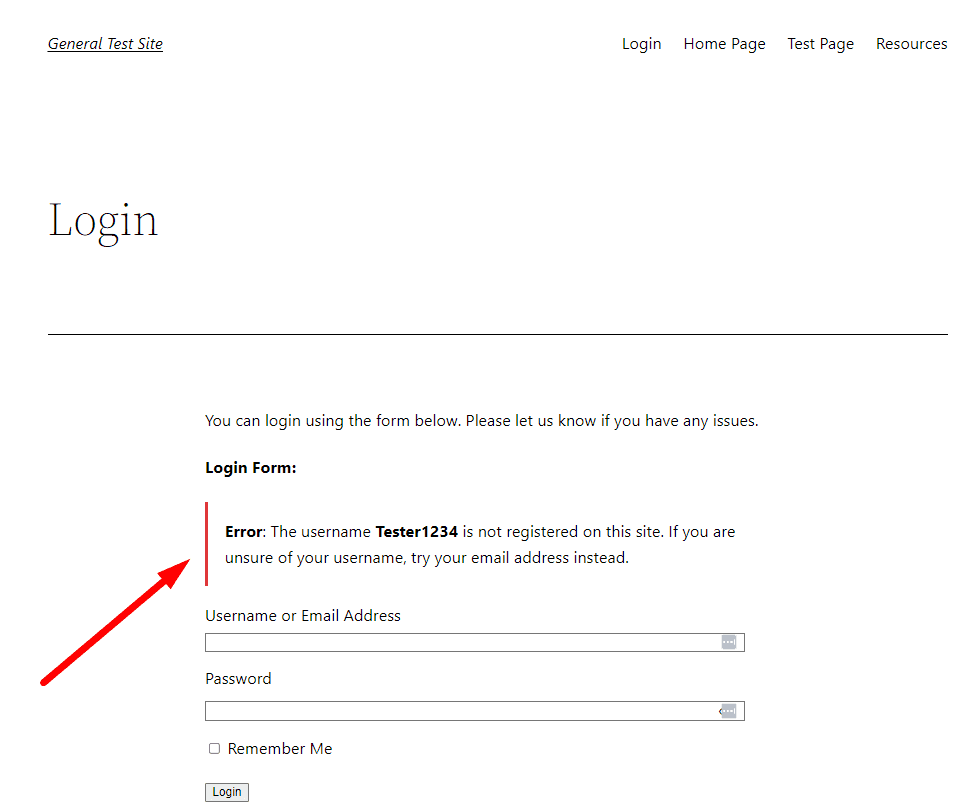
[wlm_loginform ajax_login=1] If the Login Form Mergecode with Ajax error message option is used, the user will remain on the same login page and will see the error message above the form if their login attempt fails.
—
More details (including the methods to insert the mergecode) are available in the Login Form Mergecode article. As mentioned, you can use any WishList Member or WordPress login option (or a combination of options).
—
WishList Member Social Login
Your members likely already have one or more social media accounts. Since that is the case, it would be helpful to allow those members to login to your site using their existing social account login. The popularity of online communities like Facebook and X (formerly Twitter) means that many of your members are using social media services. This means you can use the WishList Member Social Login Add-on to allow members to connect their site account with their social account and login using that social account moving forward.
For instance, you can enable and configure any of the available social providers including Facebook, Google, X (formerly Twitter), or WordPress.com in Social Login and your members will see the option to login accordingly.
The example screenshot below shows Facebook and X (formerly Twitter) have been enabled and configured. In this case, the social login options appear on the login form that appears when using the WishList Member Login Form Mergecode.

—
The social providers will also appear on the standard WordPress login page. This includes if you've used the WordPress Login Form Styling feature in WishList Member to customize the look of that login form.
In this screenshot example, the enabled and configured Facebook and X (formerly Twitter) login option appear.

—
The WishList Member Social Login Add-on can also be used to provide members with buttons to Connect or Disconnect their social accounts from their account on your site. This can be done using the available shortcodes included in the Add-on.
In this example, the following shortcode has been used to display the Connect/Disconnect buttons.
[wishlist_member_social_connect_disconnect]
—
These are only a few quick examples of what is possible when using the WishList Member Social Login Add-on. There are a variety of other options related to social logins and how your users can easily connect their social account to their site account.
More details (including full setup instructions, shortcodes, examples, etc.) are available in the WishList Member Social Login article.
—
WishList Member Quick Start Guide Series
- WishList Member Quick Start Guide
- Installing WishList Member
- WishList Member Dashboard
- WishList Member Setup Wizard
- Membership Success Checklist
- Create a Membership Level
- Create a Welcome Page – After Registration
- Create a Member Dashboard Page – After Login
- Create Membership Content
- Create a Sales / Offer Page
- Member Login Options
- Courses, Quizzes, Points and Badges
- Manage Members
