First impressions can be significant as they often set the tone for future interactions. For this reason, it's a good idea to start your members off on the right foot. An ideal way to do that is by welcoming them as soon as they join.
WishList Member includes an After Registration page (typically called the Member Welcome Page).
This means when a member registers for a membership level, they are shown the set After Registration page one time.
There is a basic message applied as the default After Registration page. But that page is also an opportunity to create a more detailed introduction to your site for your new members. An effective welcome page does exactly that; it welcomes them to your membership and provides details to prepare them for what they can expect.
—
After Registration Page Overview
As noted, the After Registration page will appear to a member directly after they register and it can only be viewed once.
A Global Default After Registration page can be set or individual After Registration pages can be set for each membership level.
Additional options and settings related to configuring the After Registration page are available in the After Registration Page Knowledge Base entry.
In this entry, we will focus on the type of information you can include on a welcome page when setting it as the After Registration page.
—
Two Key Pieces of Information Regarding the After Registration Page
- It is the first page a member sees after registration
- It can only be seen once by the member
Let's say someone just decided to join your membership and became a new member a few seconds ago. They are likely looking forward to digging into their brand new membership and exploring the site.
Since the After Registration page is their first experience as an official member, it is recommended to include some specific and useful information along with a genuine welcome. We get into more details on that below.
It is important to remember the After Registration page only appears to the member once. So any content, links, or information the member will need to access again or on a regular basis should also be included elsewhere on the site. This might include a way to access a bonus or a members only area. That type of content should be easily found at any time.
The After Login page is useful for cases like this as that page appears to the member each time they login moving forward.
—
What Should Appear on a Welcome Page?
This is a good question to ask and it can depend on the type of site. But, there are a few things that you'll typically find on a welcome page.
- A genuine welcome. The new members have placed their trust in you and your offer so a sincere “Thank you” and a “Welcome” is always appreciated.
- What is included in their membership. A brief overview of what they just purchased / joined.
- Next Steps. Where should the member go now and how can they easily find what they need.
Since the After Registration page only appears to the member once, you may find some of the links you included on the welcome page will also appear on the After Login page (often referred to as a dashboard page). More information is available on creating a dashboard page.
Of course, you can include whatever you would like on the page. You know your members and what they will want to see.
—
Welcome Page Example
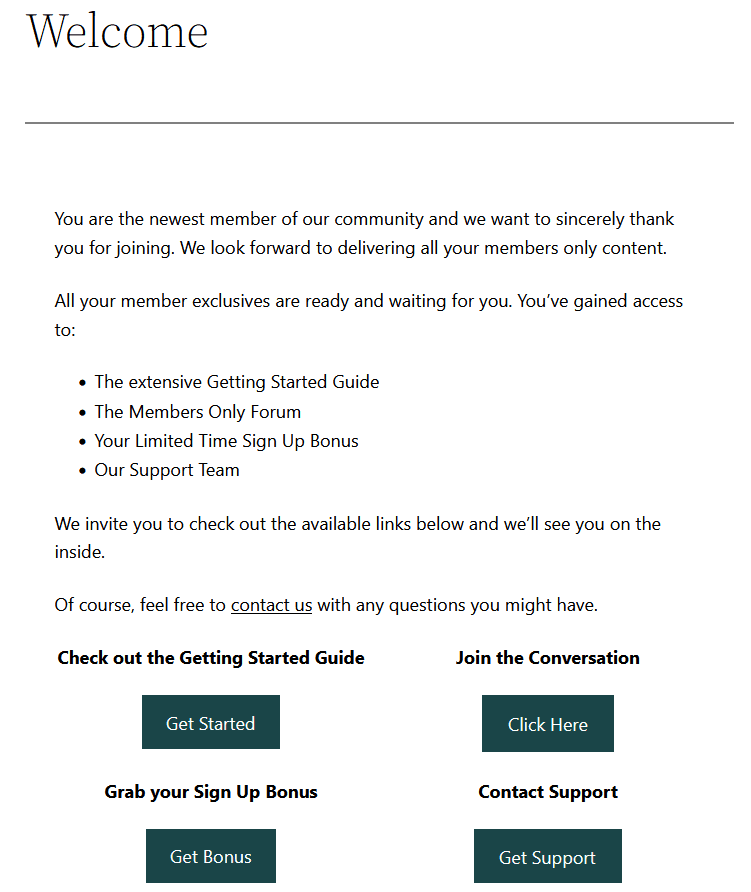
We have included a screenshot example of a welcome page below. It uses a WordPress default theme and includes some minor formatting. Of course, you can use the theme of your choice and can use a page builder if you would like.
With that being said, the page includes a short message to welcome the member and includes links to some areas they might want to check out as a new member.
You can customize your own welcome page to include what your members will want and need.

—
Welcome Page Example – Social Login
You have the ability to add social login details to the Welcome page if you're using the WishList Member Social Login Add-on. That Add-on can be used to provide your members with the option to connect their favorite social account to their site account and login using their social account moving forward.
Including the Connect/Disconnect button for social providers like Facebook, Google, X (formerly Twitter), and WordPress.com on your After Registration (Welcome) page allows your members to easily connect their accounts for an easy login process.
The Social Login Connect/Disconnect Buttons shortcode can be added to the page and it will automatically display the correct Connect or Disconnect button based on if the member viewing that page has connected their accounts or not.
[wishlist_member_social_connect_disconnect]The screenshot example below shows a site with the Facebook and X (formerly Twitter) Social Login options enabled in the Social Login Add-on and the Welcome page with the Connect/Disconnect buttons appearing. This allows site members to connect their preferred social account by clicking the appropriate button.

—
More details (including full setup instructions, shortcodes, examples, etc.) are available in the WishList Member Social Login Knowledge Base entry.
—
Revert to Previous Page Settings – Revisions
There may be times when you may want to revert back to content that was previously saved on the page. Perhaps you decide you liked the previous text better or preferred a different lay out that was used.
You can use the WordPress Revisions section to revert back to previous save points for the content on the page.
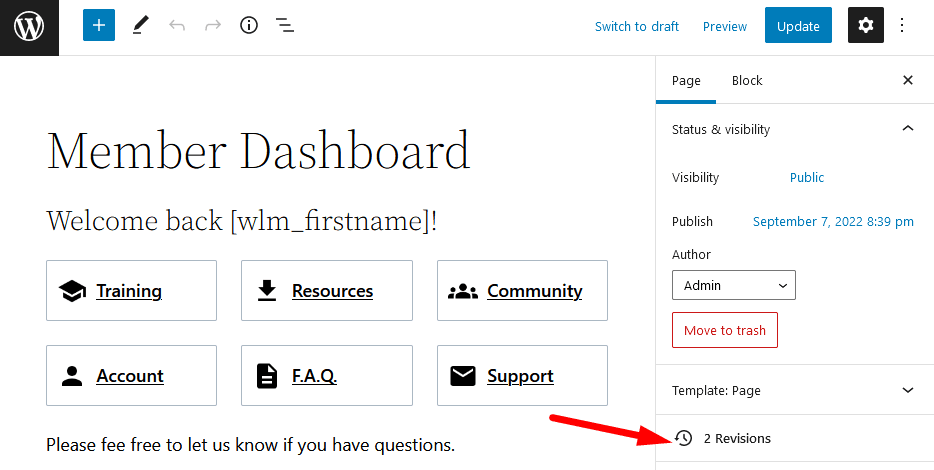
WordPress displays a Revisions area on the right side of the edit page section as displayed in the screenshot below.

—
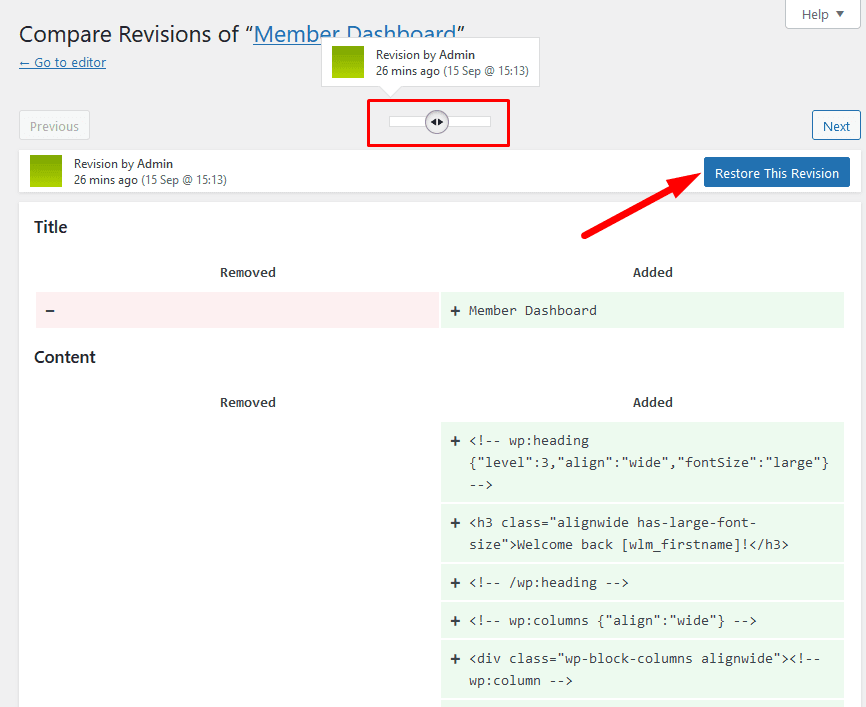
You can click to view the Revisions for the page and the Compare Revisions section appears. This WordPress feature allows you to roll back to previous save points. This can be helpful if you want to go back to using a previously saved version of the page.
Note: The slider on the top can be used to display different save points so you can select the revision of your choice.
The revisions will show what has been removed or added and the Restore This Revision button can be used to complete the restoration.

—
This essentially allows you to roll back to a previously saved version of the page.
—
WishList Member Quick Start Guide Series
- WishList Member Quick Start Guide
- Installing WishList Member
- WishList Member Dashboard
- WishList Member Setup Wizard
- Membership Success Checklist
- Create a Membership Level
- Create a Welcome Page – After Registration
- Create a Member Dashboard Page – After Login
- Create Membership Content
- Create a Sales / Offer Page
- Member Login Options
- Courses, Quizzes, Points and Badges
- Manage Members
