
Setting up WishList Member on your site can be done easily using the Setup Wizard. The Wizard will guide you through a few quick steps resulting in a configured site within a few minutes.
A checklist will also be shown at the end of the setup process. It will display what has been set up and any potential next steps.
Much of the process has been configured for you, so you can use the recommended settings or make any edits you would like along the way. You have the power to tailor your site to fit your needs.
The WishList Member Setup Wizard can be used if you are just starting out or if you ever want to go back and make adjustments.
More details are included below (including a Video Tutorial).
—
Note: You can skip any steps as you run through the Setup Wizard. If you find something isn't needed for your site or you plan to set it up later, you can move right along to the next step. No problem.
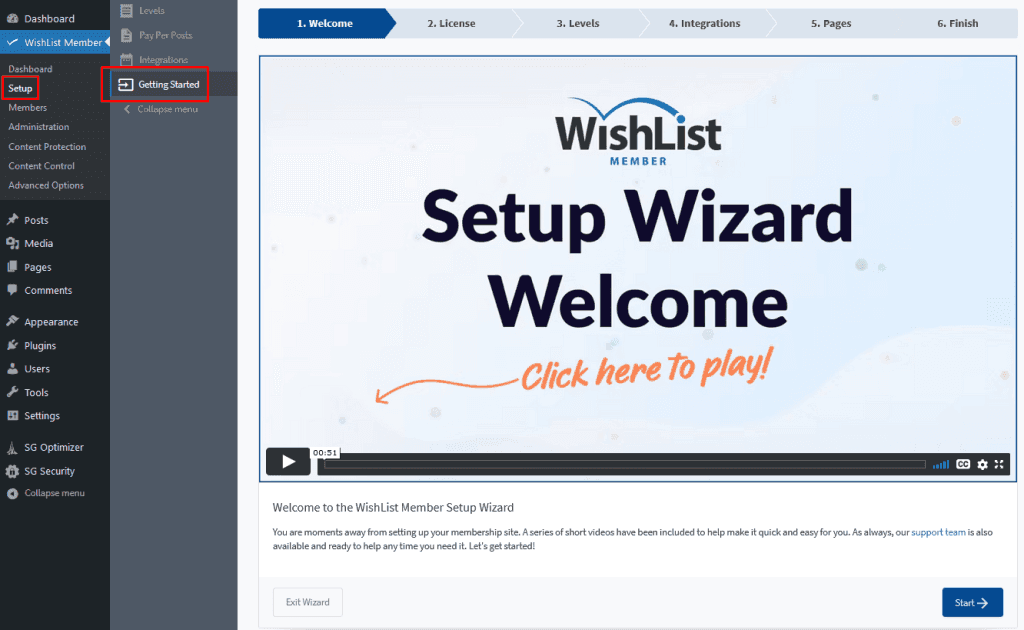
You can access the Setup Wizard at any time in the Setup > Getting Started section in WishList Member.
The first step is a short welcome and you can then click the Start button to get rolling.
Welcome to the WishList Member Setup Wizard
—
Enter your WishList Member License Key
Next up is entering your license key to activate WishList Member. Please note, if you have already activated WishList Member with your license key, this step won't appear. You'll be automatically shown the next step.
If you haven't activated WishList Member yet, you can do that with the license key you were issued when you purchased WishList Member. You can find that license key in the email you were sent after your purchase or you can find it in the Downloads section of the Customer Center.
Simply enter your license key into the corresponding field and click Save & Continue.

—
Create Membership Level
You can now create a membership level. All you need to do is enter a name for your membership level and you're all set. A membership level with typical settings will be created.
Examples of membership level names are Bronze, Silver, Gold, etc. Of course, you can name your membership level anything you would like.
The Add Another Level button can be used if you want to create more than one membership level now. You can always create more levels or edit the level you've created at any point in the future.
You can click the Save & Continue button once you enter the name of your membership level.

—
Enable Integrations
You have the option of integrating with a payment provider or with an email provider (or both). If you don't need to accept payments or don't need to use an email provider, or want to do this at another time, you can skip this step.
Integrating with a payment provider allows you to accept payments for access to your site while integrating with an email provider allows for another method of contacting and marketing to your members.
If you enable a payment provider or an email provider, you will be able to complete their configuration after the Setup Wizard is complete.

—
Create Membership Pages
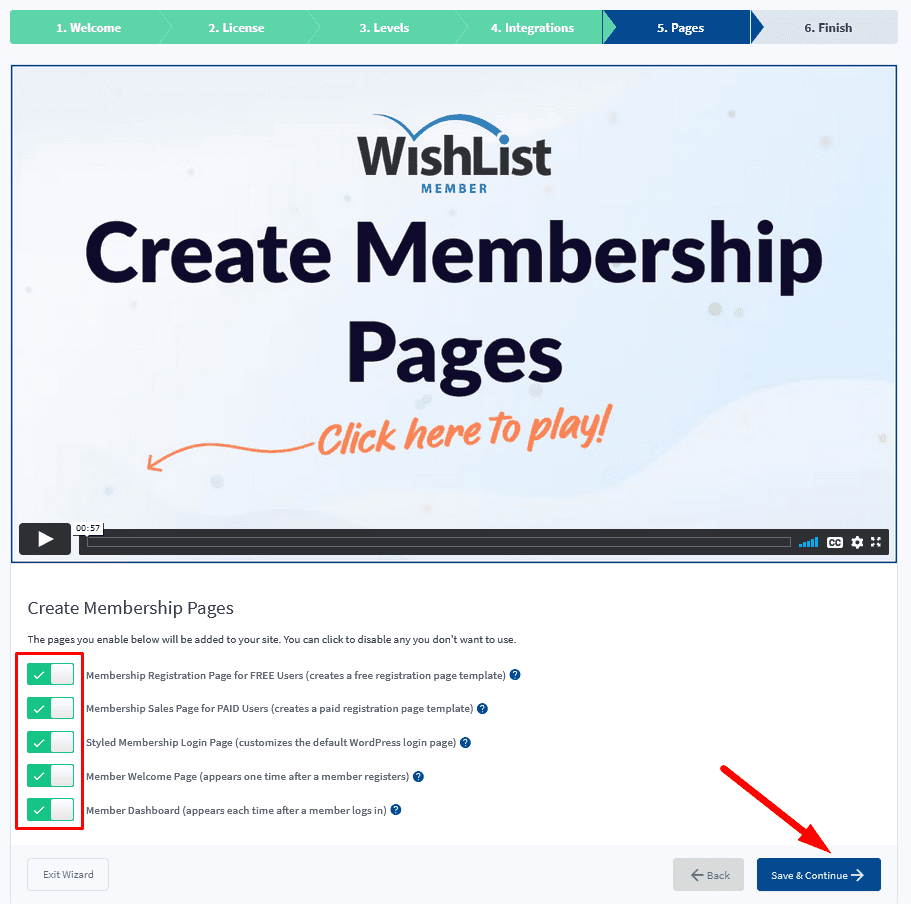
You can select which pages you would like to have created from a list of membership pages. These cover a variety of topics like member login, registration and more. You also have the option to customize any of these pages at any time.
The Membership Registration Page for FREE Users is a page you can use if you would like to allow free access to a membership level. A page is created with a registration form and you can add information describing the membership.
The Membership Sales Page for PAID Users is a page you can use if you would like to accept payments to access a membership level. A page is created with sales copy you can edit to describe your offer and you can add a purchase button/link created when integrating with a payment provider.
The Styled Membership Login Page applies a designed template to the default WordPress login page. This sets the default login page to better match the look and feel of your membership site. You can select from the available templates and make adjustments like adding your own login, setting the colors and more.
The Member Welcome page is often referred to as the After Registration Page. It is seen by the member one time only right after registration. This is an opportunity to welcome the new member and invite them to check out the site.
The Member Dashboard page is often referred to as the After Login Page. It is seen by the member each time they login moving forward. This is a useful area to include links to common sections the member will want to visit.
—
Congratulations!
You did it! The final step appears as you have run through the WishList Member Setup Wizard. You can now click the Finish button to view the Membership Success Checklist.

—
Membership Success Checklist
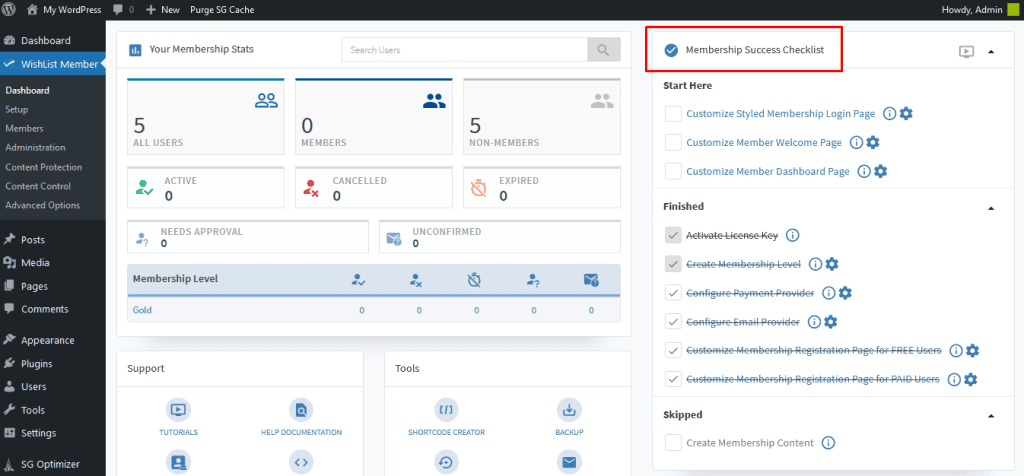
The Membership Success Checklist appears on the WishList Member dashboard. It displays what you have set up and provides information on potential next steps you can take.
—
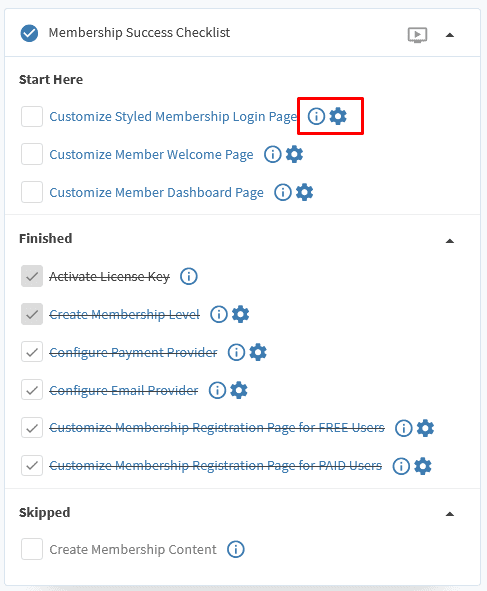
You can click on the item or the gear icon to further configure that specific item. It will direct you to that specific section in WishList Member. The letter i icon can be used to learn more about the item. It will direct you to documentation related to the item.
—
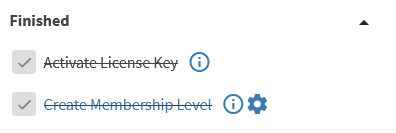
Some items will be checked off automatically when complete. Examples include activating WishList Member with your license key or creating a membership level. Completing the actions of activating the license key and creating a membership level checks those off the list and adds them to the Finished section.
—
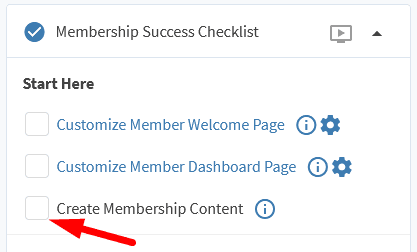
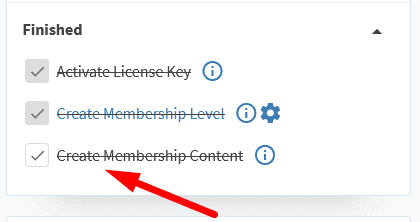
Other items can be checked off manually by clicking the box beside it. Checking off an item will move it to the Finished section of the checklist.
—
—
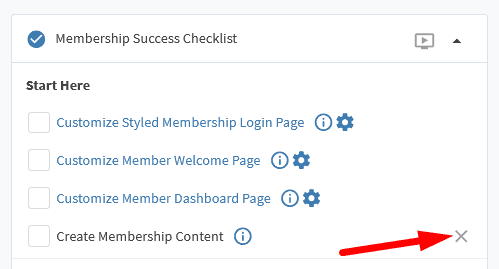
You can also skip any items that may not apply to your site or that you may want to come back to later. This can be done using the X icon that appears when mousing over an item.
—
Clicking the X icon to skip the item will place that item in the Skipped section on the bottom of the checklist.

—
You can also restore any item that has been skipped by using the Restore icon. Restoring an item will place it back into it's corresponding section.

—
The video tutorial below runs through the WishList Member Setup Wizard and explains each step along the way.
Video Tutorial
—
WishList Member Quick Start Guide Series
- WishList Member Quick Start Guide
- Installing WishList Member
- WishList Member Dashboard
- WishList Member Setup Wizard
- Membership Success Checklist
- Create a Membership Level
- Create a Welcome Page – After Registration
- Create a Member Dashboard Page – After Login
- Create Membership Content
- Create a Sales / Offer Page
- Member Login Options
- Courses, Quizzes, Points and Badges
- Manage Members
