
Installing the WishList Member plugin onto your WordPress site only takes a few quick steps. All you need is your WishList Member zip file and license key to complete the installation. This can be done using the standard method or an alternative method.
We will provide all the details below (including a Video Tutorial).
Downloading WishList Member
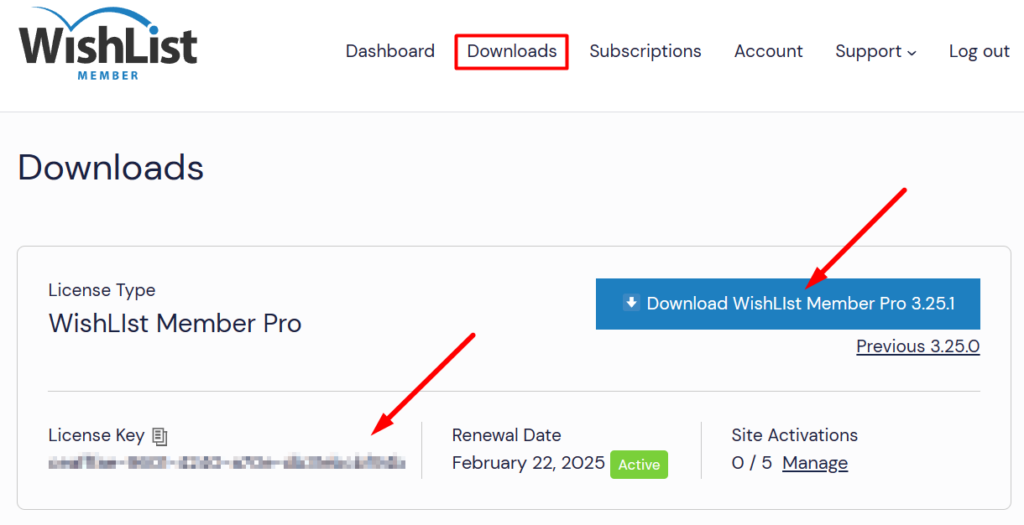
After purchasing WishList Member, you were sent an email with your download link and license key. You can also download WishList Member and get your license key at any time by visiting the Downloads section of the Customer Center. The screenshot below shows access to WishList Member Pro, but you may have a different product and software version.
—
Locating the Downloaded WishList Member Zip File
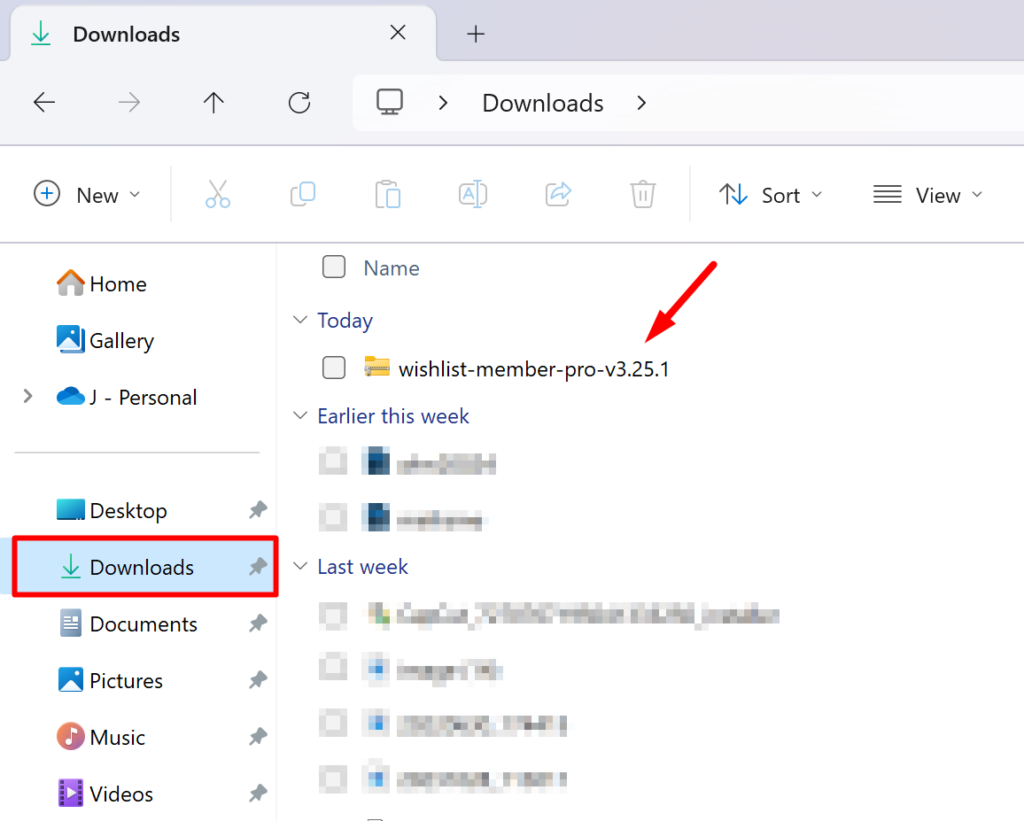
After the download completes, the WishList Member zip file will typically be in your Downloads folder. If not, a quick search for “wishlist-member” using your computer's search feature should help you locate it.
The screenshot below shows where the zip file is typically found.
—
Installing the WishList Member Plugin
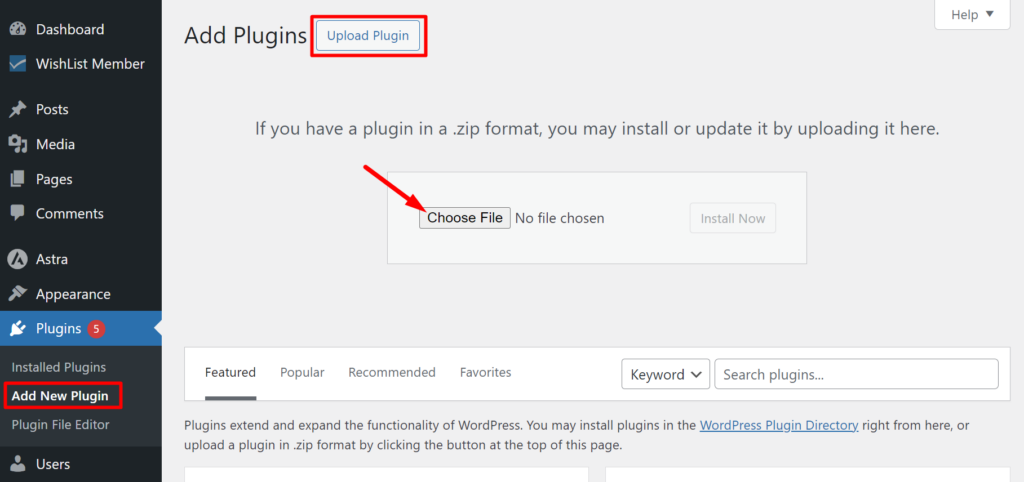
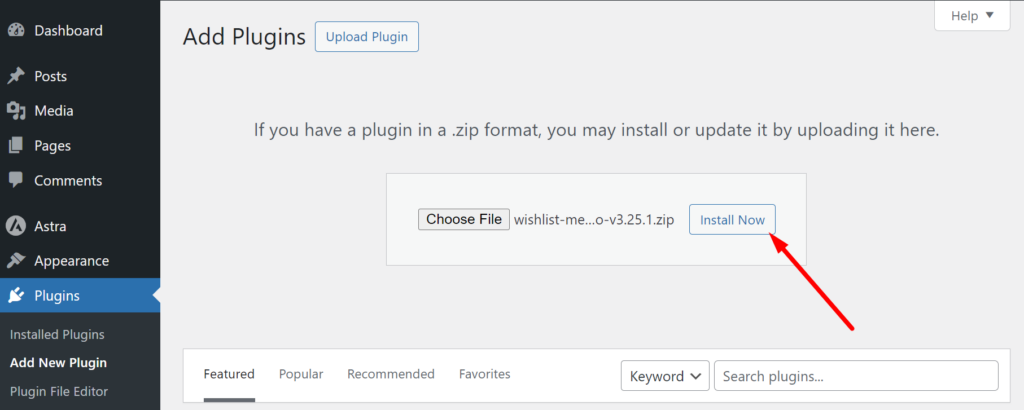
For the standard installation method, head over to the WordPress Plugins > Add New Plugin section. Click Upload Plugin and use the Choose File button to locate the downloaded WishList Member zip file from your computer.
—
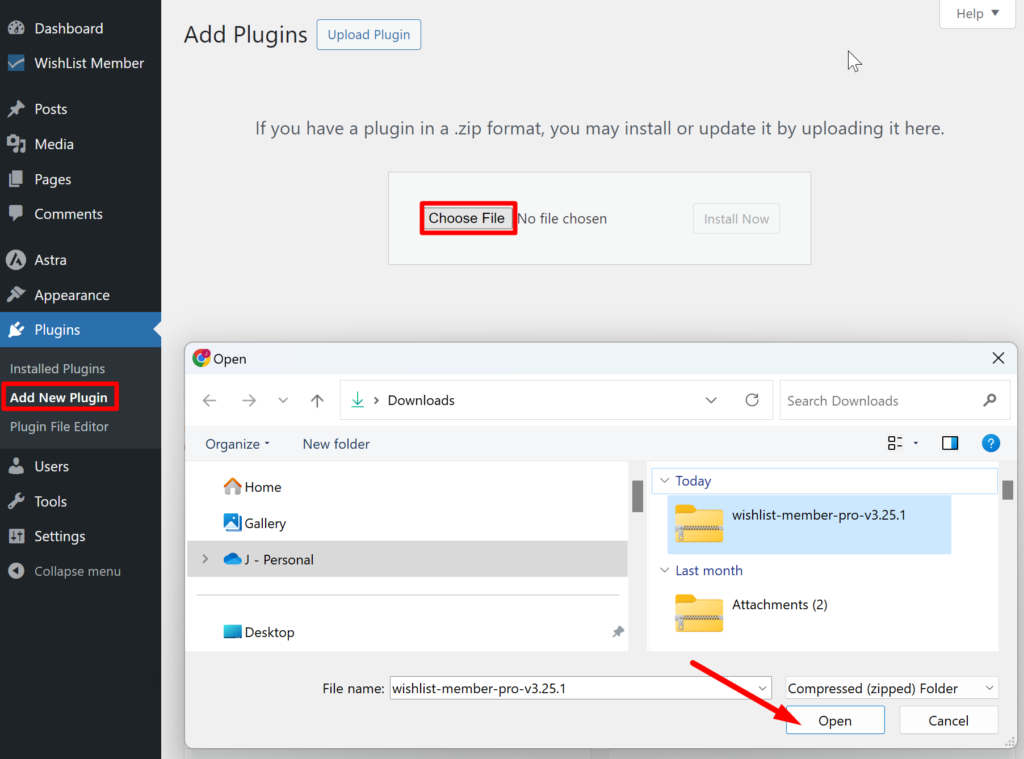
The Explorer popup will appear. Select the downloaded WishList Member zip file, and click the Open button.
—
Click the Install Now button and WordPress will install WishList Member for you in a few seconds.
—
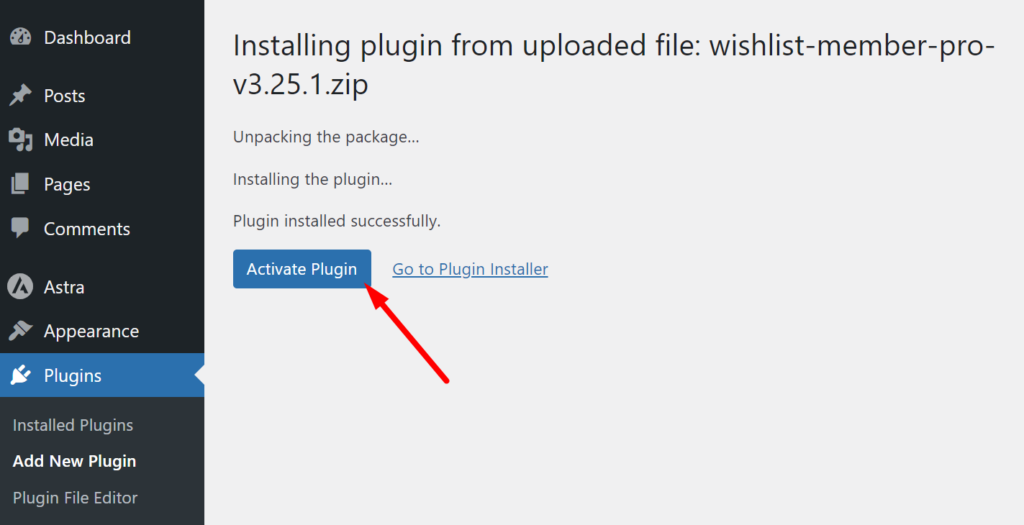
Once the WishList Member plugin is installed, click the Activate Plugin button.
—
Your WishList Member plugin is now installed and activated. The next step is activating your license.
Activating Your WishList Member License
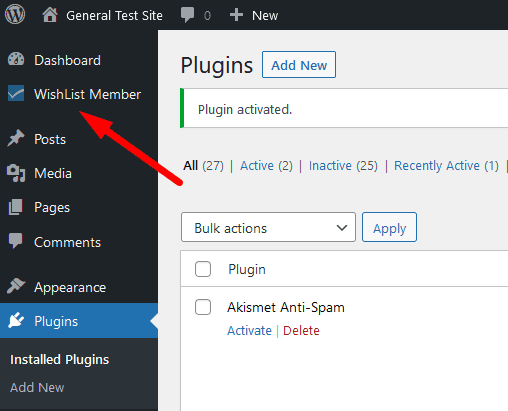
Now, you can complete the process by activating your license key at the WishList Member Dashboard. Start by clicking WishList Member in the WordPress menu.
—
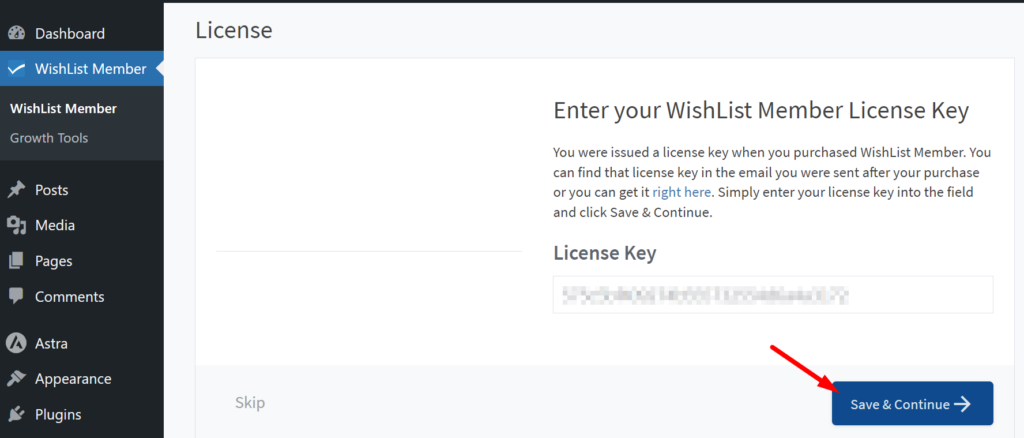
Once at the license screen, enter your WishList Member license key into the corresponding field and click the Save & Continue button.
—
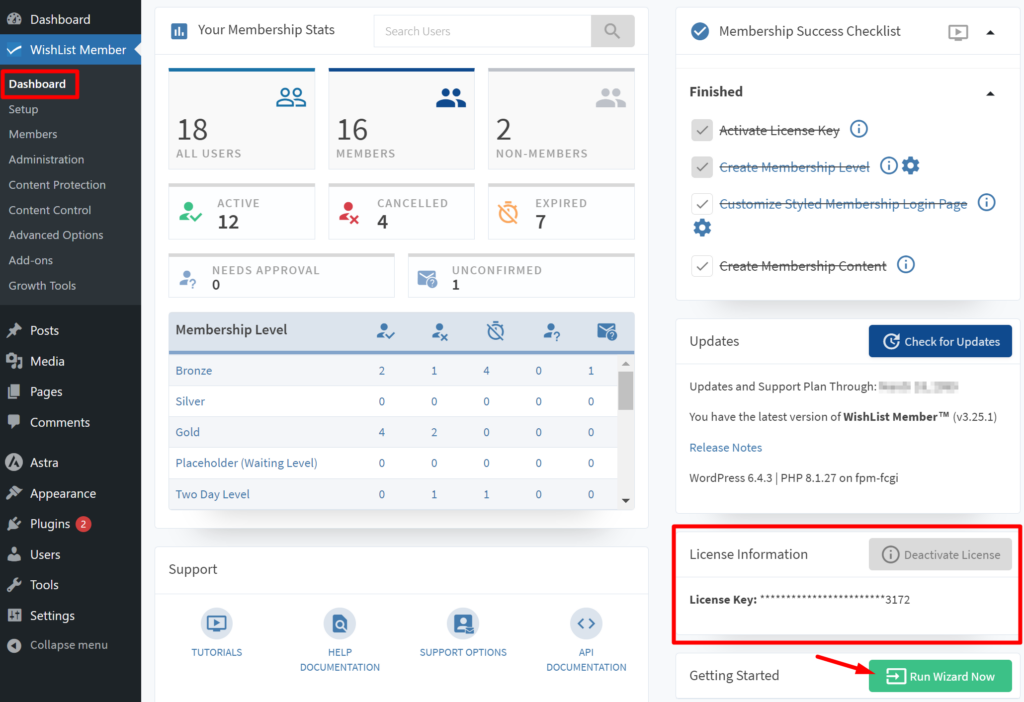
Congratulations! You are now all set. You will be directed to the WishList Member Dashboard where you will see WishList Member installed and activated.
You can also use the WishList Member Setup Wizard at any time to keep things rolling and configure your site.
—
FTP Method to Install WishList Member
In certain scenarios, you might prefer to install WishList Member using FTP (File Transfer Protocol). Why would you use this alternative method over the standard method?
- High-Speed Internet Connections: FTP can be faster for those with high-speed internet, making it a more efficient installation method.
- Upload Size Limitations: Some WordPress hosting environments have a capped upload size that might prevent the direct uploading of larger plugins. FTP bypasses this limitation by allowing you to upload files directly to your server.
Installing the WishList Member Plugin Using FTP
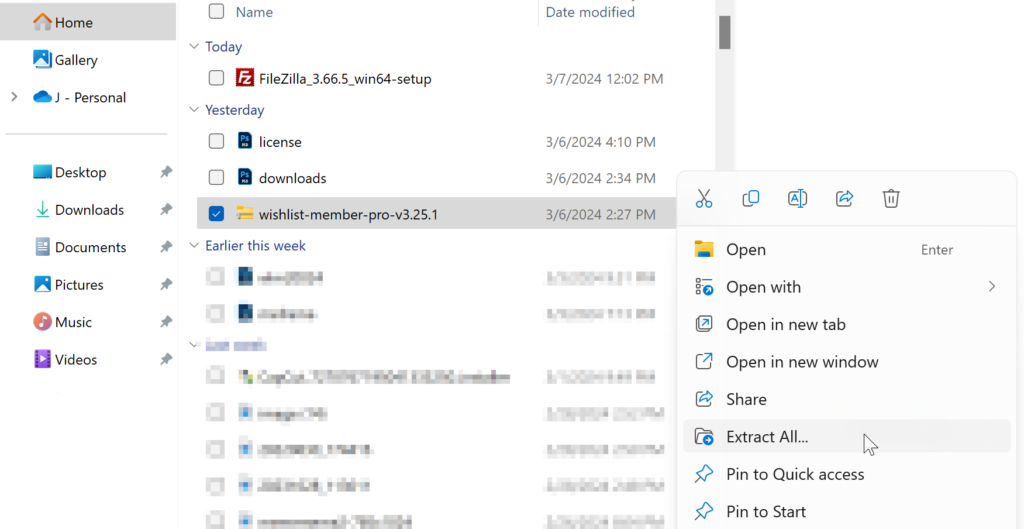
Extract the WishList Member zip file on your computer. With most computers, right clicking the downloaded zip file will bring up an extract option.
—
If not already installed, a FTP client (like FileZilla), can connect to your website's server. You will need the following connection information below. If you're unsure on how to get this info, your hosting provider can provide it to you.
- FTP Host/Server Address: This is the address of the server where your website is hosted. It might look like an IP address (192.168.1.1) or a domain name (ftp.wlptest.com, sftp.wlptest.com).
- FTP Username: The user account you'll use to log in. This may or may not be the same as your hosting account username.
- FTP Password: The password for your FTP user account. Ensure this is kept secure and confidential.
- Port Number: While the default FTP port is 21, some providers may use a different port for secure FTP connections (SFTP), typically port 22.
- Connection Type: Confirm whether your provider supports FTP, SFTP (Secure FTP), or FTPS (FTP Secure). SFTP is recommended for its enhanced security.
Once you have these FTP details mentioned above, you can input them into your preferred FTP client software (like FileZilla, Cyberduck, or WinSCP) to connect to your server and manage your website's files.
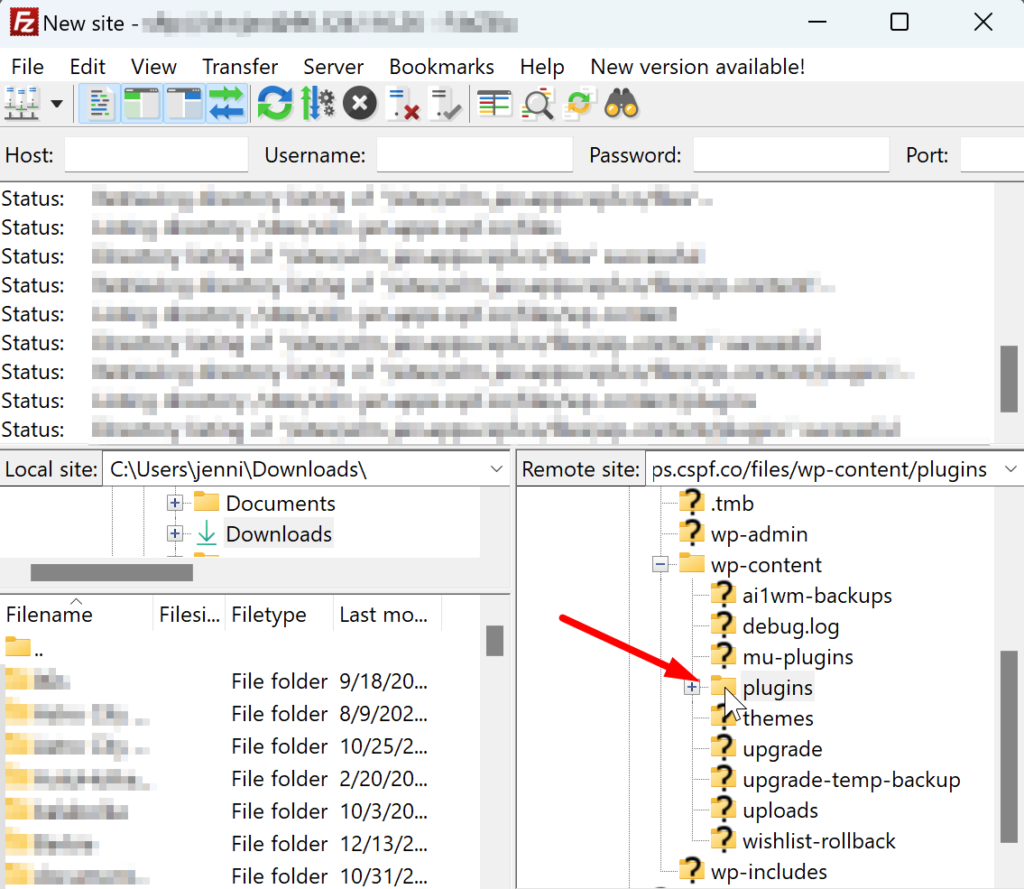
Once your FTP client is running, navigate to the wp-content/plugins directory. If needed, your hosting provider can tell you how to find the plugin directory.
The example screenshot below shows FileZilla accessing the site files.
—
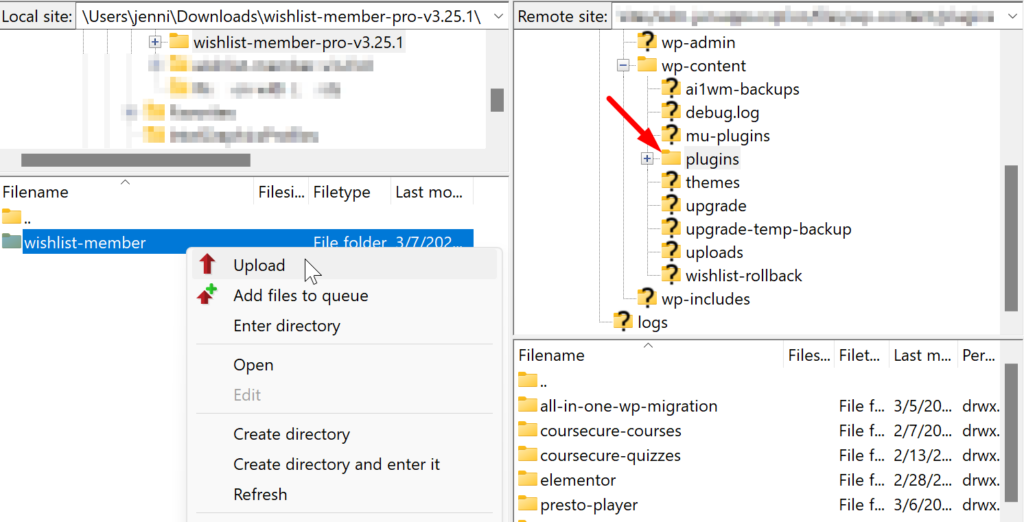
Upload the extracted WishList Member folder to the plugins directory.
—
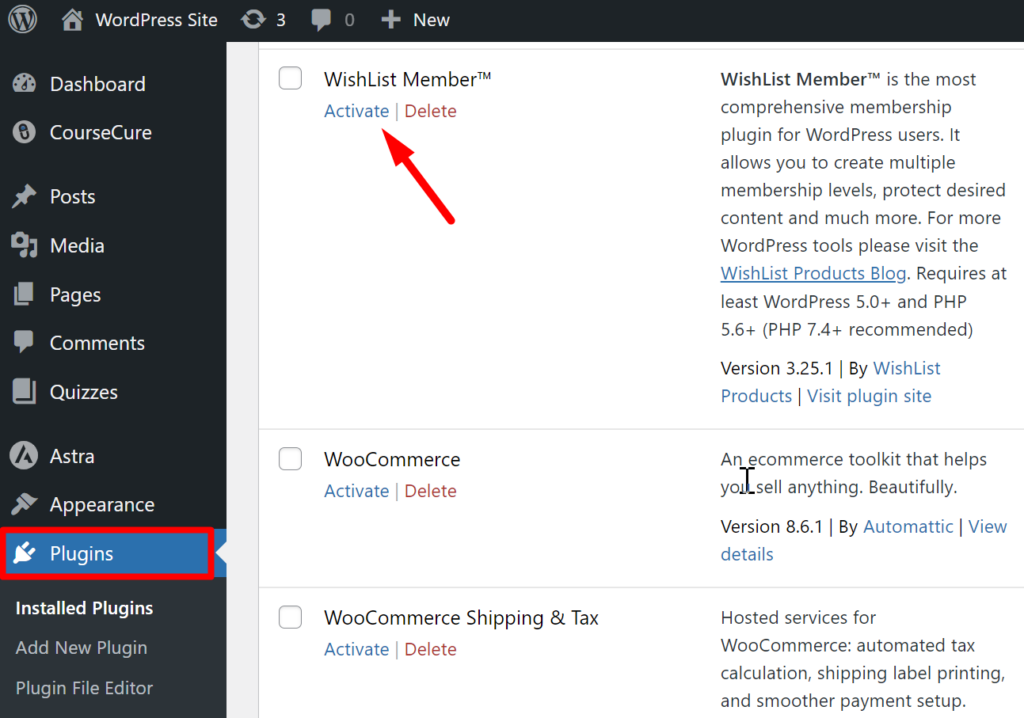
Now the WishList Member plugin has been uploaded via FTP and will appear on the WordPress > Plugins section. On the plugins page, scroll down until you see WishList Member and click the Activate Link.
—
After activation, a WishList Member menu item will appear.

—
After clicking the WishList Member menu item, you can enter your license key into the corresponding field as shown in the screenshot below.

—
These WishList Member license activation steps are the same for both the standard plugin uploader method or the FTP alternative method.
Your license is now activated and you will be directed to the WishList Member Dashboard.
—
Whether you choose the standard plugin upload method or the FTP alternative method, you've taken a significant step towards creating your own membership site. As you embark on your journey, remember the WishList Member Setup Wizard is available for easy configuration and management of your site.
WishList Member Support and the Quick Start Guide are also available if you have any further questions on the installation and activation of WishList Member.
—
Video Tutorial
—
WishList Member Quick Start Guide Series
- WishList Member Quick Start Guide
- Installing WishList Member
- WishList Member Dashboard
- WishList Member Setup Wizard
- Membership Success Checklist
- Create a Membership Level
- Create a Welcome Page – After Registration
- Create a Member Dashboard Page – After Login
- Create Membership Content
- Create a Sales / Offer Page
- Member Login Options
- Courses, Quizzes, Points and Badges
- Manage Members
