
One click of a button can add or a move a member to a new membership level and unlock exclusive content. Another button could remove or cancel access to a membership level when it is clicked by a member. A Member Action Button is a powerful WishList Member tool you can use to customize the experience for your members.
You can create a button to trigger a specific action when clicked. This allows for many useful scenarios like adding or removing a level. A Member Action Button can be applied to a Level or Pay Per Post which opens up even more possibilities.
The Member Action Button can also be used to apply actions to WordPress users. This is an easy way to add a WordPress user to a membership level.
—
An Action Button can be created in either of two places in WishList Member.
- Create an Action Button using the WishList Member Shortcode Creator
- Create an Action Button on a page/post using the Classic Block in the Gutenberg Editor
Create a Member Action Button using the WishList Member Shortcode Creator
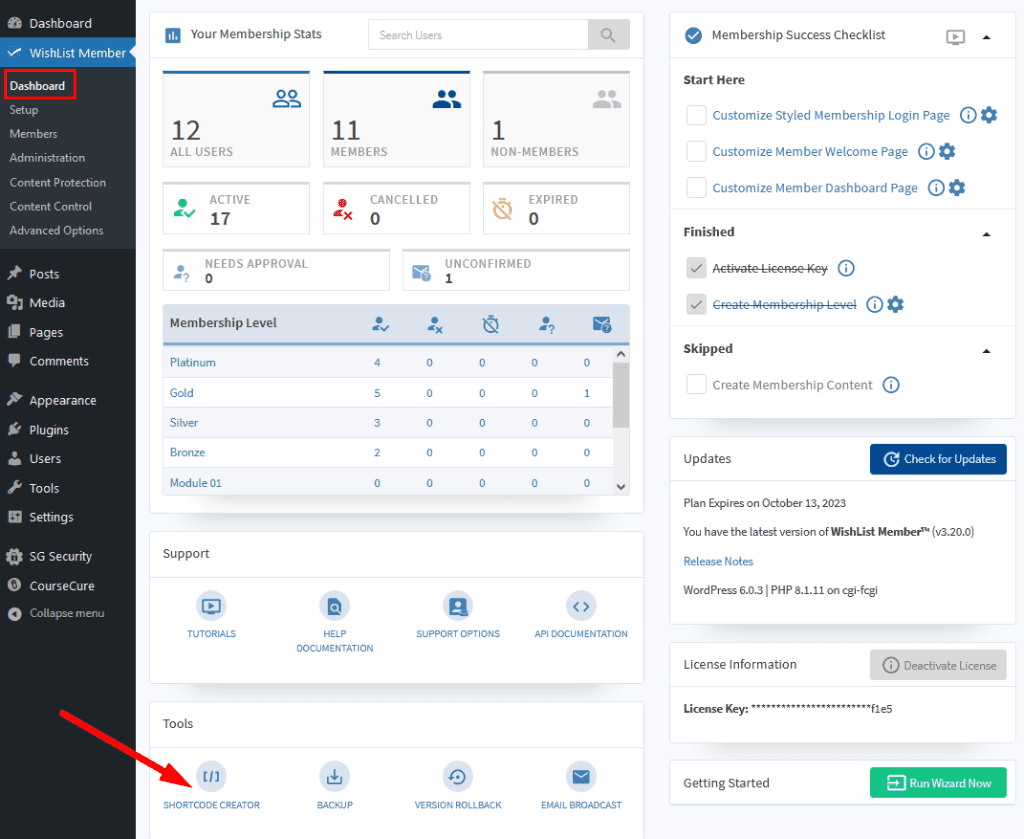
You can click the Shortcode Creator button located on the WishList Member Dashboard.
—
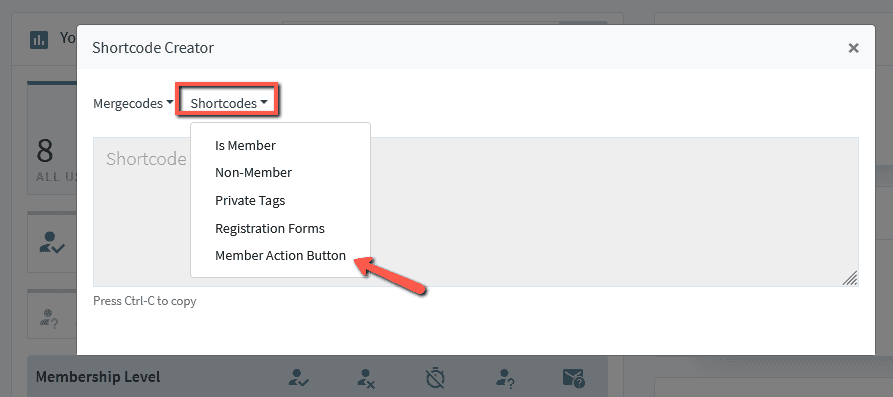
The Shortcode Creator popup will appear and you can select Shortcodes > Member Action Button
—
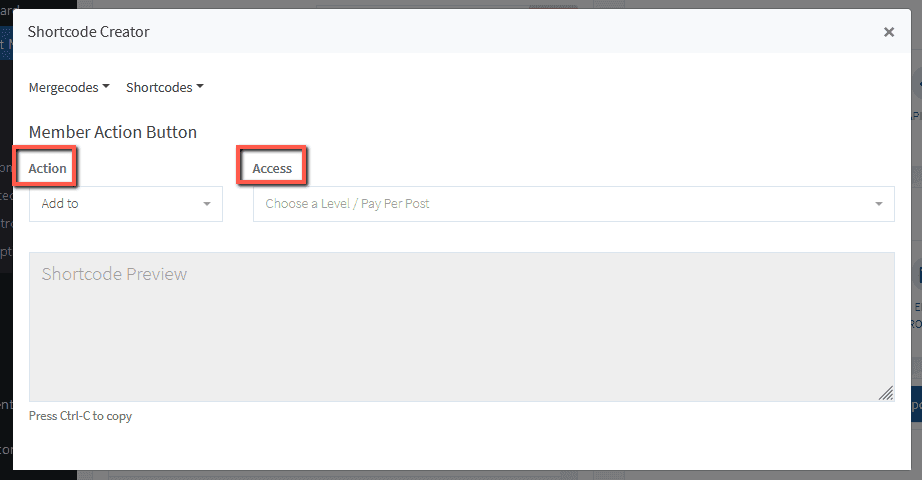
You will see the options available for the Member Action Button.
The Action dropdown can be used to select which action the button will trigger and the Access dropdown can be used to select which Level or Pay Per Post to apply the action to.
Available Actions:
- Add to
- Move to
- Remove from
- Cancel from
- Uncancel from
—
Once options are selected for the Action and Access dropdowns, additional settings will appear.
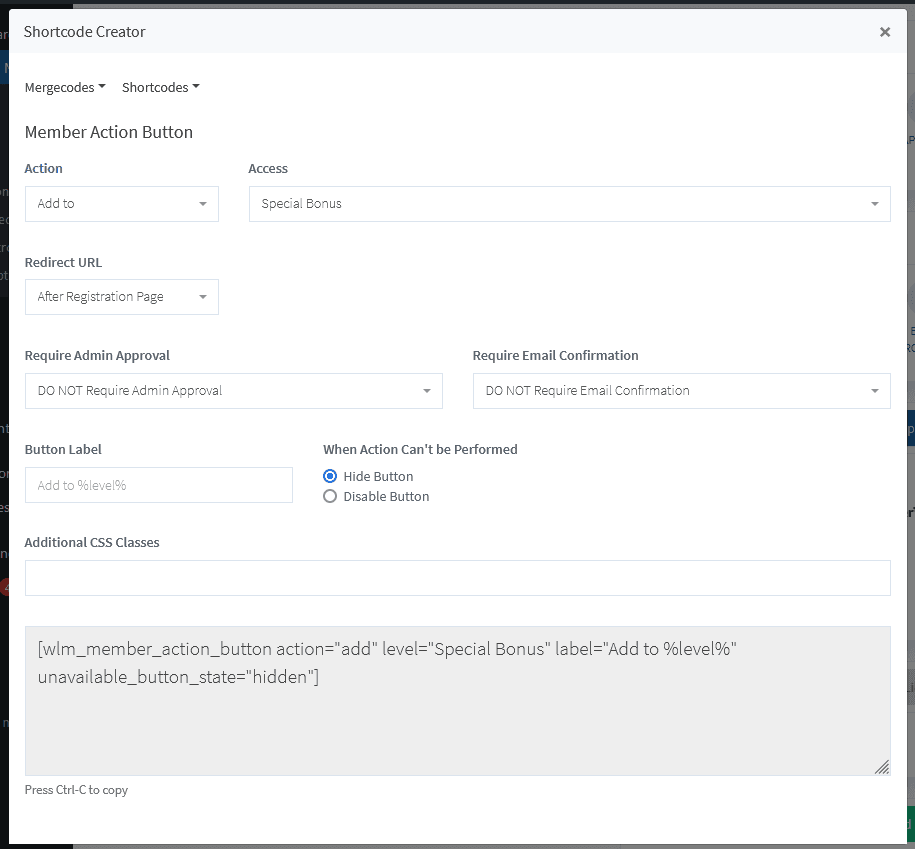
The example screenshot below shows an Action Button that would add a user to the Special Bonus Level.
A Redirect URL can be set to direct the user to the site after registration page or stay on the same page or be sent to a specific URL after using the Member Action Button.
Similar to Level settings, you can select if the Action Button requires admin approval or requires the user to confirm through email.
The Button Label can be set and you can select whether to Hide or Disable the button if the action cannot be performed. The button label will appear on the button on the live site and %level% will be replaced with the level name
You can select if you want to hide the button or show a disabled button with a label you set When the Action Can't Be Performed. The action cannot be performed if the action has already been applied to the logged in user (the level has already been added, or removed, etc.) and they visit the page again. The Member Action Button can either be hidden or disabled in that case.
Additional CSS Classes can be added for those who want to apply customization to the button appearance.
The bottom field containing the shortcode will adjust based on the selections made. When finished, you can simply copy the shortcode and paste it into any page or post on your site and the Action Button with your configured settings will appear.
Example Screenshot:
—
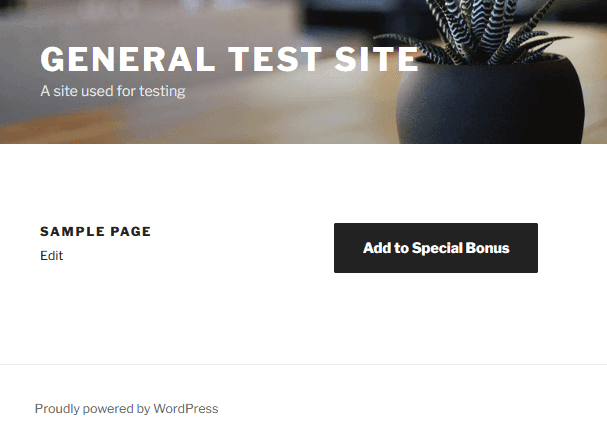
Once you paste the shortcode into a page or post, the Action Button can now be viewed and used on the live page.
Anyone who clicks this button would be immediately added to the Special Bonus level and could access any content assigned to that level.
—
Create a Member Action Button on a page/post using the Classic Block in the Gutenberg Editor
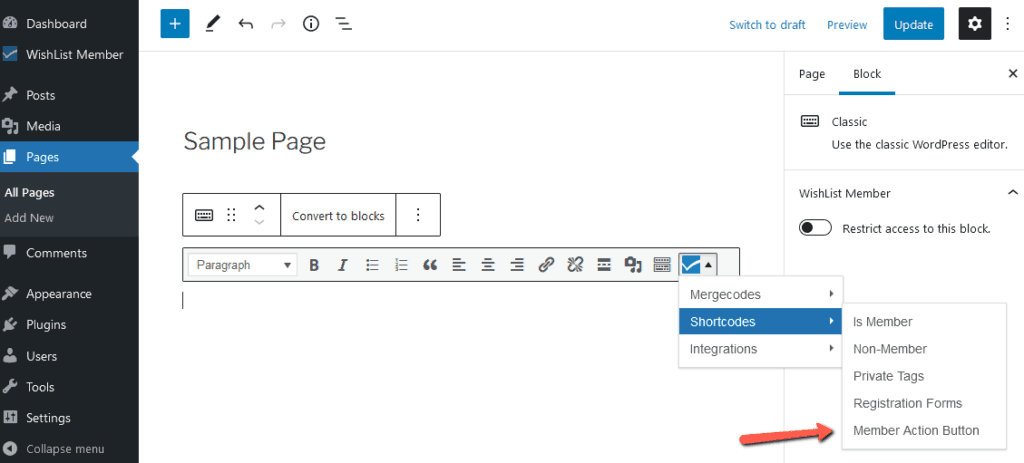
You can also add a button to a page or post when editing using the WordPress Gutenberg editor. The first step is adding a Classic Block to a page or post using the Gutenberg editor. You can then click the blue WishList Member Mergecode/Shortcode insert button and select Shortcodes > Member Action Button.
—
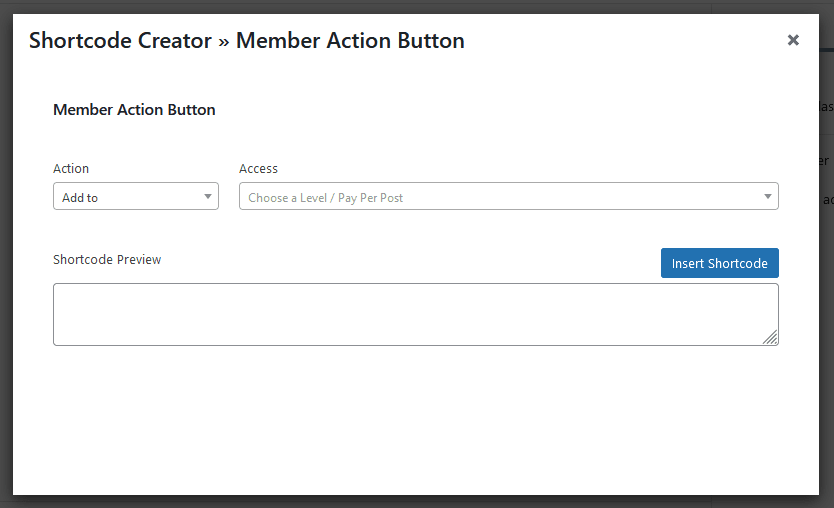
The Shortcode Creator popup for the Member Action Button will appear.
—
You will see the options available for the Action Button.
The Action dropdown can be used to select which action the button will trigger and the Access dropdown can be used to select which Level or Pay Per Post to apply the action to.
Available Actions:
- Add to
- Move to
- Remove from
- Cancel from
- Uncancel from
Once options are selected for the Action and Access dropdown, additional settings will appear.
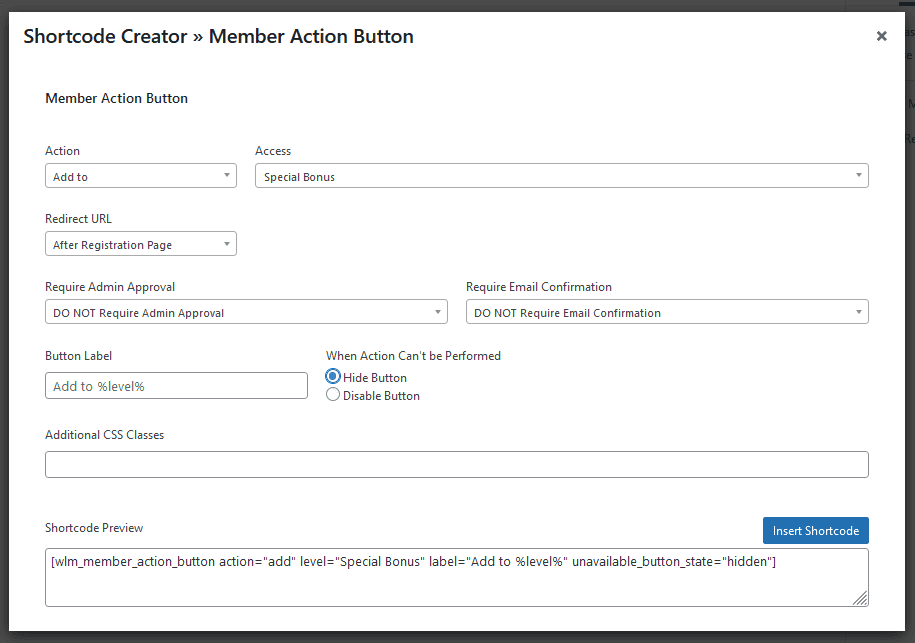
The example screenshot below shows an Action Button that would add a user to the Special Bonus Level.
A Redirect URL can be set to direct the user to the site after registration page or stay on the same page or be sent to a specific URL after using the Action Button.
Similar to Level settings, you can select if the Member Action Button requires admin approval or requires the user to confirm through email.
The Button Label can be set and you can select whether to Hide or Disable the button if the action cannot be performed. The button label will appear on the button on the live site and %level% will be replaced with the level name.
You can select if you want to hide the button or show a disabled button with a label you set When the Action Can't Be Performed. The action cannot be performed if the action has already been applied to the logged in user (the level has already been added, or removed, etc.) and they visit the page again. The Member Action Button can either be hidden or disabled in that case.
Additional CSS Classes can be added for those who want to apply customization to the button appearance.
The bottom field containing the shortcode will adjust based on the selections made. When finished, you can simply copy the shortcode and paste it into any page or post on your site and the Action Button with your configured settings will appear.
Example Screenshot:
—
The Member Action Button shortcode is now inserted into the page.
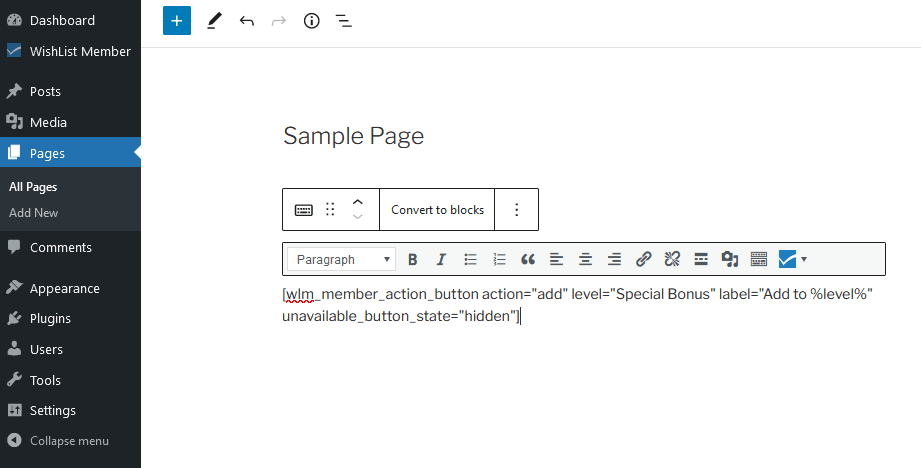
—
Once you paste the shortcode into a page or post, the Member Action Button can now be viewed and used on the live page.
Anyone who clicks this button would be immediately added to the Special Bonus level and could access any content assigned to that level.

—
The Member Action Button opens up a number of possibilities to automatically provide your members with additional exclusive content or to remove access if needed.
You have the ability to customize the experience for your community.
