The Points add-on in WishList Member allows you to award Points to users based on criteria you create. You have full control over creating the Triggers and Points Rules that add (or remove) Points for users. This means you could create any Points Rules you want. As an example, a Points Rule could be set for a specific number of Points to be given to users each day they login to your site. Or you could issue Points when a user posts their first comment.
Those Points can also be redeemed by users for a variety of extras or exclusive access to content you create. These are only a few quick examples. You can really get creative when deciding how you want to provide Points to users and how you want to allow Points to be redeemed.
You also have the option to incorporate additional WishList Member Add-ons with Points like Quizzes, Badges and Courses.
This knowledge base entry includes details and examples of the available Points features and functionality within WishList Member. The table of contents on the right can be used to jump to any section.
—
Points Setup
Point Rules can be created in the Setup > Points Rules section.

—
Each Rule will add/subtract the set number of Points based on how the Trigger is configured. “When this happens” “Then do this”
The green plus icon on the top of the Points Rules section can be clicked to begin the Points creation process.

—
Set a Name for the Points Rule and click the green Apply button.

—
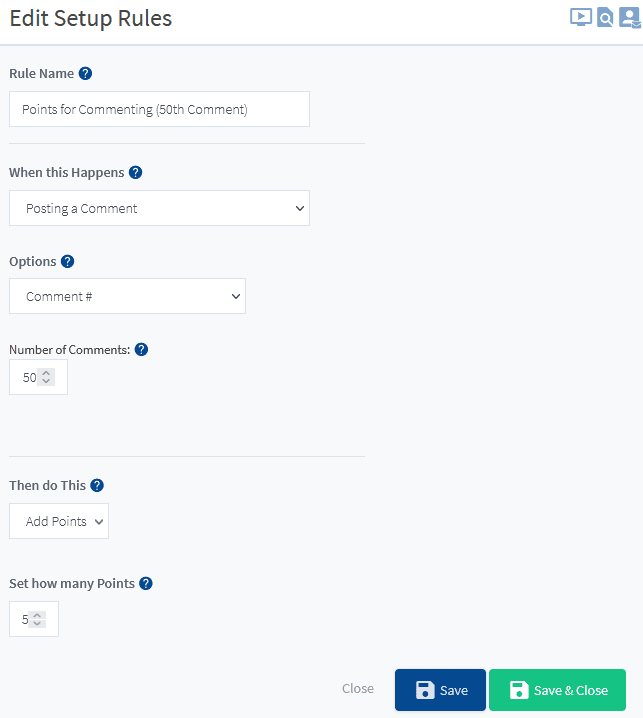
Once the Points Rule has a Name, the Edit Setup Rules section will appear and the various settings can be configured for that specific Points Rule.
There is a variety of available Triggers available in the “When this happens” dropdown. Selecting a specific Trigger from the dropdown will result in showing the specific options for that Trigger.
Triggers can range from user login and comments to completing a Quiz or Course. There is a wide selection of available Triggers.
In the example shown below, Users will be issued 5 Points when they post their 50th comment on the site.
The blue Save or green Save & Close button can be clicked once all settings are configured.
—
Points Redemption
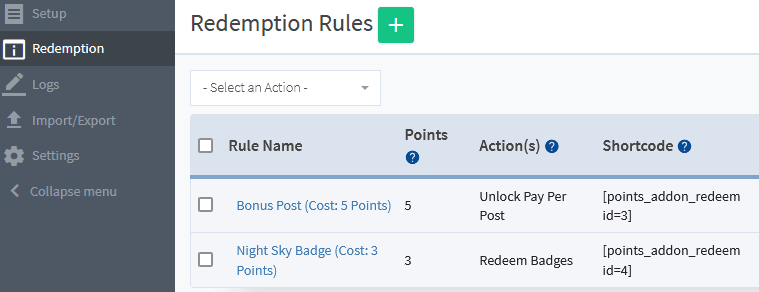
Redemption Rules can be created in the Redemption > Redemption Rules section.
—
Each Redemption Rule will set the Action that is Triggered when a User redeems the set number of Points.
The green plus icon on the top of the Redemption Rules section can be clicked to begin the Rule creation process.

—
Once the Redemption Rule has a Name, the Edit section will appear and the various settings can be configured for that specific Rule.
The Edit section includes the following sub tabs:
- Settings
- Actions
- Button
- Configuration
- Success

—
Settings
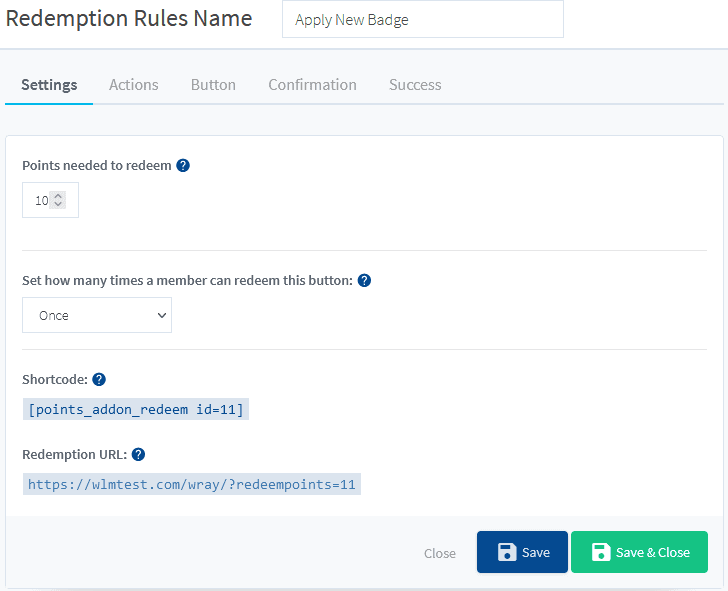
The Settings sub tab can be used to adjust the general settings for the Redemption Rule.
—
Points needed to redeem: This is the total number of Points a User needs to redeem
Set the number of times a user can redeem this offer: This is the maximum number of ties a User can redeem the specific offer.
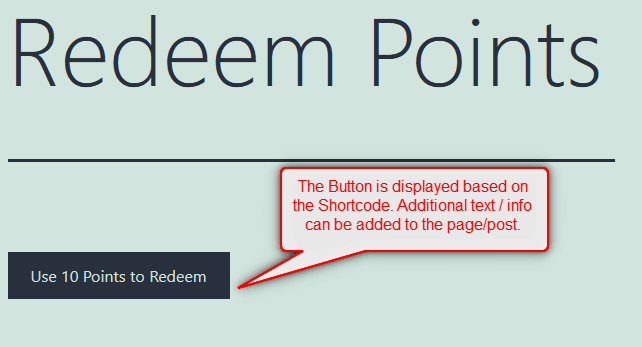
Shortcode: This can be copied and pasted into any page/post on the site. It will display a button on the page/post that can be used to redeem. (More details on the button are included in the Button sub tab).
Redemption URL: This will display a pop up box with the redemption offer on the site when clicked.
The blue Save or green Save & Close button can be clicked once all settings are configured.
—
Example of the Shortcode displaying the Button on a live site. More information on styling the Button is included below.
—
Actions
A single or multiple Action can be set to happen after a successful Redemption.
The green plus icon on the top of the Actions section can be clicked to begin the Action creation process.
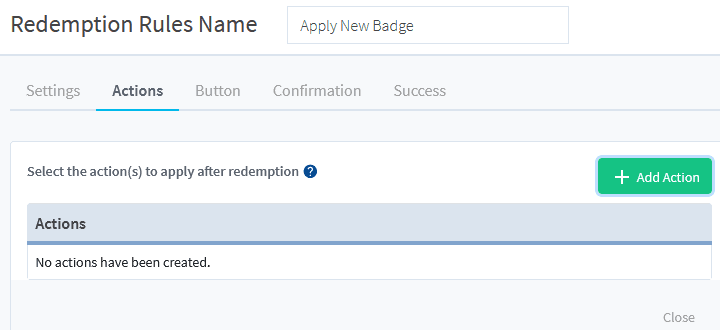
—
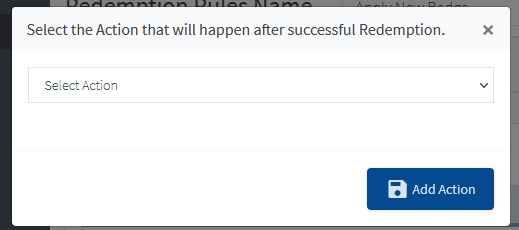
The “Select the Action that will happen after successful Redemption” pop up will appear and the desired Action can be selected from the dropdown. The selected Action will determine and display the available options in the pop up.
Some options include Send HTTP Post, Redeem Badges, etc.
—
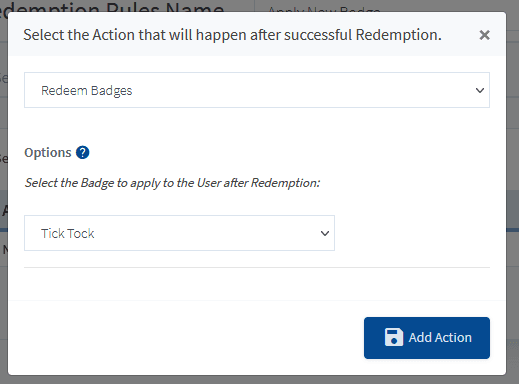
In the example shown below, Users will be issued the Tick Tock Badge after a successful Redemption.
The blue Add Action button can be clicked once all settings are configured.
—
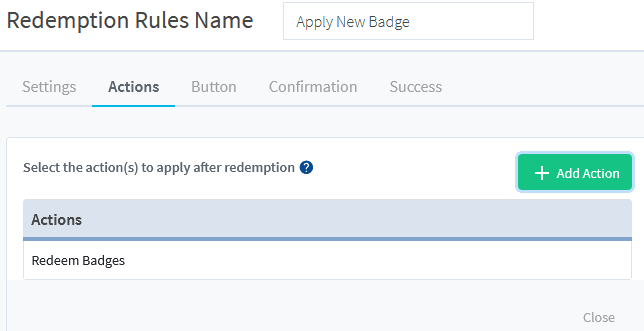
The newly created Action now appears on the Actions list. This process can be repeated to create additional Actions.
—
Button
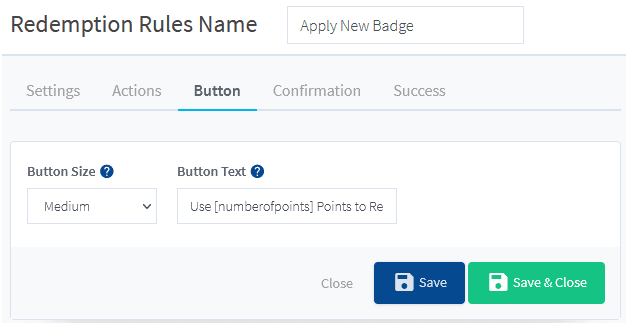
A Button can be created to allow Users to redeem Points. The Shortcode located in the Settings sub tab can be added to any page/post on the site to display the Button.
The settings in the Button sub tab control the look of the Button.
—
Button Text: The [numberofpoints] mergecode will be automatically replaced with the number of points set in the “Points needed to redeem” field in the Settings sub tab.
The blue Save or green Save & Close button can be clicked once all settings are configured.
—
Confirmation
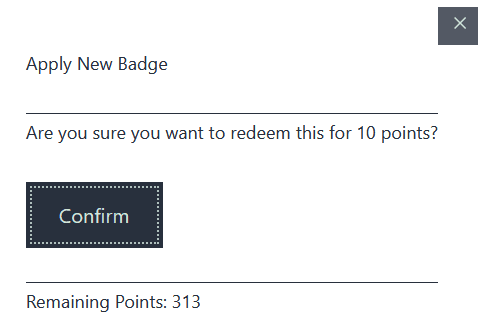
A Confirmation message appears when a User clicks to Redeem.
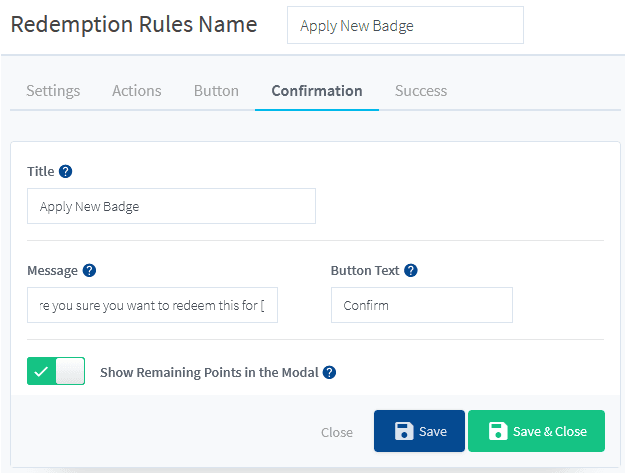
The settings in the Confirmation sub tab allow for adjustment the messaging that will appear to the User.
—
Title: The Title will be displayed on the top of the Confirmation pop up form when redeeming the offer.
Message: A Message asking for Confirmation to Redeem the set number of Points. The [numberofpoints] mergecode will be automatically replaced with the number of points set in the “Points needed to redeem” field in the Settings sub tab.
Button Text: This text will appear on the Button shown within the Confirmation pop up.
Show Remaining Points in the Pop up: If Enabled, the User’s remaining Points will be displayed in the Confirmation pop up after Redemption.
—
Example of the Confirmation pop up on a live site:
—
Success
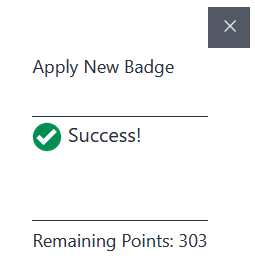
A Success message appears when a User successfully completes a Redemption.
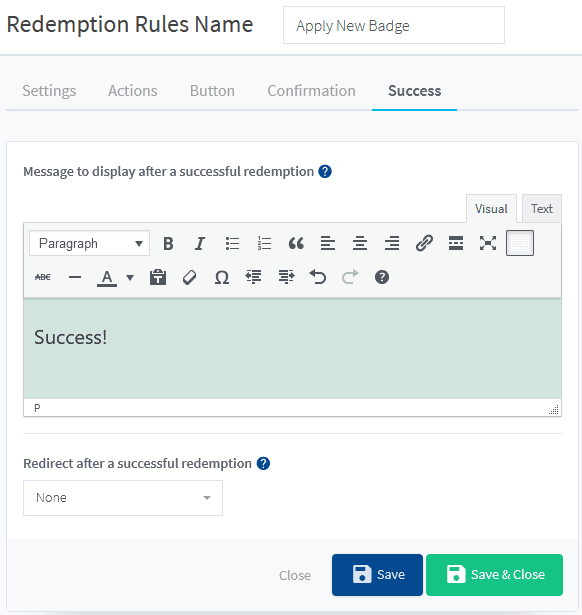
The settings in the Success sub tab allow for adjustment the messaging and potential redirection for the User.
—
Message to display after a successful redemption: The Message displayed to the User to indicate a successful Redemption.
Redirect after a successful redemption: Select if the User should be redirected to a Custom URL or an existing Page/Post after Redemption.The option of no redirection can also be set.
—
Example of the Success message on a live site:
—
Logs
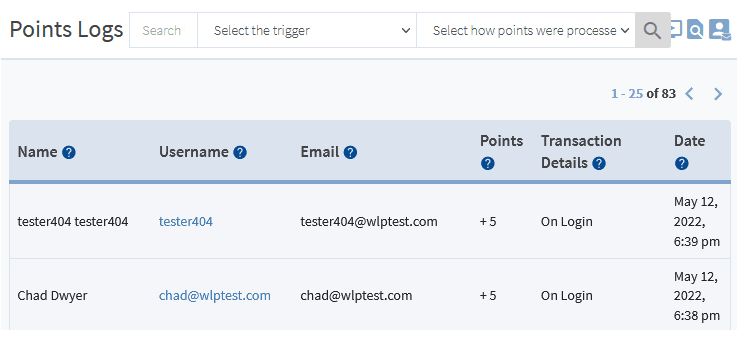
The Logs section is available to display a list of Users and the Points they have earned/redeemed.
An advanced search is available with options to Select the Trigger type and/or Select how the Points were processed (Added or Subtracted).
—
Import/Export
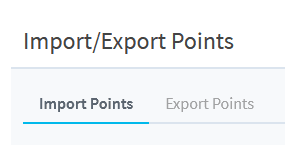
The Import/Export section includes the following sub tabs:
- Import Points
- Export Points
—
Import Points
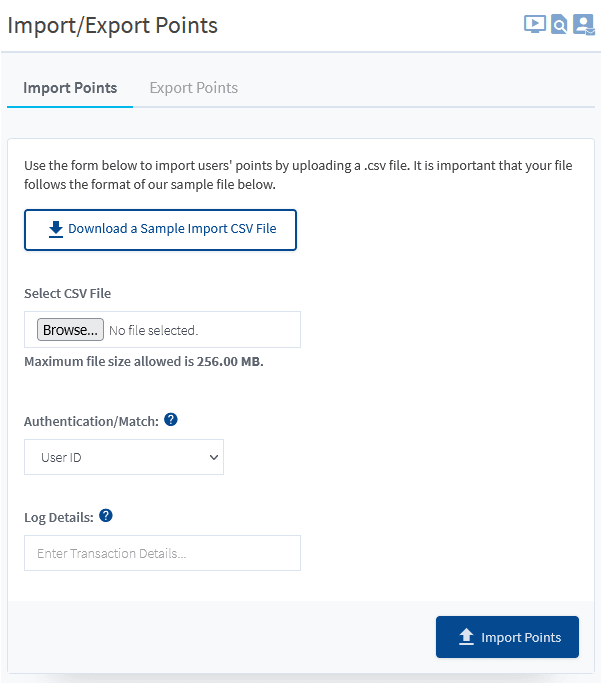
A .CSV file can be used to Import Points. A sample file is provided to ensure the correct format is used.
—
Authentication/Match: The data to be used to match the Users from the .CSV file with the Users in the site. (User ID, Username or Email Address).
Log Details: The message to be displayed in the Transaction Details column in the Logs section.
—
Export Points
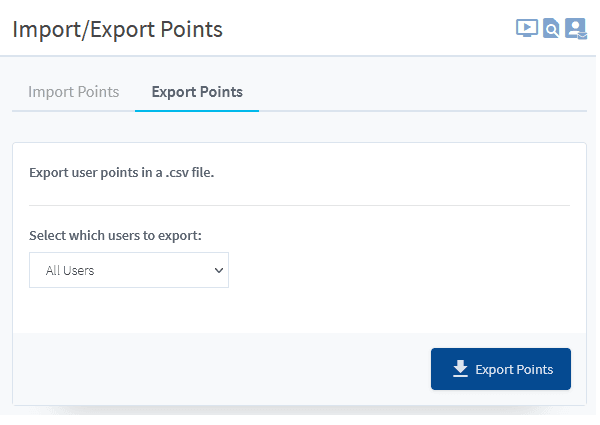
A .CSV file can be Exported with User Points.
—
Select which users to export: The .CSV file can contain all Users or only Users with Points.
—
Settings
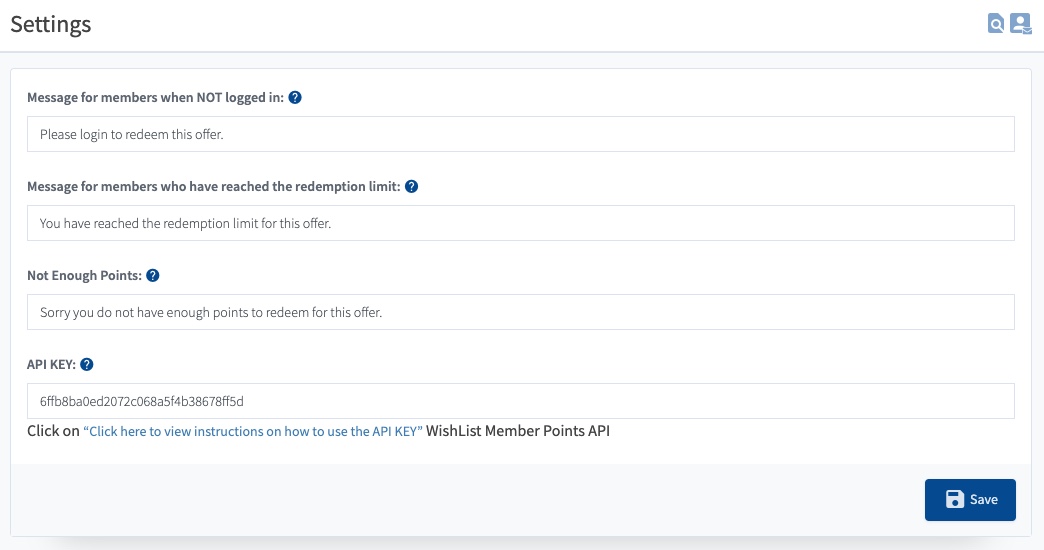
There is a section that covers a few Settings for Points.
Navigate to WishList Member > Points > Settings
—
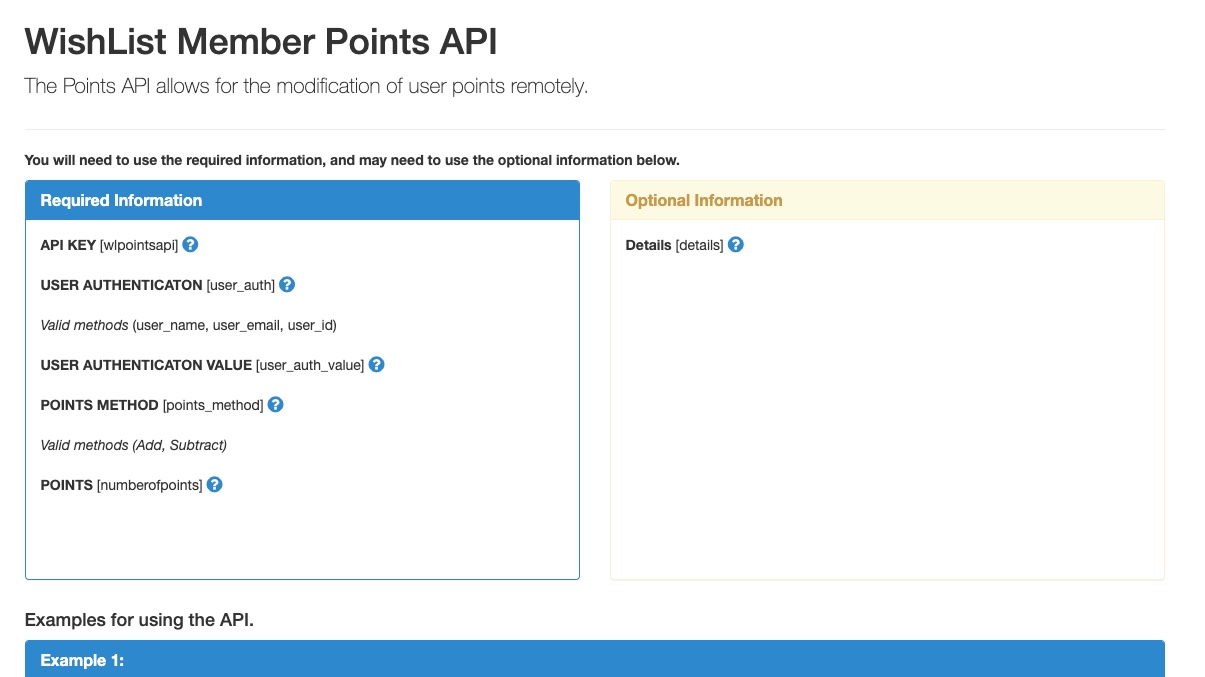
The “Click here to view instructions…” API KEY link directs to a page on your site with more details on using the WishList Member Points API. An example screenshot is included below.
—
