WishList Member includes an integration with Zapier. You can set specific automation to occur between different online systems (or multiple WishList Member sites) based on triggers and actions you set up.
This can include adding users to a level in WishList Member if they sign up for your email list. Or removing them from a scheduled webinar if they cancel their access to your site. These are just a couple examples since Zapier can integrate with thousands of apps. More details are explained below (including a Video Tutorial).
—
Enable Zapier Integration
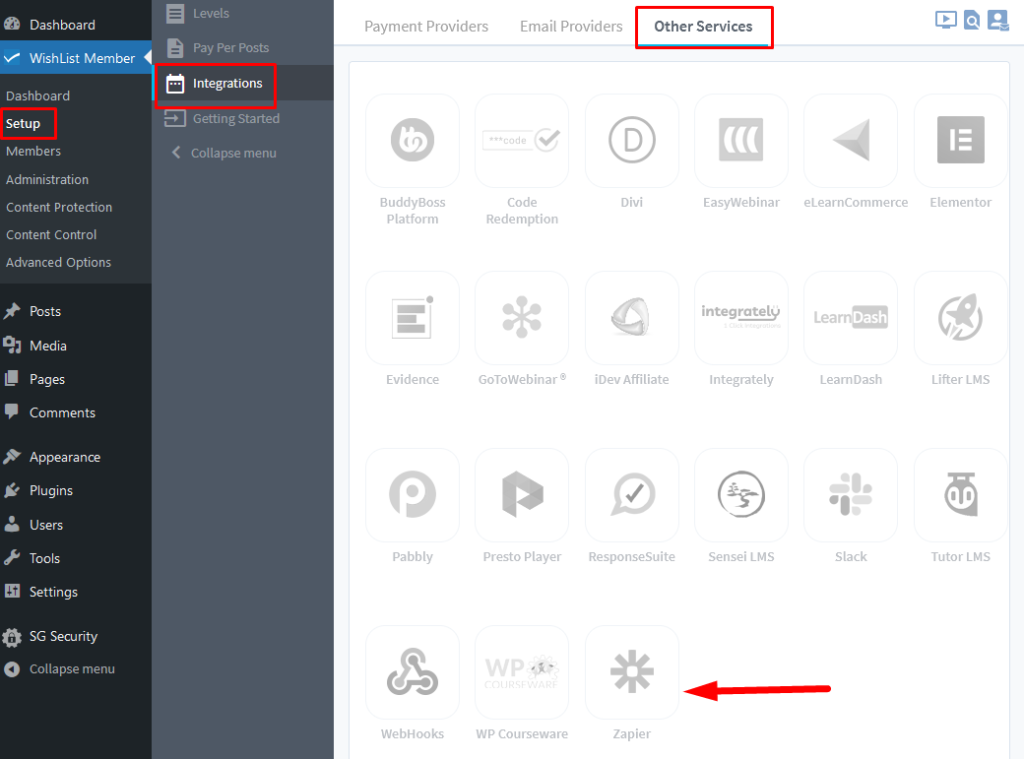
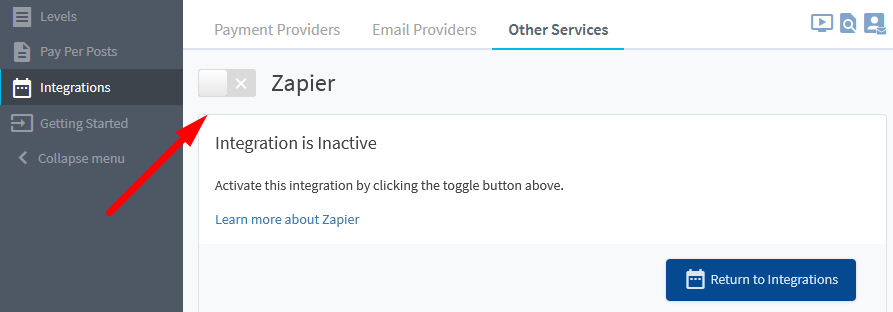
First, you can select and enable the Zapier option in the Setup > Integrations > Other Services section of WishList Member.
—
—
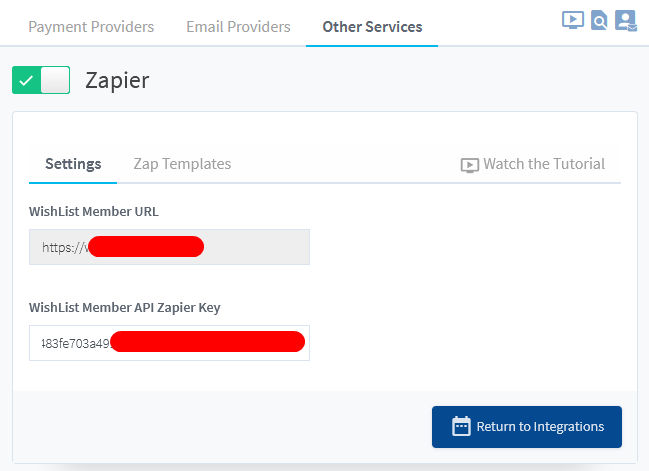
The Settings tab will appear and the WishList Member URL and WishList Member API Zapier Key fields will appear. This is because WishList Member and Zapier need to be connected. This is a quick process (more details below).
—
The WishList Member URL and WishList Member API Zapier Key can be pasted into the provided fields in the Connected Accounts section of Zapier.
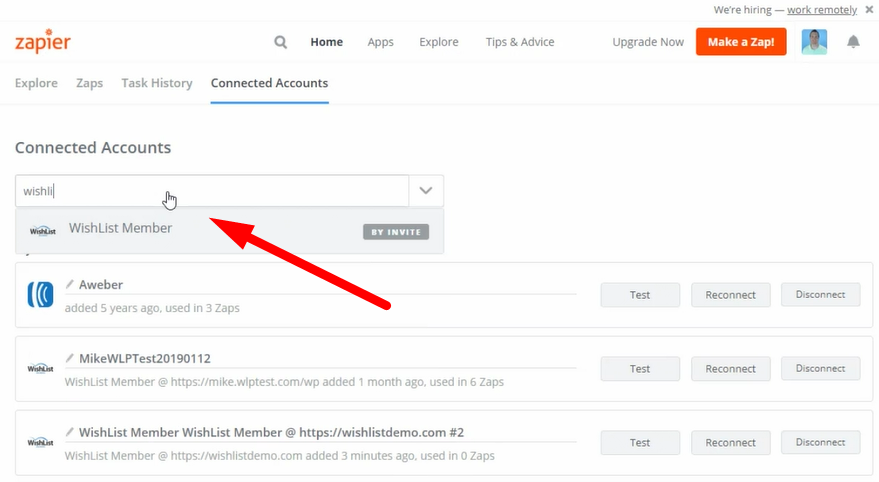
This can be found when you create a Zap of by going directly to the Connected Accounts section and selecting the WishList Member option.
—
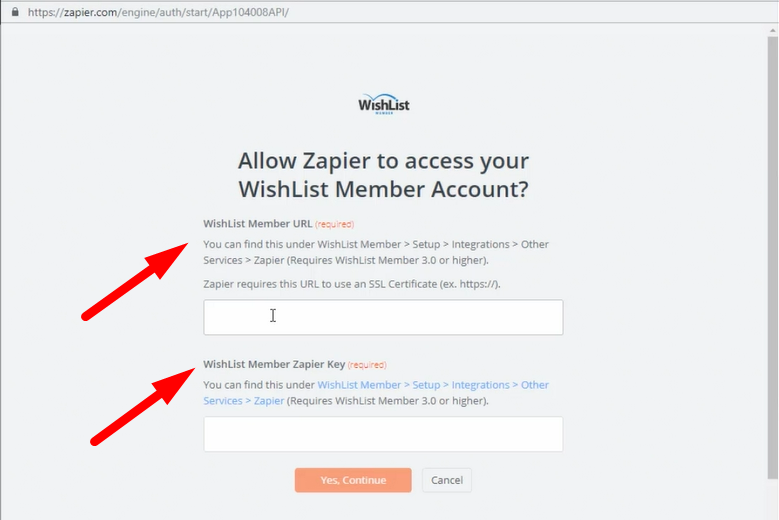
Selecting the WishList Member option will display the following popup and the WishList Member URL and WishList Member API Zapier Key can be pasted into the corresponding fields.
Note: Zapier requires the WishList Member URL to use an SSL Certificate (ex. https://). That is a requirement on the Zapier side.
—
The process of connecting WishList Member and Zapier is explained in more detail in the Tutorial Video below.
It also walks through the Next Steps in the process of creating automations between multiple systems.
—
Video Tutorial
—
For Reference (with Time Stamps)
You can add the WishList Member™ app to your Zapier account by following this link:
https://zapier.com/apps/wishlist-member/integrations
Check out the additional systems that integrate with Zapier.
—
The following is explained in the Tutorial Video above and is included here for quick reference.
1:16 Connected Accounts. Select and test the communication between your connected accounts.

—
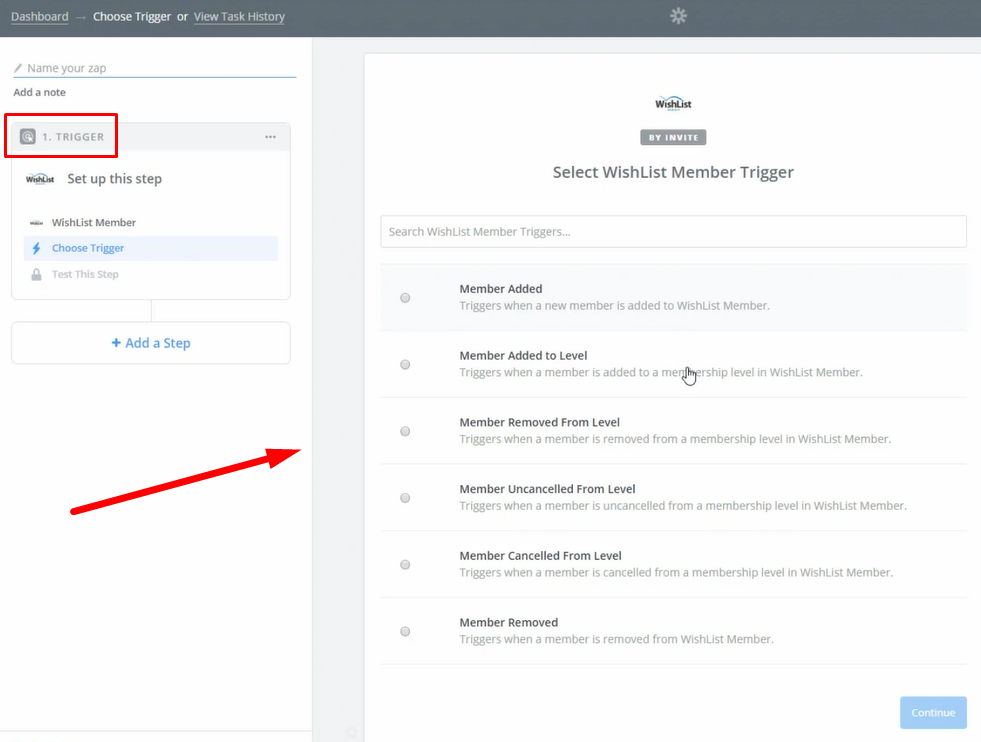
1:40 When you “Make a Zap”, there are a number of WishList Member Triggers available.
- Member Added
- Members Added to Level
- Member Removed from Level
- Member Uncancelled from Level
- Member Cancelled from Level
- Member Removed
—
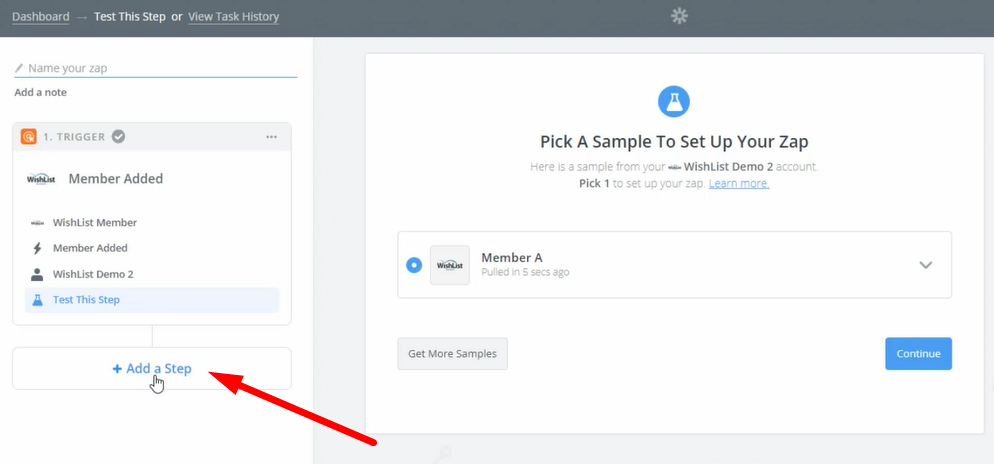
2:31 Selecting the App you want to integrate with WishList Member through Zapier.
—
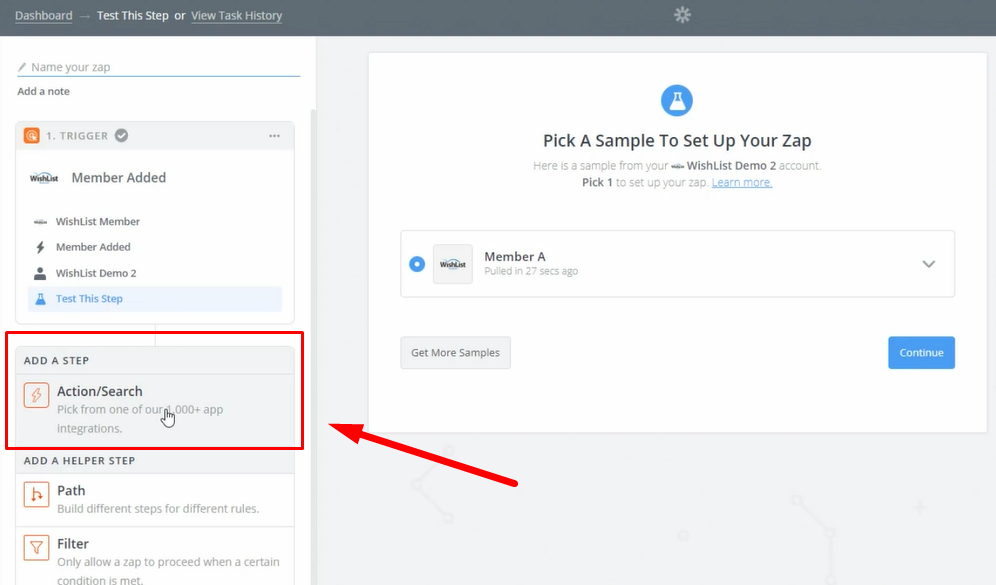
2:37 Setting the Action to be Triggered.
—
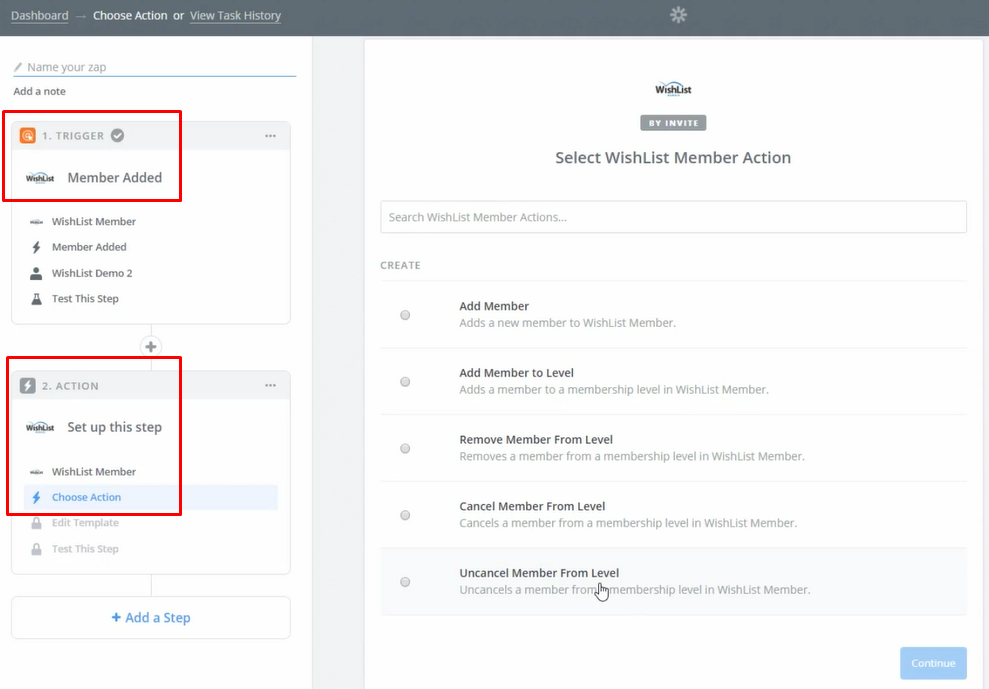
2:43 You can connect WishList Member to the thousands of apps available through Zapier or you can connect WishList Member to another site running WishList Member.
The screenshot example below shows a WishList Member Trigger and a WishList Member Action.
—
3:31 The template for the specific Zap is filled out and additional options are mentioned.
