Enable Google Social Provider
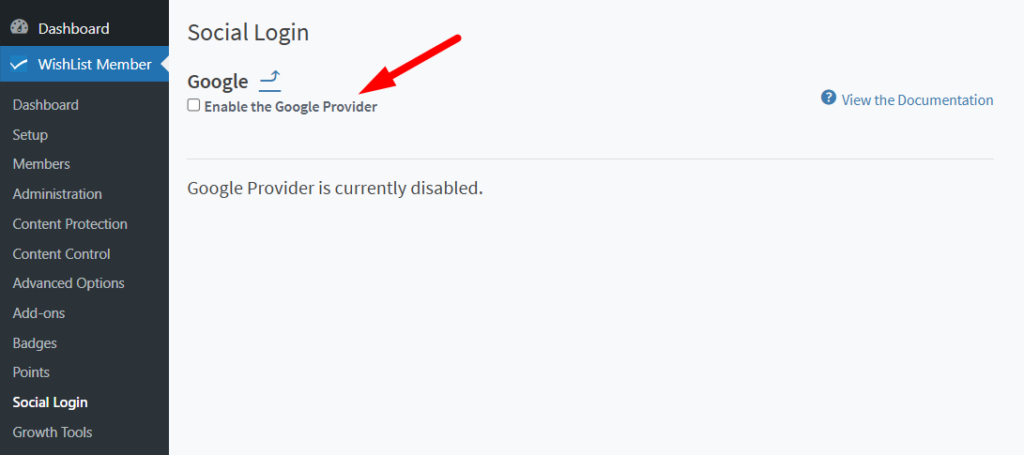
You can select and enable the Google option in the Social Login section of WishList Member.

—
The Google configuration section appears and you can click to “Enable the Google Provider”.

—
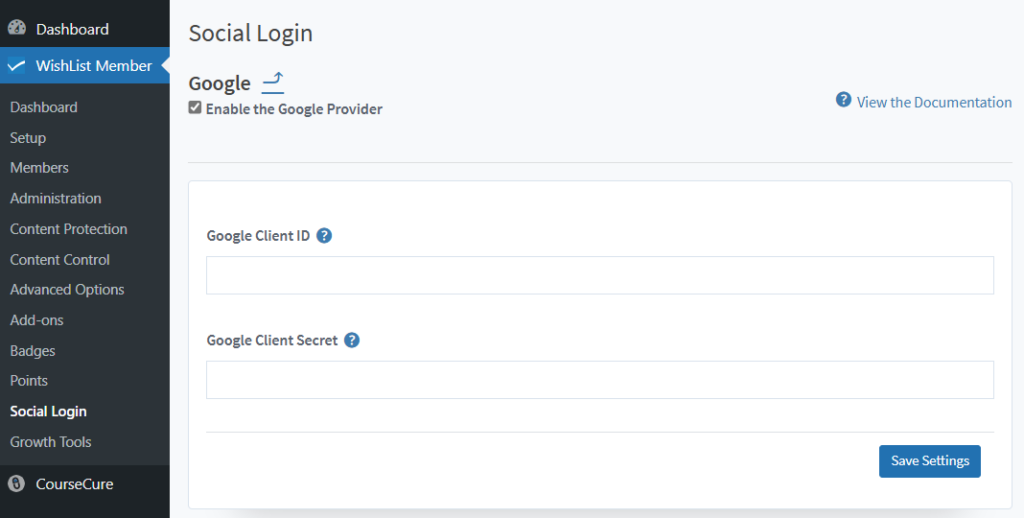
The Google configuration section will now display two fields required to connect your site with your Google App. This is because WishList Member and Google need to be connected using the Google Client ID and Google Client Secret provided by Google. This connection process is explained below the following screenshot.

—
Connecting WishList Member and Google
You will need to create a Google App in order to allow your users to login with their Google accounts.
The first step is navigating to https://console.cloud.google.com/apis/ and logging in with your Google account in order to create your Google App.

—
Creating a Google App
Once you have logged into your Google account as noted above, the Google Enabled APIs & Services section appears. If you already have an existing project you want to use, select the project from the dropdown on the top of the page. If you do not have an existing project, click the Create Project link.

—
The New Project section appears after clicking the Create Project link. Set your Project Name and click the Create button.

—
You will be directed back to the Enabled APIs & Services section and are now within the new project you just created. In this example, the project is named My Project.

—
Navigate to OAuth Consent Screen in the side navigation and select External as the User Type and click the Create button.

—
Setting Up Your Google App
The Google App is created based on the information above. Additional fields will appear and you can fill them in accordingly.
In the App Information section, enter a name for your Google App in the App Name field and a support email address in the User Support Email field. The App Name will appear to users when asking for their consent. The email address can be used by users to contact you with questions about their consent.

—
Scroll down the page to the App Domains section and click the “+ Add Domain” button under Authorized Domains.

—
Enter your domain name into the Authorized Domain Name 1 field without a subdomain and without http or https. This should be your main site URL.

—
Scroll down the page to the Developer Contact Information section and enter an email address Google can use to notify you about any changes to your project.

—
Once all the fields are filled in as explained above, click the Save and Continue button on the bottom of the page.

—
The Scopes section will appear. Click the Save and Continue button on the bottom of the page.

—
The Test Users section will appear. Click the Save and Continue button on the bottom of the page.

—
The Summary section will appear. Click the Credentials link in the left side navigation.

—
The Credentials section will appear. Click the Create Credentials link on the top of the site and select the OAuth Client ID option.

—
The Create OAuth Client ID section will appear. Select Web Application from the Application Type dropdown.

—
Additional fields will appear and you can fill them in accordingly.
Enter a web client name into the Name field.

—
Scroll down the page to the Authorized Redirect URIs section and click the “+ Add URI” button.

—
Add the following to the “Authorized Redirects URIs” field and click the Create button. You will need to replace YOUR-SITE-URL with your actual site URL.
https://YOUR-SITE-URL.com/?wishlist_member-sl-callback=google
—
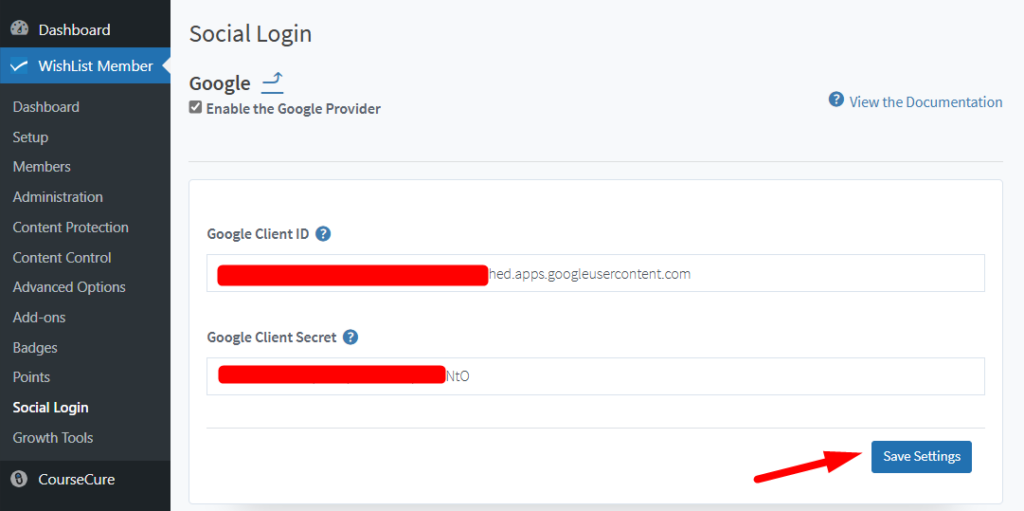
The OAuth Client Created popup appears. You will see the Client ID and Client Secret fields within the popup. Copy each field value and paste it into the corresponding field in WishList Member.

—
Click the Save Settings button in WishList Member once the two fields have been filled in.

—
Once you have saved the Client ID and Client Secret, click the Verify Settings button to complete the integration.

—
The Google verification screen will be displayed. Click the Continue button to confirm the integration.

—
A successful verification message will be displayed and Google is now connected with WishList Member.

—
