Enable Facebook Social Provider
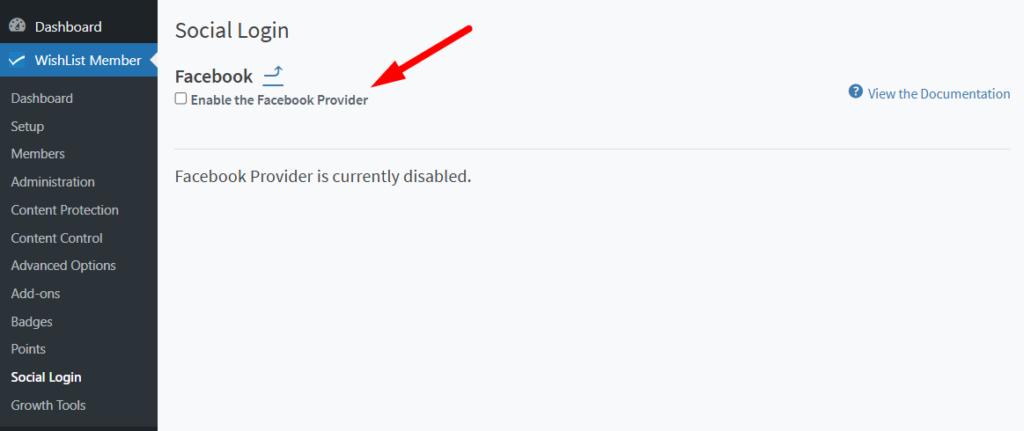
You can select and enable the Facebook provider in the Social Login section of WishList Member.

—
The Facebook configuration section appears and you can click to “Enable the Facebook Provider”.
—
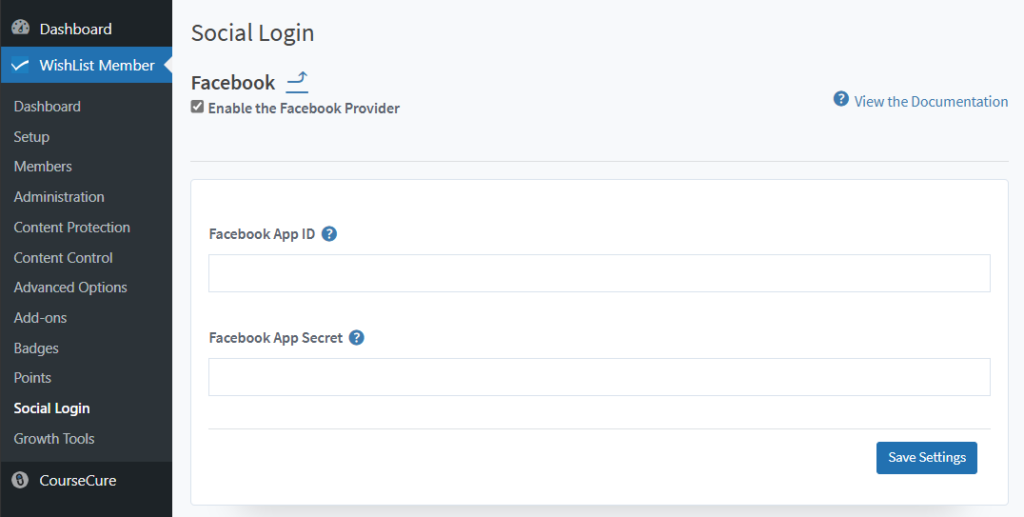
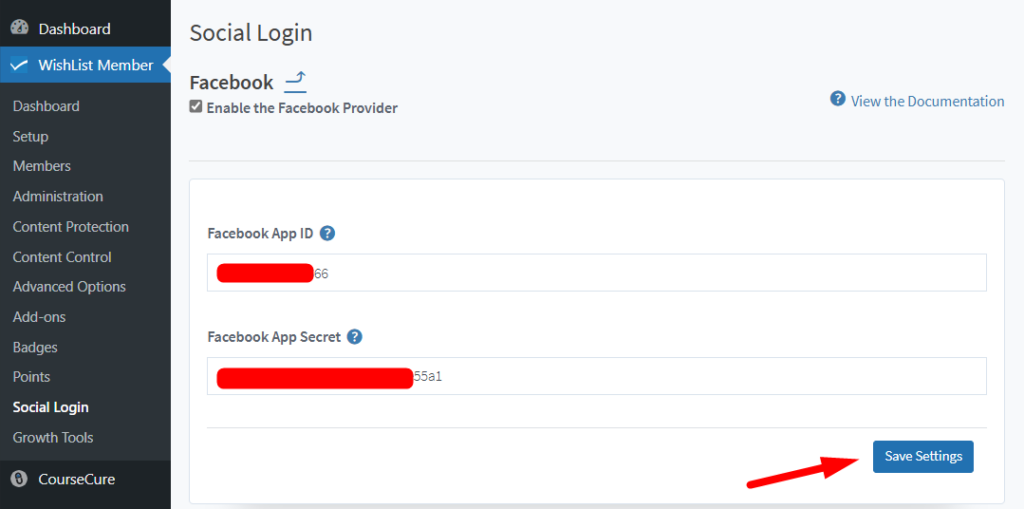
The Facebook configuration section will now display two fields required to connect your site with your Facebook App. This is because WishList Member and Facebook need to be connected using the Facebook App ID and Facebook App Secret provided by Facebook. This connection process is explained below the following screenshot.
—
Connecting WishList Member and Facebook
You will need to create a Facebook App in order to allow your users to login with their Facebook accounts.
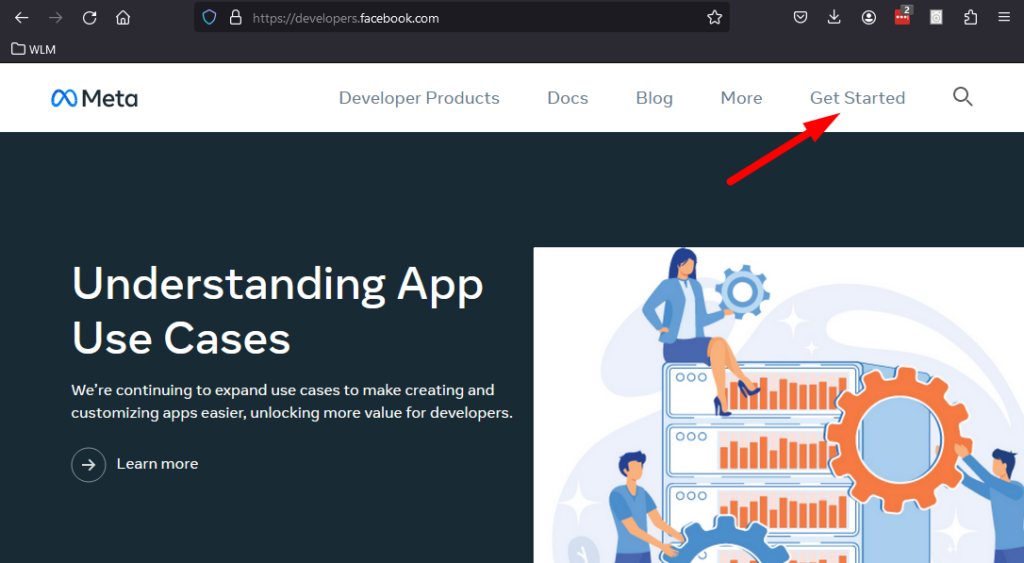
The first step is navigating to https://developers.facebook.com/apps and logging in with your Facebook Developer account in order to create your Facebook App. If you aren't logged in with your Facebook Developer account or if don't have a Facebook Developer account, you will be sent to the main https://developers.facebook.com site.
—
Create a Facebook Developer Account (If You Don't Have One Currently)
If you already have a Facebook Developer account, you can use that existing account. If not, the Meta for Developers page will appear after you click the Get Started link mentioned above and the Register section is displayed. You can click the Continue button to create a Facebook Developer account.

—
The Verify Account section will appear and you will be asked to provide a phone number to verify the account. A text message will be sent to the phone number including a code you can enter into the corresponding field. You can click the Continue button to proceed.

—
The Contact Info section will appear and you can set your preferred email address. You can click the Confirm Email button to proceed.

—
The About You section will appear and you can select the Developer option. You can click the Complete Registration button to finish the process of creating a Facebook Developer Account.

—
Creating a Facebook App
You have a Facebook Developer Account and you are directed to the https://developers.facebook.com/apps section.

—
Click the Create App button on the top right of the page.

—
The Create an App > Add Use Case section will appear. Select the “Authenticate and request data from users with Facebook Login” option as the Use Case and click the Next button.

—
The Create an App > Login Type section will appear. Select the “No, I'm not building a game” option and click the Next button.

—
The Create an App > App Details section will appear. Fill in the “Add an app name” and “App contact email” fields and click the Create App button.

—
Setting up Your Facebook App
Your Facebook App has been created based on the information shared above and you are directed to the App Dashboard.

—
Click the Use Cases option on the left side navigation and then click on the Customize button that appears next to the “Authentication and account creation” item.

—
The Use Cases > Customize section appears. Click the Go to Settings button you will find in the Settings area below Facebook Login.

—
Add the following URL to the “Valid OAuth redirect URIs” field and click the Save Changes button. You will need to replace YOUR-SITE-URL with your actual site URL.
https://YOUR-SITE-URL/?wishlist_member-sl-callback=facebook
—
Click the Go Back button on the top right of the page to return to the Use Cases > Customize section.

—
The Use Cases > Customize section appears. Click the Add button for the Email option in the Permissions section.

—
The email will now show as added. Click the Go Back button again on the top right of the page.

—
The main Facebook Apps section appears. Click on App Settings > Basic in the left side navigation.

—
The App Settings > Basic section appears and you will need to fill in the following fields:
- App Domains. This will be your site domain
- Privacy Policy URL. This will be a link to your online Privacy Policy. Provide a publicly available and easily accessible privacy policy that explains data you are collecting and how you will use that data.
- User Data Deletion. Select the “Data Deletion Instructions URL” option from the dropdown and enter the URL of your page with instructions on how users can delete their accounts on your site. To comply with GDPR, you should offer the option to delete accounts on your site, either by the user or by the admin.
- If each user has the option to delete their account, the Data Deletion Instructions URL should point to a guide explaining how users can delete their accounts.
- If the accounts are deleted by a site admin, the Data Deletion Instructions URL should point to a section on the site (usually within the Privacy Policy) with the contact details users can use to send their account erasure requests.
- App Category. Select the category for your app from the dropdown.
- App Icon. Upload the icon for your app.

—
Once the fields have been filled in, scroll down to the bottom of the page and click on the “+ Add Platform” button.

—
The Select Platform popup appears. Select the Website option and click the Next button.

—
The Select Platform popup disappears and you will need to enter the following URL into the Website > Site URL field and click the Save Changes button. You will need to replace YOUR-SITE-URL with your actual site URL.
https://YOUR-SITE-URL.com
—
The Facebook App is now created and there are just a few settings left to configure to connect Facebook with WishList Member.
Upgrade Facebook App from Standard Access to Advanced Access
By default, your app only has Standard Access for the “public_profile” and “email” permissions. This means only you are able to login with it currently. To get Advanced Access for your app, you will just need to go through the Business Verification process. You can start that process in the Review > Verification section on the left side navigation and clicking on the Start Verification button.

—
Once you complete the verification process with Facebook, your app will have Advanced Access.
Upgrade Facebook App from Development Mode to Live Mode
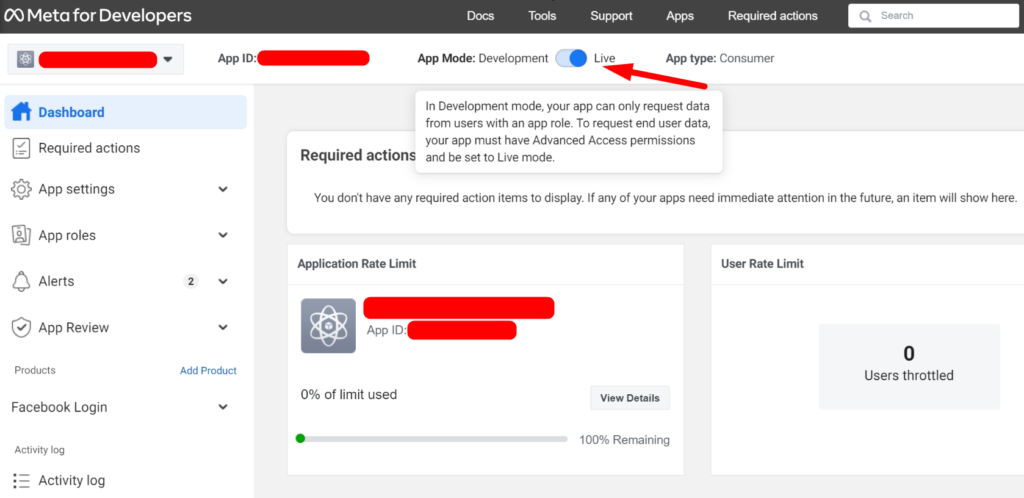
Users outside of your business cannot use the Facebook login option if your Facebook App is in Development Mode. So once the verification process mentioned above is complete, you can click the Go Live toggle on the top of the Dashboard section of your Facebook App to publish your app.
This will set your app to Live Mode and you can proceed with connecting Facebook with WishList Member.
—
The last step to connect Facebook with WishList Member is by using the App ID and App Secret provided by Facebook. You can click on App Settings > Basic in the left side navigation again.
You will see the App ID and App Secret fields on the top of the page. Copy each field value and paste it into the corresponding field in WishList Member.

—
Click the Save Settings button in WishList Member once the two fields have been filled in.
—
Once you have saved the Facebook App ID and Facebook App Secret, click the Verify Settings button to confirm that the integration is complete.

—
A successful verification message will be displayed and Facebook is now connected with WishList Member.

—
