
WishList Member includes an integration with Recurly. This allows you to automatically provide access to a member in WishList Member if they purchase through a Recurly powered payment form. This means you can automatically provide a user with access to members only content once their payment is successful.
All the details are explained below (including examples and screenshots).
—
Enable Recurly Integration
You can select and enable the Recurly option in the Setup > Integrations > Payment Providers section of WishList Member.

—

—
The Settings tab will appear and the API Status will show as “Not Configured”. This is because WishList Member and Recurly need to be connected using the API Key provided by Recurly. This quick connection process is explained below.
Connecting WishList Member and Recurly
Click the blue Configure button.

—
The Recurly Configuration popup will appear and the Recurly Private API Key field is displayed.

—
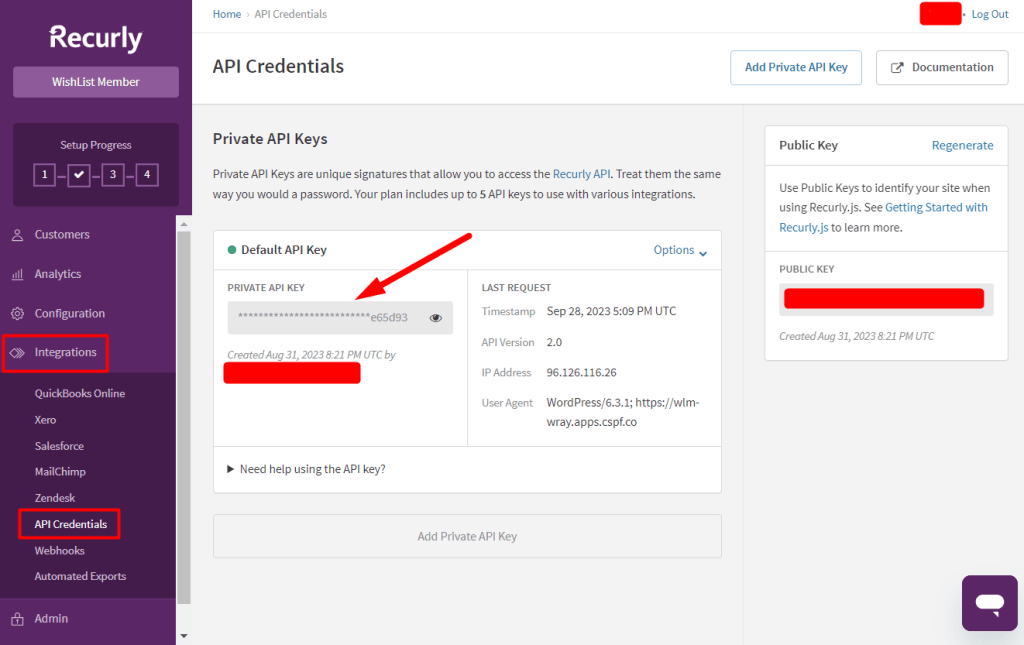
The Recurly Private API Key is located in the Integrations > API Credentials section of Recurly. A new API Key can be created in this section if you haven't already generated one.
—
Paste the Private API Key from Recurly into the corresponding field in WishList Member in the Recurly Configuration popup. Click the Save & Close button to save these settings.

—
The API Status will now show as “Connected” and the Products tab is now available.

—
WishList Member and Recurly are now connected and the integration process can continue.
Integrating Recurly Plans with WishList Member
You can create plans in Recurly and those plans can be integrated with corresponding membership levels in WishList Member. This allows you to create a plan in Recurly and anyone who purchases that plan will be assigned to the membership level you select in WishList Member.
The Products tab displays all the membership levels in WishList Member and a corresponding SKU for each level. The Plan column will display the name of an integrated Recurly plan once that has been configured.

—
The first step is creating a plan in Recurly. You also have the option of integrating an existing Recurly plan with WishList Member if you have one.
Plans can be viewed or created in the Configure > Plans section of Recurly.

—
You can create the plan in Recurly based on your preferences. This means you can set what you would like as the price, subscription length, pricing model, etc.
That being said, there are two pieces of information related to WishList Member that need to be included when configuring a Recurly plan to be integrated with WishList Member.
- Accounting Code
- Return URL After Success
Click the “New Plan” button to create a new plan or click an existing plan name to edit that plan.

—
The example below will use a Recurly plan named Skydiving 101.

—
Your plan can be configured how you would like but it needs to include the specific membership level SKU from WishList Member to be pasted into the Accounting Code field in Recurly. It also needs the Push Notification URL from WishList Member to be pasted into the Return URL After Success field in Recurly.
Accounting Code. Copy the specific membership level SKU in the Setup > Integrations > Payment Providers > Recurly > Products section of WishList Member. The screenshot example below shows the SKU for the Gold level.

—
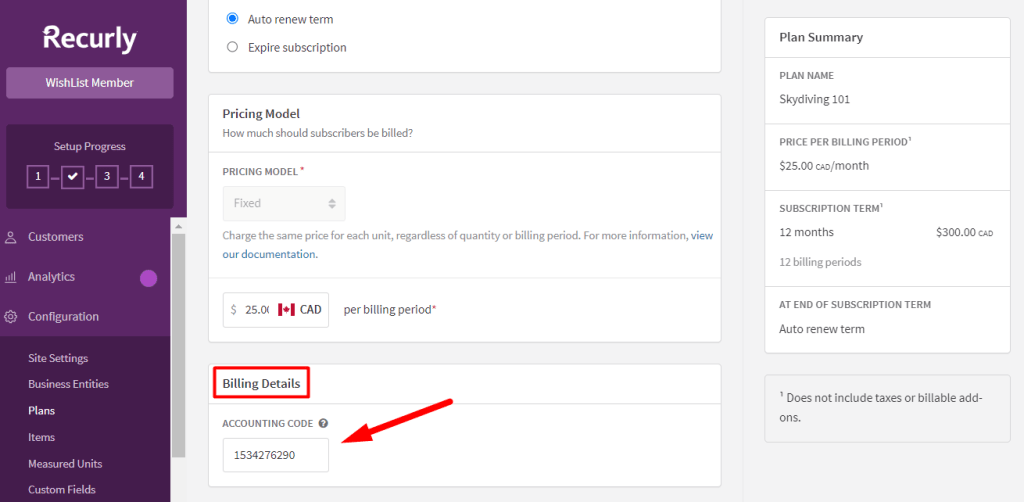
Then paste the SKU into the Accounting Details field in the Configuration > Plans > *Edit Plan* > Billing Details section of the plan in Recurly.
—
Return URL After Success. Copy the Push Notification URL from the Setup > Integrations > Payment Providers > Recurly > API section of WishList Member. The screenshot example below shows the Push Notification URL.

—
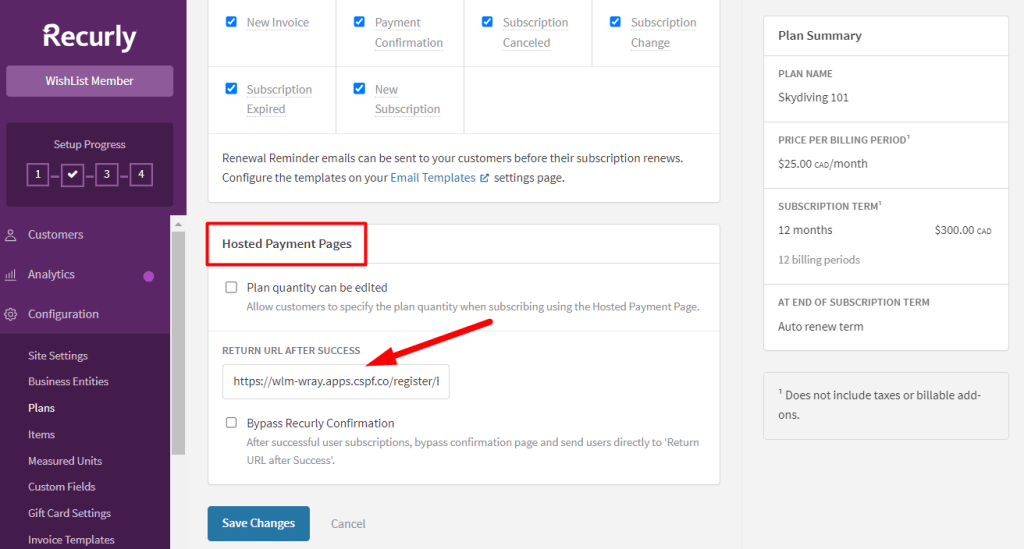
Then paste the Push Notification URL into the Return URL After Success field in the Configuration > Plans > *Edit Plan* > Hosted Payment Pages section of the plan in Recurly and add ?act=reg&account_code={{account_code}}&plan_code={{plan_code}} to the end of that URL.
—
—
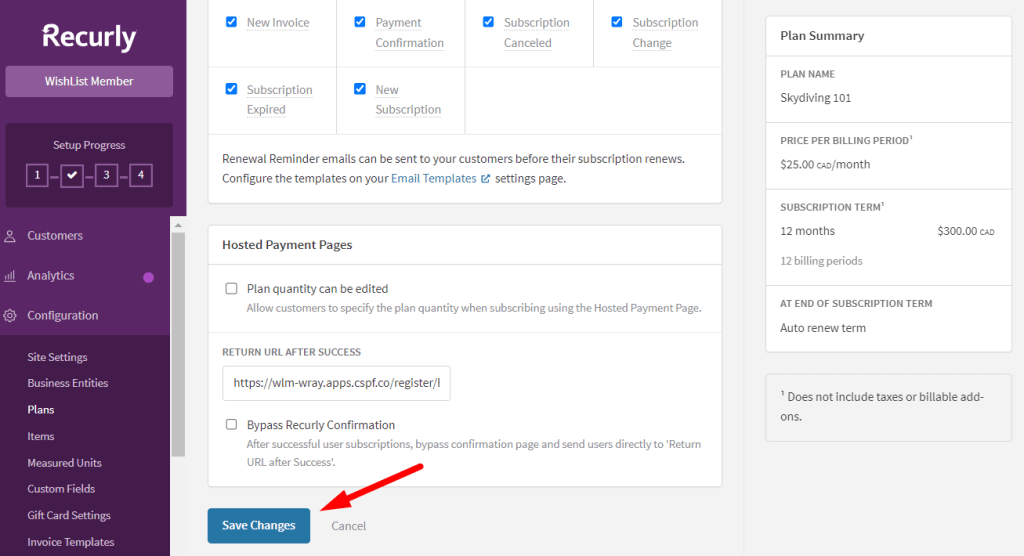
Click the Save Changes button to apply the information from WishList Member to the Accounting Code and Return URL After Success fields in Recurly.
—
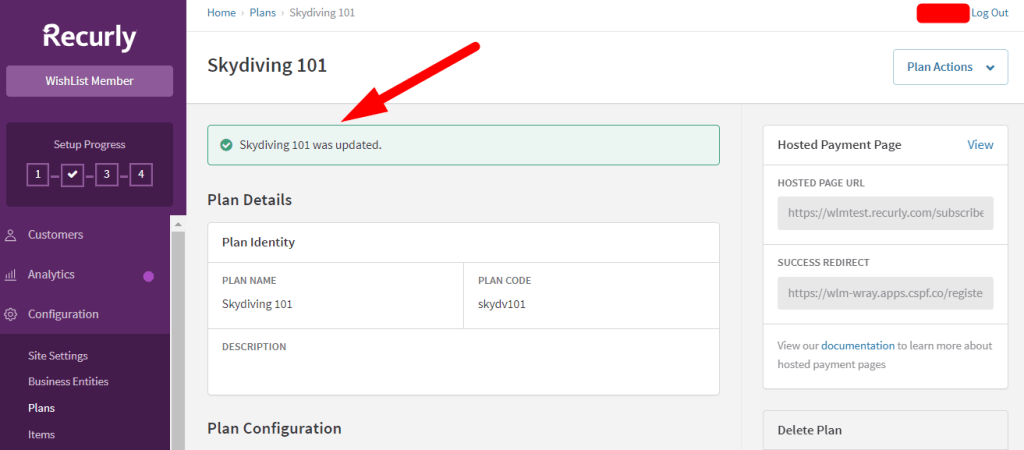
A message stating the plan has been updated will appear.
—
Navigate back to the Products tab in the Recurly integration section of WishList Member and click to edit the membership level you are integrating with Recurly. The screenshot below shows the Gold level selected.

—
The Editing Recurly Product popup will appear and you can select the Recurly Plan to assign to the membership level. The Recurly Plan dropdown will include all the available plans in the connected Recurly account so you can select the desired plan. The Skydiving 101 plan is being assigned to the Gold level in this example. Click the Save & Close button to save these settings.

—
The Skydiving 101 plan now appears in the Plan column for the Gold membership level.

—
The final step to integrate a Recurly plan with a membership level in WishList Member is to copy the Push Notification URL from WishList Member again…

—
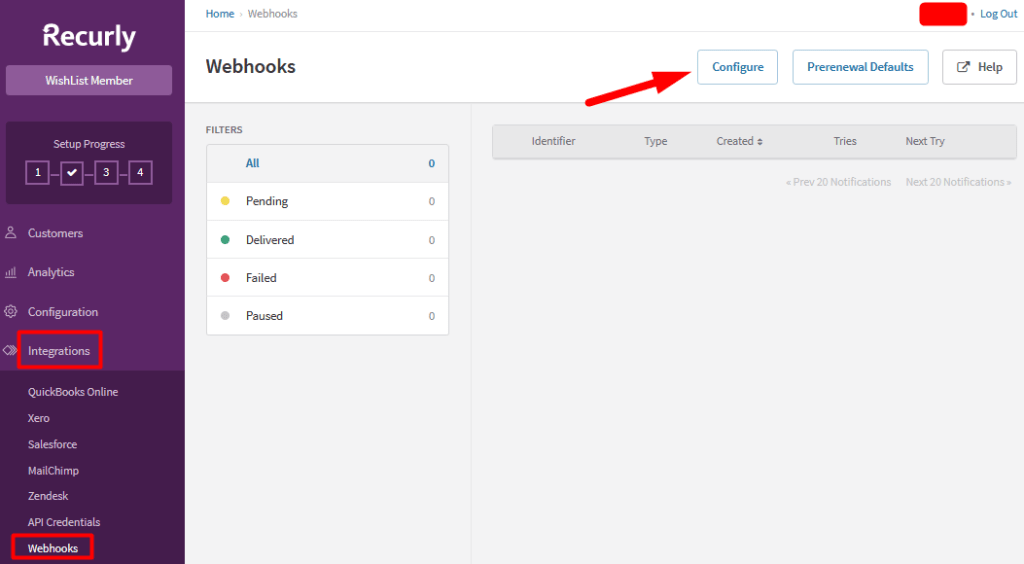
…and go to the Integrations > Webhooks section of Recurly and click the Configure button.
—
The Webhooks Endpoints section will appear and you can click the New Endpoint button.

—
Paste the Push Notification URL you copied from WishList Member into the Endpoint URL field and enter an Endpoint Name. You can set the Endpoint Name to be anything you want.
The HTTP Auth Username and HTTP Auth Password fields can be left blank.
Set the format to XML and click the “Select All Notifications” link.

—
Once all the settings are configured, scroll to the bottom of the Endpoint page and click the Save Changes button.

—
The Webhook Endpoint is now created and the Recurly Plan is integrated with the membership level.

—
Selling the Plan (with Connected Membership Level)
Now that you have created the plan in Recurly and integrated it with the corresponding membership level in WishList Member, you can use the provided purchase link from Recurly to sell access to the membership level. You can do this by adding the payment link to your site.
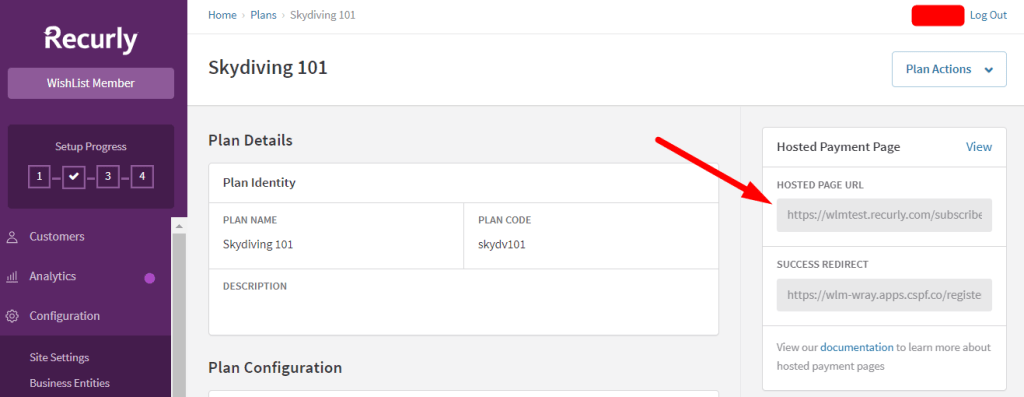
The payment link is named the Hosted Page URL in Recurly.
You can find the Hosted Page URL in the Edit Plan section of Recurly. It will appear in the Hosted Payment Page section of the plan.
—
The payment link (Hosted Page URL) can be placed anywhere on your site and will direct users to a purchase form when clicked. You can use the link itself or create a button by linking an image to the Hosted Page URL.
The screenshot below shows an example of the purchase form that will appear when the payment link is used.
Step 1 includes fields for First Name, Last Name and Email Address and the price is also displayed.

—
Step 2 of the purchase process requires the Billing Information be entered and then the Save button can be used to finish the purchase.

—
Once the user fills in the form and makes the payment, they will see a Thank You page stating the purchase was a success and can click the button to register for the corresponding membership level.

—
The registration form will appear and the user can complete the purchase/registration process by filling in and submitting the form.

—
The user is now a member with the corresponding membership level assigned to their account. You will see that user appear in the Members > Manage section of WishList Member.

—
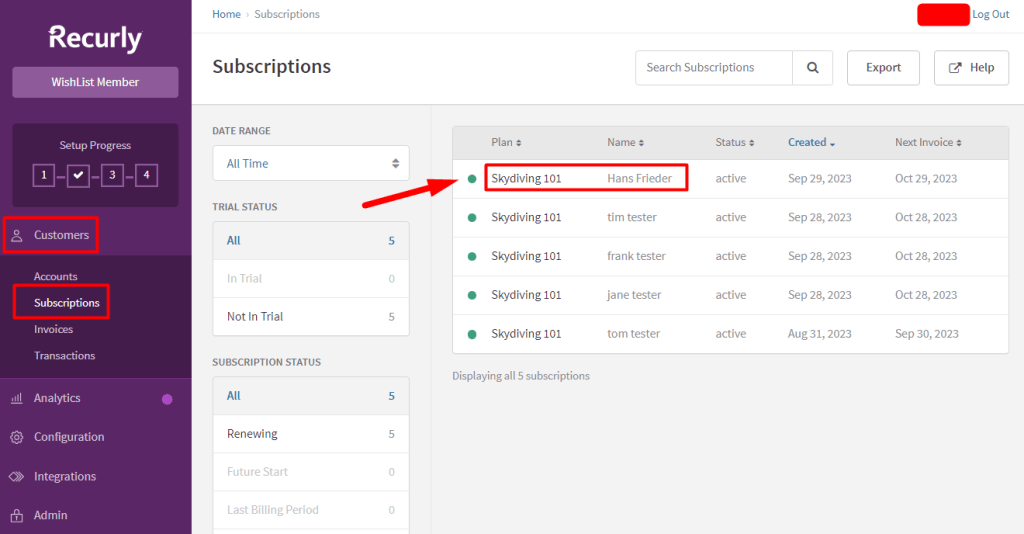
You will also see that user appear in the Customers > Subscriptions section of Recurly.
—
You can allow users to pay through Recurly and gain access to your membership using the methods explained in the article above. This means anyone who purchases through a Recurly powered payment form can be automatically added to a corresponding membership level in WishList Member.
