
You can decide when members gain access to protected content and can even set if you want to remove access after a set period of time. Its as easy as setting a couple options for a membership level once and then anyone who joins that level will receive access to content based on the schedule you set. This is handled by Content Scheduler, a very useful part of the Content Control feature in WishList Member.
Content Scheduler allows you to drip content to members. Dripping content is an ever growing popular option for publishing content.
It is a method of releasing content bit-by-bit instead of all-at-once. So, when a new member joins an online site – instead of dropping all the content on them at once, you can “drip” out your content on a module by module basis over a set period of time.
More details are included below including Screenshots and information on Setup and the Content Scheduler Shortcode.
Content Scheduler Setup
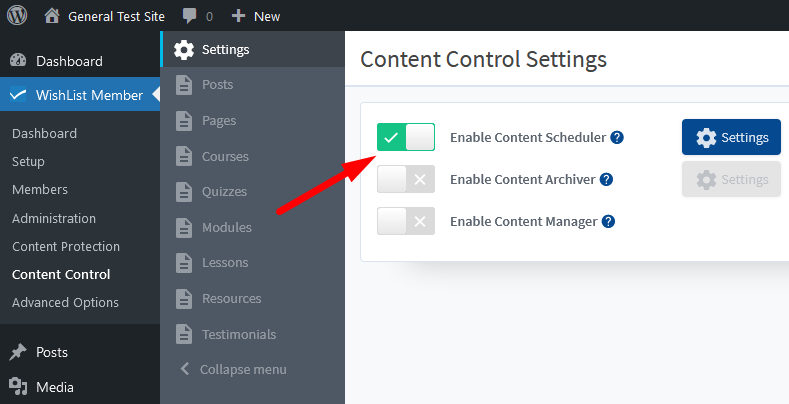
To get started, click on the Content Control menu option in WishList Member.

—
You'll first need to make sure the Content Scheduler feature is enabled, so you can click on the “Settings” link.

—
Then click the toggle next to “Enable Content Scheduler”.
—
While you're here, you can edit the settings for Content Scheduler by clicking the “Settings” button.

—
The Content Scheduler Settings popup appears. You can set a Page, Message or URL users will see if they try to access content that has been scheduled, but they don't have access to it yet.
You can set what they will see by editing the options in this section. A default message is selected but you can choose or edit any option you would like.

—
Schedule Content with WishList Member Content Scheduler
You can now select the “post type” you'd like to edit. This will usually be your posts or pages, but if you (or a plugin you are using) has created any custom post types, you can select any of those here.

—
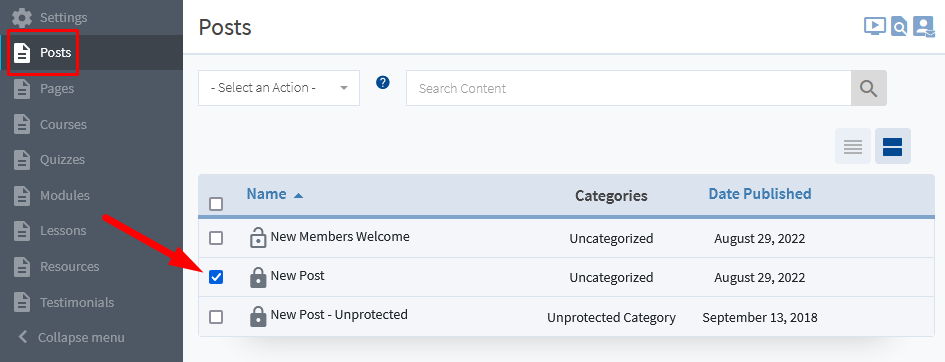
Now you can select the post or page you would like to work with. This example uses a post named “New Post”.
—
Then, select “Set Content Schedule (Drip)” from the dropdown.

—
The Set Content Schedule (Drip) popup appears. You can select the membership level(s) that you would like to apply the schedule to. You have the option to select one or multiple levels. The screenshot below shows the Platinum level being selected.

—
You have two choices when it comes to how to schedule the content. These two options appear under the “Show” title.
After. If selected, you can set when the content will appear to the user after they have registered to the level and for how long.
On. If selected, you can set when the content will appear to the user starting on a specific date and for how long.
Show Content After
Select the “After” option under the Show title and the corresponding fields will appear. Set the number of days “After User Registered” for the level that you'd like the content to start showing. In this case, 0 days has been selected so the post will show right away to new members.
You can set the number of days you would like the post to “Show For”. In this case, the field has been left empty so the post will always show to members in the selected level. As an example, you could set the “Show For” field to 14 days if you only wanted the members to be able to view that post for 14 days.

—
Once you click the “Set Content Schedule” button, you will now see the schedule is set for that post in the Posts list.

—
—
Show Content On
Select the “On” option under the Show title and the corresponding fields will appear. Set the “Start Date” for the level that you'd like the content to start showing. In this case, February 20th has been selected so the post will show to members starting on that date.
You can set the number of days you would like the post to “Show For”. In this case, the field has been set to 30 days so the post will stop showing to members in the selected level on that date. The date and time the content will stop showing to members is also displayed.

—
Once you click the “Set Content Schedule” button, you will now see the schedule is set for that post in the Posts list.

—
You can also edit or delete a schedule by clicking the pencil or trash can icons that will appear when you hover over a post.

—
Those are the steps you can use to schedule your content. Of course, those are just a couple of examples. Let's take a look at another content scheduling example.
With the setup shown in the screenshots below, the selected post would show to the members 7 days after they register to the Gold membership level and it would show for 14 days before “disappearing” for them.

—

—
There are a number of creative uses for Content Scheduler. Dripping out a course, managing an on-boarding sequence, displaying time-limited content and a whole lot more.
One more thing to note is the Sequential Upgrade feature is also available for dripping content. It allows for dripping content using a different method and more details can be found in the Sequential Upgrade Knowledge Base article.
—
Schedule Content Directly on a WordPress Page or Post
You also have the option to schedule content in the WishList Member section while editing a WordPress page or post. You'll see these options below the main content area.

—
The two “Show” options are available and you can select “After” or “On” using the blue slider.
The screenshot example below shows the After option selected and set to show the content to members in the Platinum level 7 days after they register and for 14 days.

—
The screenshot example below shows the On option selected and set to show the content to members in the Gold level on March 18th and for 45 days.

—
Content Scheduler Shortcode
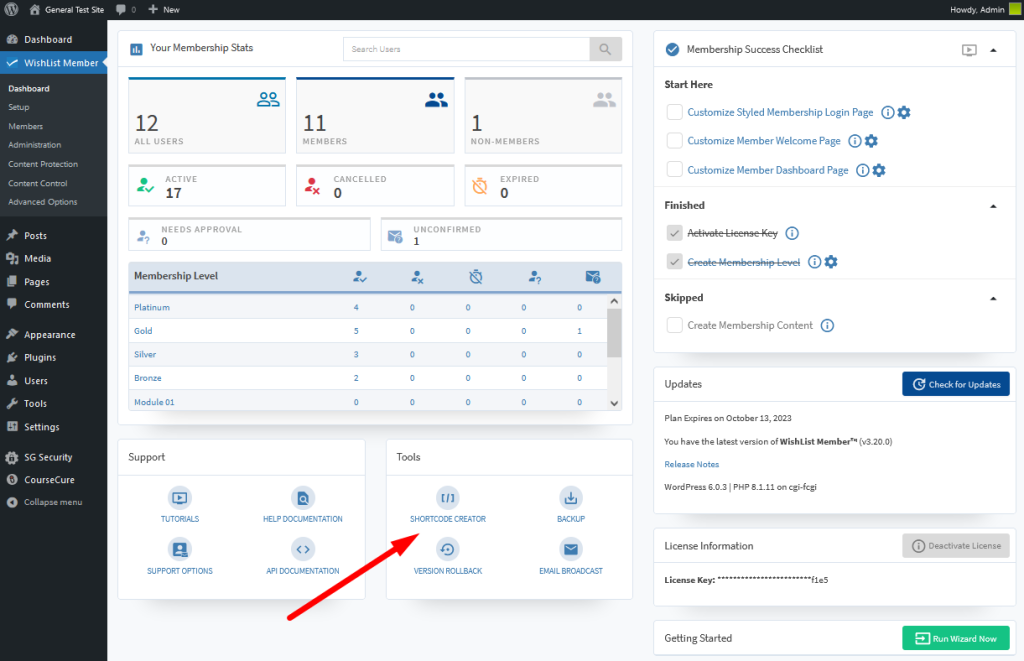
The Content Scheduler Shortcode is available to use and it can be inserted into a page or post by using a Classic Block in the WordPress Gutenberg editor or the Shortcode Creator found on the WishList Member Dashboard.
This shortcode can be used to display a list of upcoming scheduled content to members.
More details on inserting shortcodes/mergecodes can be found in this Knowledge Base article.
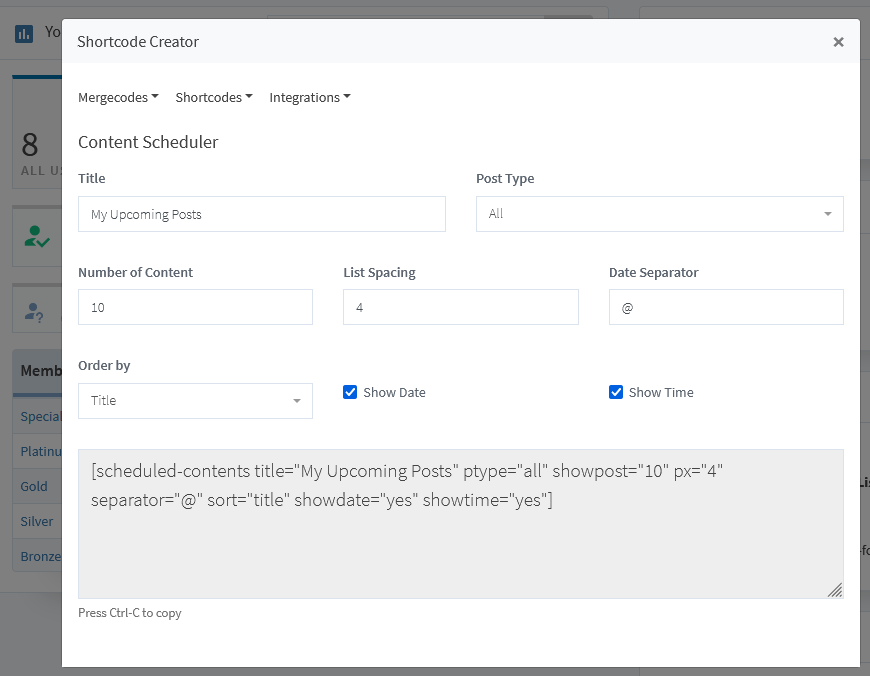
Below is an example of the Content Scheduler Shortcode being created using the Shortcode Creator on the WishList Member Dashboard.
—
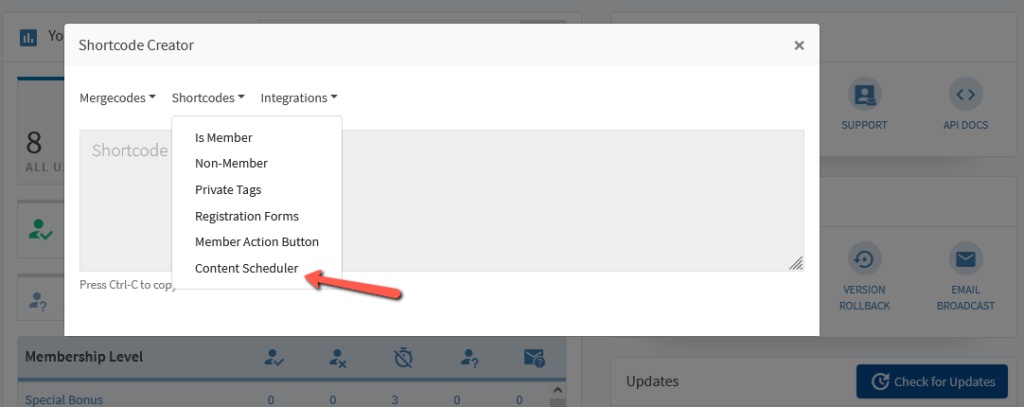
The Shortcode Creator popup appears and you can select the Content Scheduler Shortcode. A few clicks to adjust the available options and then copy the Shortcode to be inserted into the page, post, etc. of your choice.
—
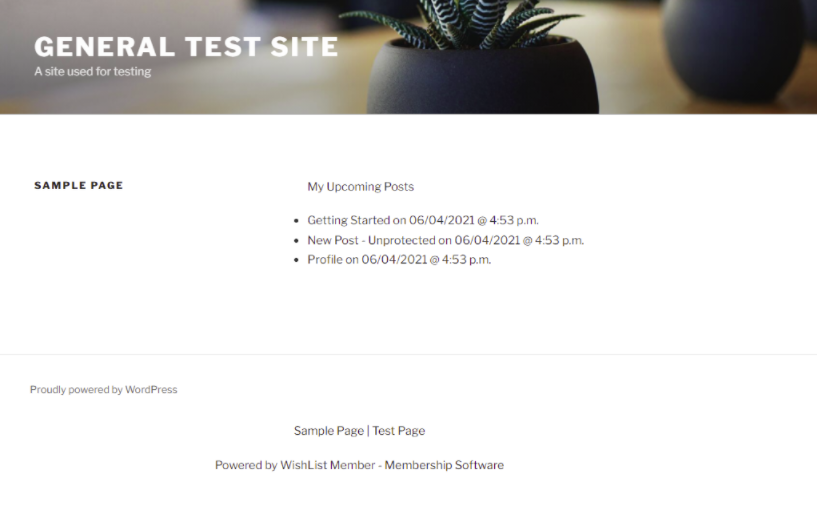
This will display a list of the upcoming scheduled content. The list can show the date and time that content will be available to the member.
—
Below is an example of how the list of Upcoming Content can appear to a Member.
—
Content Scheduler is a powerful piece of the Content Control feature within WishList Member. You have the power to select when your members get to access protected content and for how long.
We also recommend checking out the other options within Content Control.
- Content Archiver. Often referred to as the “magazine method”, content can be accessed by members who are in a membership level during the set period of time. Once a selected date hits, new members won’t be able to access that archived content while previous members can still access it.
- Content Manager. There are times when you might want to automate the content on your site. Perhaps you want to set a page to re-post over the course of the next year. Or, maybe you want to move a post to a protected category after it’s been available to the public for a week. These are a sample of what can be done using Content Manager.
