
There will be times when your members want to change their password or need to switch their current email address to a new one. Updating their profile picture is also a popular self serve option members will want to do every now and then. Providing your members with a profile page they can edit themselves is a quick task you can handle when using WishList Member. Including a link to a profile page from a Member Dashboard is also a helpful way to allow members to easily update their own account info.
There are a few options you can use when creating a profile page for members and we will run through those below.
—
WishList Member uses the WordPress database to create member access so a member account is based on a WordPress user account.
This means the member can use any WordPress or WishList Member option to adjust their account (password, email address, etc.).
WishList Member Profile Form Gutenberg Block
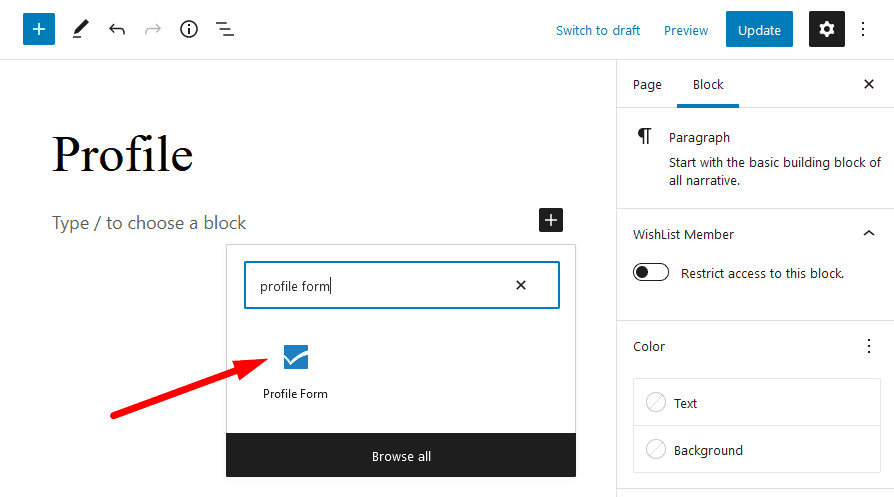
You can insert the WishList Member Profile Form Gutenberg block into a page or post and it will display the profile form to members on the site. This is a fast way to create a profile page in a matter of moments.
—
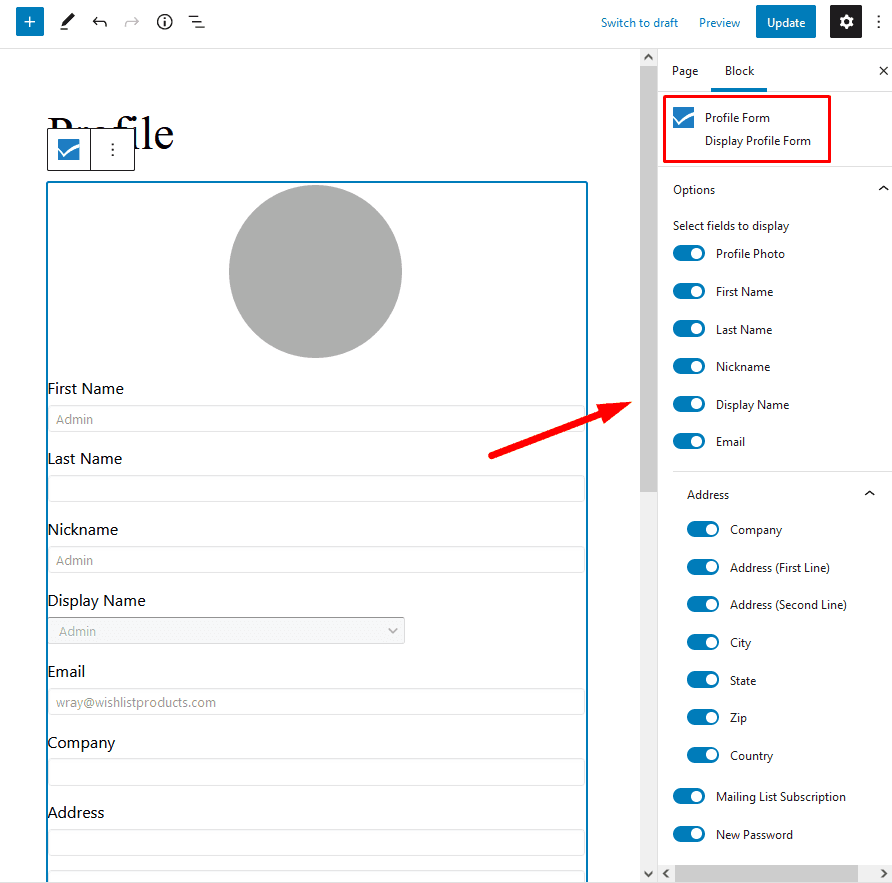
All the profile fields will be enabled by default but you can disable any fields you want to remove from the profile form.
—
Below is a screenshot of how the profile form with all fields enabled will appear to members on the site. Of course, you can decide which fields you want to display using the options mentioned above.
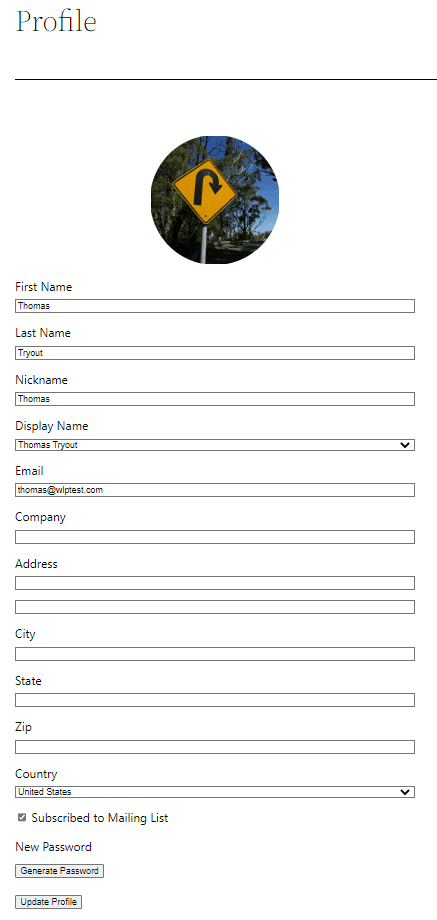
The member can update their profile picture, set a new password or adjust any of the other available fields. Once they are finished, they just need to click the Update Profile button and they are all set.
Below is a screenshot of how the profile form will appear to members on the site. A default WordPress theme is used in this case.
—
WishList Member Profile Form Mergecode
WishList Member also includes a Profile Form Mergecode that can be inserted into any page or post.
Profile Form Mergecode: [wlm_profileform]
Adding that code to the content section of a page or post will insert a profile form. This mergecode (like all WishList Member mergecodes or shortcodes) does not need to be added to the HTML code of a page or post. It can simply be added to the content area and the profile form will automatically be displayed to the members on the site.
Additional mergecodes can also be used to display additional information as well.
This is a quick way to add mergecodes or shortcodes to a page or post.
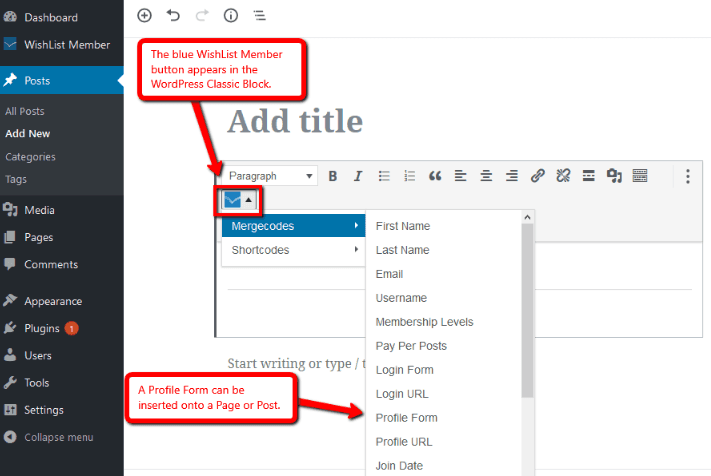
(Another option to generate and copy a mergecode or shortcode is the Shortcode Creator found on the WishList Member Dashboard).
—
Below is a screenshot example of how the profile page appears to a member on the site when the WishList Member profile form mergecode is inserted on the page.
Just like when using the Profile Form Gutenberg block mentioned above, the member has the option to update their profile picture by hovering over the image and can set a new password. They can also adjust any of the other available fields. Once they are finished, they just need to click the Update Profile button and they are all set.

—
More details regarding the stored location of the profile image file can be found in the Profile Form – Image Location article.
WishList Member Social Login – Member Profile Form
If you are using the WishList Member Social Login Add-on, the Connect/Disconnect buttons are automatically added to the form that is displayed when using the WishList Member Profile Form. These buttons allow members to connect or disconnect their social accounts on any page that uses that WishList Member Profile Form.
The example screenshot below shows a logged in member viewing a page that includes the WishList Member Profile Form. In this case, the site has enable the Facebook and Google Social Providers and the member has not connected their site account to either of the available social accounts in this case. The member has the option of clicking the Connect button if they want to connect any of their accounts.

—
More details on WishList Member Social Login (including full setup instructions, examples, a video tutorial, etc.) are available in the WishList Member Social Login Knowledge Base entry.
—
Additional WishList Member Mergecodes
There are a variety of additional mergecodes available that can be used with the profile form. These are optional and can be used if you want to display any of the corresponding information to members.
The examples below use the Gold membership level for the Join Date, Expiration Date and Membership Levels mergecodes.
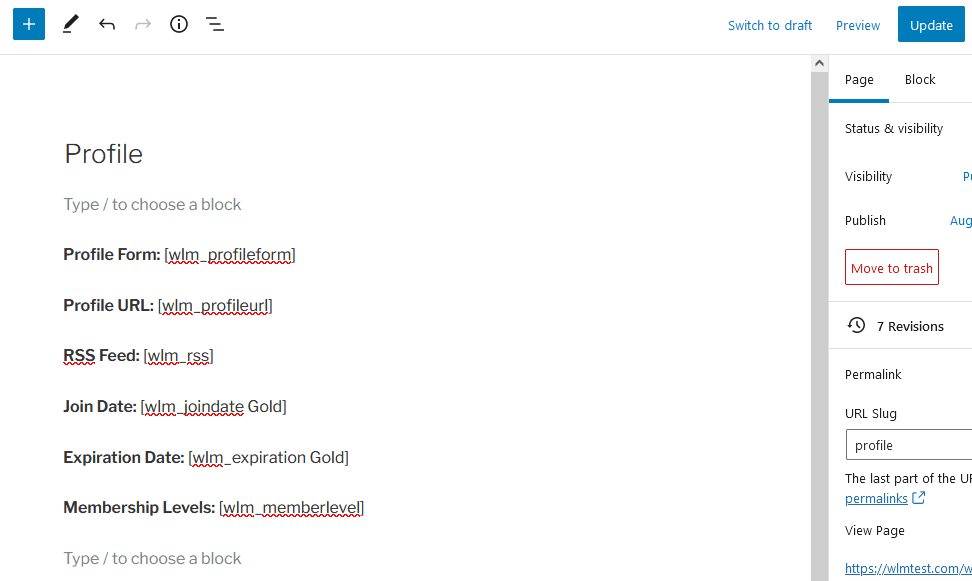
Profile Form: [wlm_profileform]
Profile URL: [wlm_profileurl]
RSS Feed: [wlm_rss]
Join Date: [wlm_joindate Gold]
Expiration Date: [wlm_expiration Gold]
Membership Levels: [wlm_memberlevel]
Below is an example of the above mergecodes inserted into a page in the WordPress page editor.
—
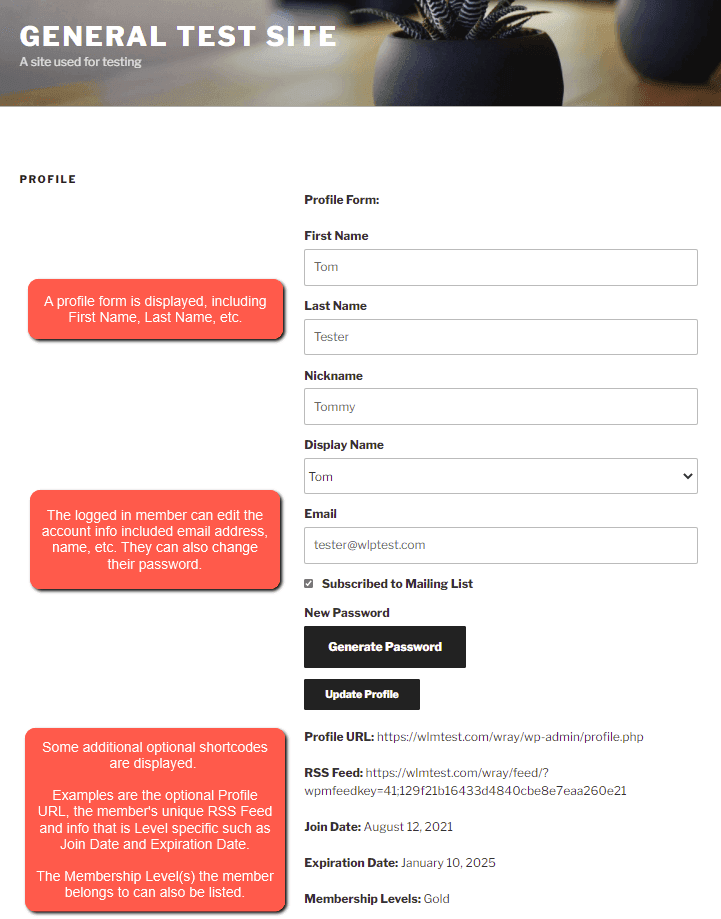
This will result in the profile form being displayed, including First Name, Last Name, etc.
The additional optional mergecodes display the profile page URL, the member's unique RSS Feed and info that is membership level specific such as the date they joined the level (Join Date) and the date they are set to expire from the level (Expiration Date). The expiration date example only applies to levels that are set to expire. The membership level(s) the member belongs to can also be listed.
Below is an example of how this appears on the site.
—
Enable / Disable Profile Form Fields
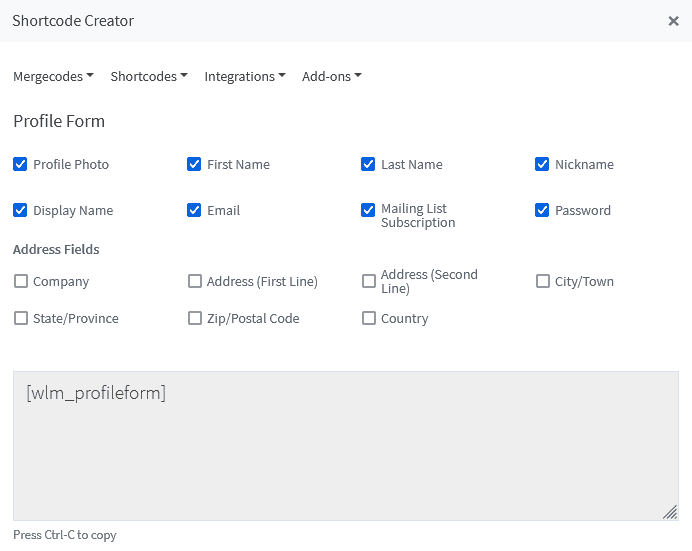
You can select which fields will appear on the profile form by using the check boxes when inserting the Profile Form mergecode. This can be done when using either the WishList Member code inserted in the Gutenberg Classic block or when using the Shortcode Creator on the WishList Member Dashboard.
Something to keep in mind is you will also have the option to display information gathered through custom fields if you use a custom registration form to sign up members. Those custom fields will appear as options that can be enabled/disabled if you are inserting the Registration Form mergecode.
—
Only the selected fields will appear when the Profile Form mergecode is inserted.
The example below shows the Profile Form being created with all the fields selected. This means all those fields will be displayed on the site.
—
The example below shows the Profile Form being created with two fields not selected. This means the Nickname and Display Name fields will not be displayed on the site.
Note: The Mergecode now shows nickname=”hide” and display_name=”hide”. This is because those fields are unchecked.

—
WordPress Profile Section
If you are wanting to edit or customize the appearance of the WordPress profile section, you could look into available plugins that will allow you to edit the WordPress profile section. (This is separate from the profile page generated by the WishList Member Profile Form mergecode mentioned above).
There are some profile plugins available in the WordPress plugin directly you can check out to see if they fit your needs. Since members are created in WishList Member based on the WordPress user database, a plugin that works with WordPress users will typically work with members. A search for “User Profile” brings up a selection of options. You can search for these in the WordPress Plugins Directory.
—
You have a number of options to create and display a profile page for your members. This allows your members to take care of typical needs like updating a password or changing their email address on file. This helps make the process easier on you and your members.
