Still handing out plastic membership cards in 2025? It might be time to reconsider.
Contents
From banking and boarding passes to event tickets, people now expect instant access to everything. And yes, the same applies to even membership details. Physical cards are easy to forget, expensive to replace, and offer little flexibility when member info changes. Digital membership cards, on the other hand, are fast, secure, and always just a tap away.
Regardless of whether you are running a coaching business, managing a gym, or building a thriving online community, going digital will give your members a smoother and more professional experience. And for you? It means less administrative work, lower printing costs, and greater control over how your membership is managed.
In this guide, we’ll discuss digital membership cards in more detail, and show you exactly how to create digital membership cards, step by step, and how easy it is to do it with the right tools.
What Are Digital Membership Cards?
Digital membership cards are a virtual version of traditional membership cards, but instead of being made of plastic, they’re stored digitally. Members can access them directly from their phones, they can be emailed to members, downloaded as a PDF, or even displayed inside a member’s account on your website.

What Makes Digital Membership Cards Different From Physical Cards?
- Flexibility: Digital cards can be updated in real time. If a member upgrades, renews, or changes their info, you don’t need to reprint anything. They simply access the latest version instantly.
- Accessibility: Members can view their card anytime, from any device. No need to carry a physical card or worry about losing it.
What are the Benefits of Digital Membership Cards
Switching to digital membership cards is not necessarily about modernizing your business or following the latest trends, it also comes with a long list of practical benefits for both you and your members. Some of them are:
- Easy access across all devices: Digital cards can be accessed from smartphones, tablets, or computers – anytime, anywhere. There’s no need to print, ship, or manually hand out physical cards. Everything is managed online, saving you time and hassle.
- Lower costs for you and your team: Say goodbye to printing costs, shipping fees, and reissuing lost cards. With digital cards, updates occur in real-time at no additional cost, keeping your operations lean and budget-friendly.
- A greener, more sustainable option: No plastic. No paper. No waste. Digital membership cards are a sustainable solution that aligns with eco-conscious values and helps reduce your business’s environmental footprint.
- Secure and system-friendly: Digital cards can include secure features like QR codes, encrypted member IDs, or login-only access. Plus, they integrate seamlessly with your existing tools like a CRM, event check-in system, or your membership platform.
How to Create Digital Membership Cards: 7 Easy Steps
Creating a digital membership card might sound technical, but it’s simpler than you think, especially when you have the right tools and a clear plan. It doesn’t matter if you're starting from scratch or upgrading from physical cards; the process can be smooth, scalable, and surprisingly quick.
Below, we’ll walk you through the essential steps to help you design, build, and deliver digital membership cards your members will love.
Step 1: What Do You Plan to Include in Your Digital Membership Cards?
Before you jump into design or tools, start with the basics – what exactly should your digital membership card include? This step sets the foundation for everything that follows.
Think about the kind of experience you want your members to have and the information they’ll need at a glance. Depending on your business type, here are some options you can consider:
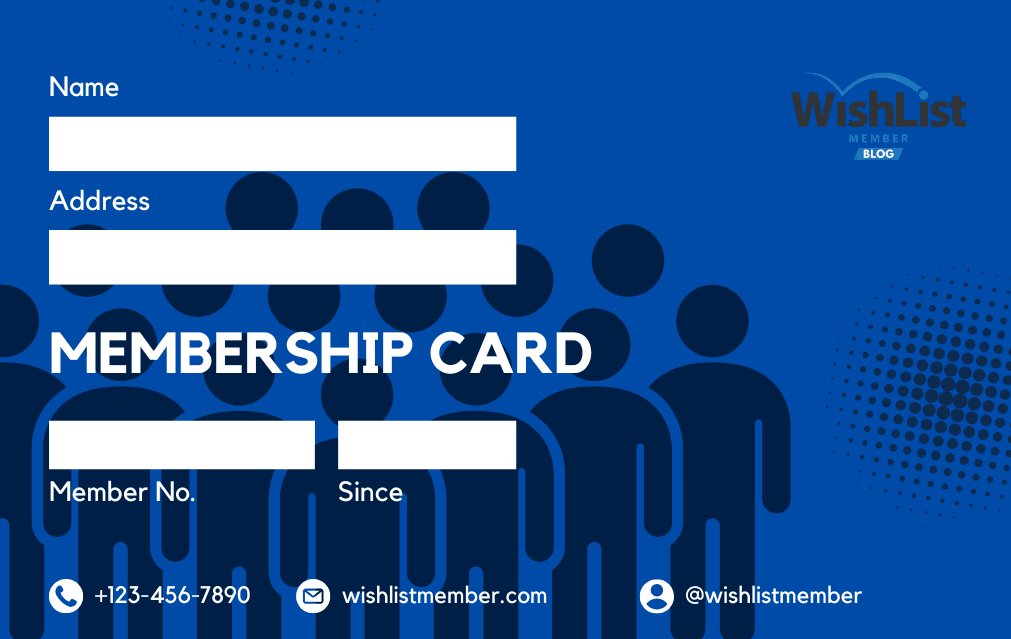
- Member’s full name
- Membership ID or number
- Membership level or tier
- Join or expiry date
- Benefits or access rights
- Your organization’s logo and branding
- A QR code or barcode for scanning
If you run a coaching program, you might include a unique member goal or milestone. For a gym or club, access hours or facility rights could be helpful. Remember to keep your digital membership cards clean and focused. Too much information can clutter the card, making it less user-friendly.
Step 2: Purchase and Set Up a Membership Management Tool
To ensure easy access to the digital membership cards, you need a tool or platform that can make member management easy for you. One of such tools is WishList Member. Before you start designing your card, choose and purchase a plan that fits your business. After purchasing, you’ll get a download link and license key.
Next, install and set up WishList Member on your WordPress site. Then, create membership levels, login pages, and registration forms.
When this is done, create a New Page for the Digital Card. In your WordPress dashboard, go to Pages > Add New. Title it something like “My Membership Card.”
Once this setup is complete, you’re ready to move on to designing and personalizing your digital membership card.
Step 3: Design Your Digital Membership Cards
Now it’s time to bring your digital membership card to life, visually. A well-designed card makes it easy for members to find the info they need at a glance.You don’t need to be a graphic designer to get this right. Most platforms offer ready-made templates you can start with, or you can build a custom design that reflects your brand.
But here are some things that you can keep in mind while designing your digital membership cards.
- Keep it simple with only essential member details.
- Use brand colors to make the card instantly recognizable.
- Add your logo to boost trust and professionalism.
- Include a member ID or QR code for quick scanning.
- Choose fonts that are easy to read at a glance.
- Design with mobile users in mind.
- Highlight expiry or renewal dates clearly.
- Add a profile photo for a personal and secure touch..
How to Design Your Digital Membership Cards with Elementor, Divi, or WordPress Block Editor
You can use any drag-and-drop builder you’re comfortable with. Elementor and Divi offer more creative control with custom spacing, columns, and mobile responsiveness. The WordPress block editor (Gutenberg) works well if you prefer to keep it lightweight.
Here are the essentials to include in your layout:
- Your Logo
Place your business or organization’s logo at the top or corner of the card to reinforce brand identity. It helps your card look professional and trustworthy. - Background Color or Image
Choose a background that matches your brand colors. You could also use a soft pattern or subtle texture, just make sure it doesn’t overpower the text. - Organized Layout (Columns or Boxes)
Use columns or section dividers to group related information. For example:
- Left side: Member photo and name
- Right side: Membership details like level, start date, and expiry
- Bottom section: QR code or unique ID
- Left side: Member photo and name
Organizing information visually makes the card easier to read, especially on mobile.
Step 4: Add Member Information Using Mergecode or Shortcode
Mergecode or Shortcode helps your digital card reflect real-time updates like new signups, plan changes, or expired memberships – automatically.
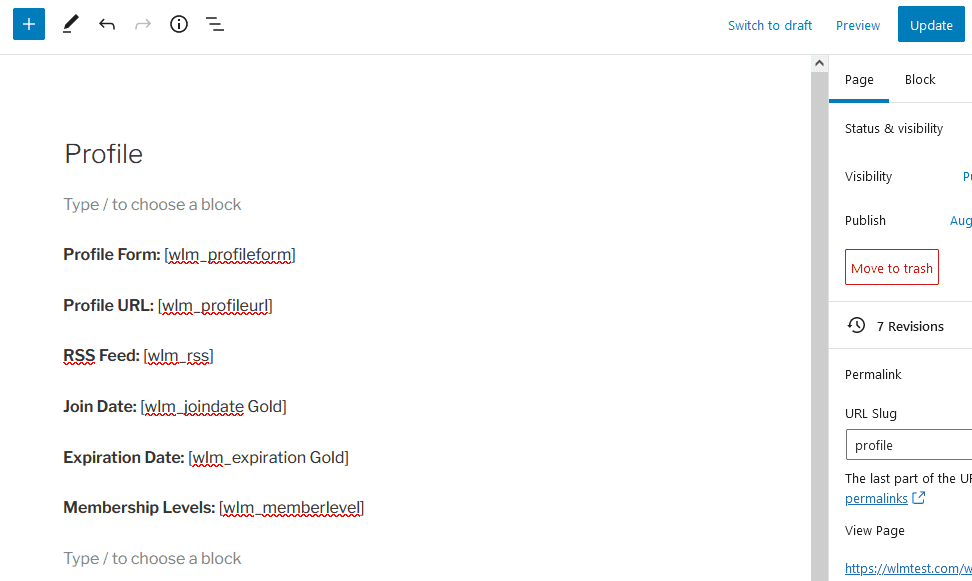
With WishList Member, you can use mergecode or shortcode in an Elementor element easily. You can also integrate your digital membership cards easily by using Mergecode or Shortcode to pull live member data (name, level, registration date) directly onto the designed page that serves as their digital card.
For Example:
- First Name: [wlm_firstname]
- Last Name: [wlm_lastname]
- Email: [wlm_email]
- Username: [wlm_username]
- Profile Form: [wlm_profileform]
- Profile URL: [wlm_profileurl]
- RSS Feed: [wlm_rss]
- Join Date: [wlm_joindate Gold]
- Expiration Date: [wlm_expiration Gold]
- Membership Levels: [wlm_memberlevel]
Just paste these tags into your card design – wherever you want the info to appear. Here is an example:

When a member visits this page, the Mergecode or Shortcode will show their personal info automatically.
Step 5: Restrict the Page to Members Only
After designing your digital membership card, it’s important to make sure that only your members can see it. You don’t want the page to be publicly available to anyone who visits your site.
WishList Member makes this easy with Private Tags. They let you hide specific content or entire pages from non-members. When used correctly, they ensure that only people with the right membership level can view the membership card.
You can create private tags using shortcodes. This is done by wrapping your content in a special shortcode that includes the name of the membership level you want to target. E.g. [wlm_private “Basic, Premium, VIP”]
Only members with the selected level(s) will see what’s inside those tags. If someone who isn't logged in – or doesn’t belong to those levels – visits the page, they’ll see nothing or be redirected (depending on your settings).
Alternatively, you can use the page protection settings
While editing the page in WordPress, scroll to the right-hand sidebar and look for the WishList Member settings box.
- Check the box to “Protect this content.”
- Choose which membership level(s) should have access
This protects the whole page without needing to use tags inside the content.
Using Private Tags gives you fine-tuned control over who can see your digital membership cards, making sure they remain secure, exclusive, and personalized for your members.
Step 6: Make the Card Accessible
Here are a few easy ways to give your members access:
1. Redirect Members to the Card After Login
Inside WishList Member, you can set up a redirect so that when a member logs in, they are automatically taken to their membership card page.
To do this:
- Go to the WishList Member settings in your WordPress dashboard.
- Under Advanced Options > Redirects, choose the membership level you want to edit.
- In the After Login Redirect URL field, paste the link to your digital card page.
- Save your changes.
Now, every time someone in that membership level logs in, they’ll go straight to their card.
2. Link to the Card from the Member Dashboard or Account Page
If you have a member dashboard or a personalized account area, you can add a button or link that says something like “View My Membership Card”. This gives members control to view it anytime they need to.
You can add this link using your page builder or WordPress editor and link it directly to the protected card page.
3. Include the Link in Welcome Emails
WishList Member lets you customize the welcome email members receive after they join. This is a great place to add a direct link to their digital card.
To do this:
- Go to WishList Member > Email Settings.
- Find the welcome email for each membership level.
- Add the text: “Click here to view your digital membership card” and link it to the protected page.
Make Your Digital Membership Cards Downloadable
If you’d like members to download or print their digital membership cards, there are simple tools that can help. One option is to use a plugin like PDF Generator for WordPress, which allows you to convert any WordPress page into a downloadable PDF. You just design the card as a regular page and place a “Download PDF” button where members can easily find it.
Step 7: Collect Feedback From Members and Improve
After launch, don’t just set it and forget it. Ask your members what they think. You can send a brief feedback survey, track support requests, or simply check in with a few users to gauge their experience. You might find ways to improve the layout, add missing info, or make the card easier to find and use.
Digital membership cards aren’t just a one-time setup; they’re part of your ongoing member experience. Gathering insights and making small improvements over time demonstrates to your members that you care about quality and convenience.
Final Thoughts
We hope this blog has helped you understand what digital membership cards are and their benefits. We have taken the time to make the digital membership cards creation process easy and simple for you so that you can provide more value to your users. Start creating your digital membership cards today and make your membership and business more professional, branded, and accessible.
Have questions about setting up digital membership cards? Drop them in the comments below. We’re here to help.Already using WishList Member to create digital membership cards? We’d love to hear how it’s working for you! Share your experience in the comments.
Enjoyed this article? Follow us on Twitter, Facebook, YouTube, and LinkedIn. Plus, get notified about feature updates, upgrades, and more when you subscribe to our newsletter!


This Post Has 2 Comments
This is such a well-written piece, I really enjoyed every bit of it.
We appreciate that, Jason!