
WishList Member includes an integration with MailChimp. You can set specific automation to occur based on rules you set up. This can include adding users to a new Email List/Audience when they join a new membership level. Or removing them from an Email List/Audience if they are removed from the level. You can also add or remove users from Groups based on actions like being added to or removed from a level. The integration with MailChimp opens up a lot of possibilities for you and your members.
These are just a few examples. More details are explained below (including a Tutorial Video).
—
Enable MailChimp Integration
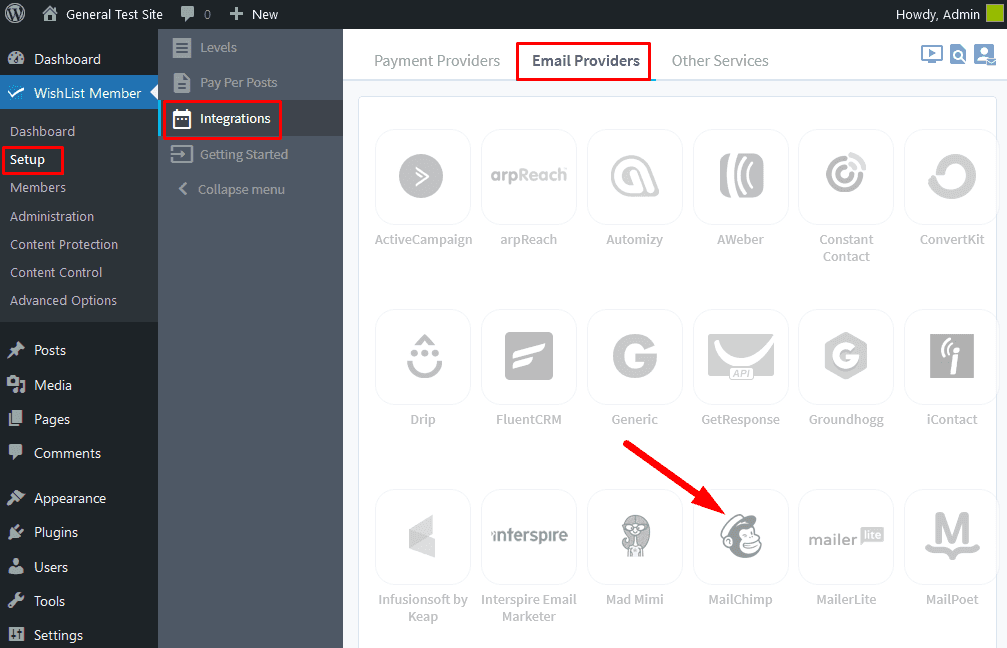
First, you can select and enable the MailChimp option in the Setup > Integrations > Email Providers section of WishList Member.
—
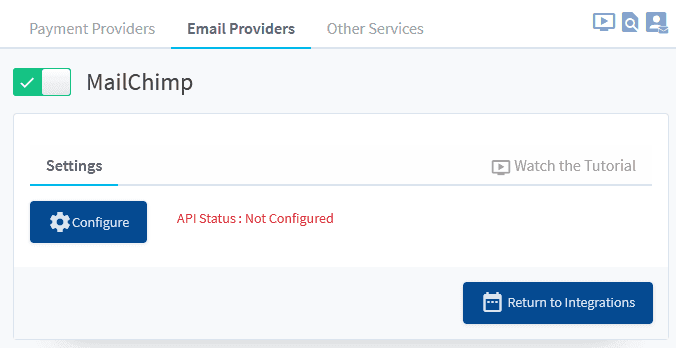
Click the toggle next to MailChimp to enable the integration.

—
The Settings tab will appear and the API Status will show as “Not Configured”. This is because WishList Member and MailChimp need to be connected using the MailChimp API Key provided by MailChimp. This is a quick process (more details below).
—
Connecting MailChimp with WishList Member
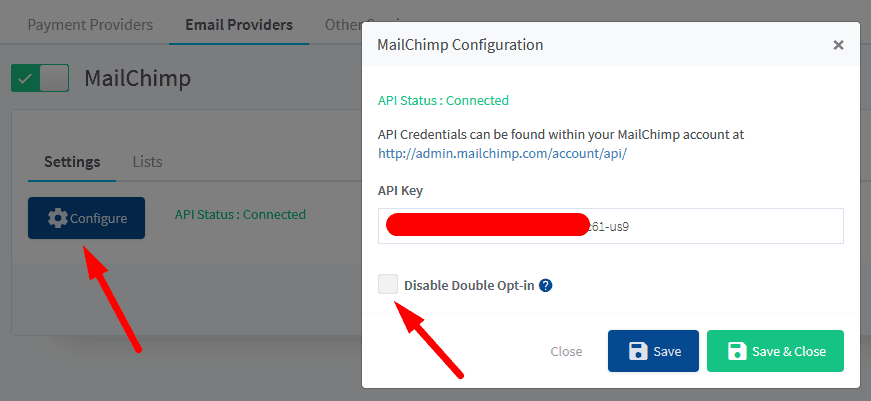
Click the blue Configure button.

—
The MailChimp Configuration popup will appear.

—
You will need to be logged into your account in the MailChimp site when you click the provided http://admin.mailchimp.com/account/api/ link in order to authenticate the connection. You can be logged into MailChimp in another tab of the same browser.
If you are not logged into the MailChimp site when you click the provided link, you will be directed to the login page and you can fill in the login form.
The API Key is located in the Account & Billing > Extras > API Keys section of the MailChimp site.

—
Copy the API Key from MailChimp and paste the API Key into the corresponding field in WishList Member. Click the Save & Close button once the API Key has been entered into the field.

—
The Settings tab in the WishList Member Integrations section for MailChimp now shows a message stating the API Status is Connected.

—
WishList Member and MailChimp are now connected and the integration process can continue.
—
Integrating MailChimp Lists/Audiences and Groups with WishList Member
You can select if Lists/Audiences and/or Groups within the connected MailChimp account should be applied to a user account when that user is added to a membership level in WishList Member. This means you can apply a specific List/Audience or Group when a user is added to a new level. You can also apply multiple Lists/Audiences or Groups when a user is added to a membership level. You are essentially automatically applying a MailChimp List/Audience or Group to a user based on that user being added to a membership level in WishList Member.
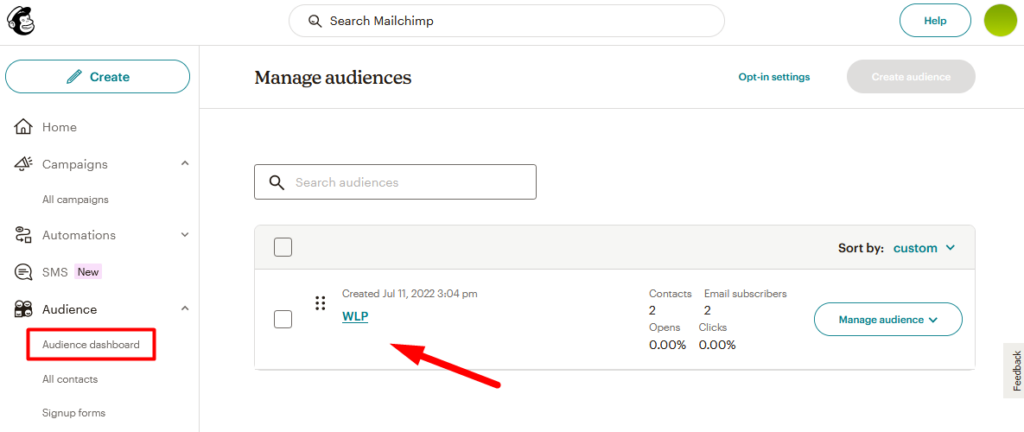
Lists/Audiences can be found (and created) in the Audience > Audience Dashboard > Manage Audience > View Audiences section of MailChimp.
—
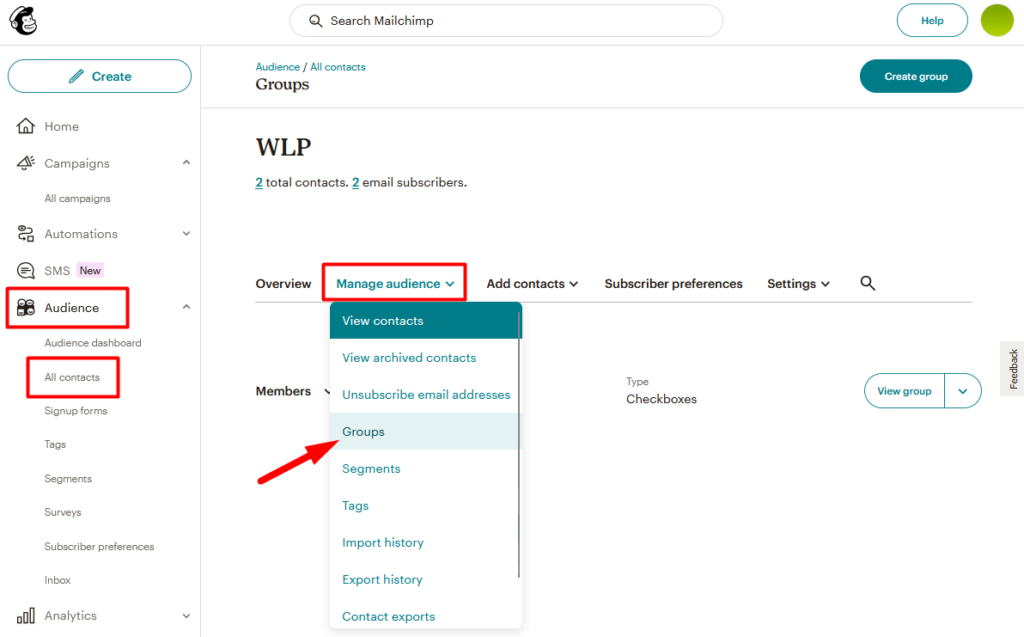
Groups can be found (and created) in the Audience > All Contacts > Manage Audience > Groups section of MailChimp.
—
The screenshot example below shows a Category named Members and there are three Groups within that Category.
- Red Group
- Blue Group
- Green Group

—
You can create any Lists/Audiences and you can create any Categories and any Groups you would like within MailChimp. WishList Member will be able to interact with these MailChimp features through the integration.
Automation Based on Membership Level Actions
There are two main MailChimp related actions that can be triggered when users join a level or are added to the level in WishList Member. There are also an additional four related MailChimp actions that can be triggered if a user is removed from the level in WishList Member.
The levels will be listed in the Setup > Integrations > Email Providers > MailChimp > Lists section of WishList Member. You can edit a level by clicking its name or the edit icon that appears upon mouse over.

—
The Editing MailChimp Settings for Level pop up appears and you can configure the settings. In this example, the Silver level is being configured.

—
Select List and Group
The first step is selecting the desired Audience/List from the List dropdown. This dropdown is automatically populated with the Audiences/Lists in the connected MailChimp account.
The example screenshot below shows the WLP List being selected.

—
Once a List is selected, the Interest Groups field appears and is populated with the corresponding Groups from the connected MailChimp account.
In this case, the Category is named Members and the three Groups within that Category are displayed in the dropdown.
The example screenshot below shows the Blue Group being selected.

—
Click the Save or Save & Close button and this will result in any users who join the Silver level or are added to the Silver level in WishList Member being added to the Blue Group within the WLP Audience/List in MailChimp.

—
The screenshot example below shows this has been setup and is shown in the List Options column.

—
Action if Removed from Level
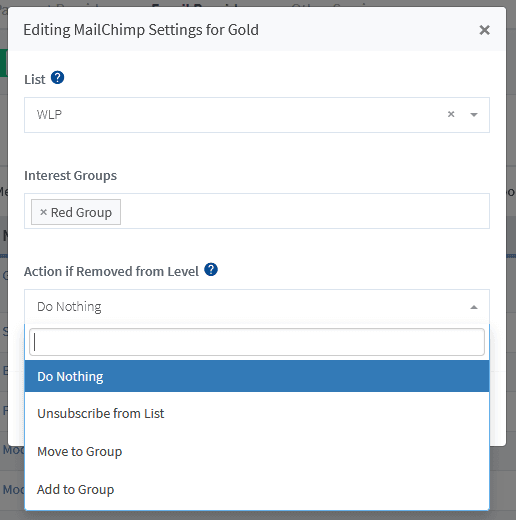
You also have the option to select a MailChimp related action to occur if a user is removed from the level in WishList Member. There are four available actions.
Do Nothing. No further action will take place if the user is removed from the level.
Unsubscribe from List/Audience. The user will be Unsubscribed from the List/Audience in MailChimp if they are removed from the level in WishList Member.
Move to Group. The user will be Moved into the selected Group(s) if they are removed from the level in WishList Member. Note: Moving into selected Group(s) will remove the user from the previous Group(s).
Add to Group. The user will be Added into the selected Group(s) if they are removed from the level in WishList Member. Note: Adding into selected Group(s) will keep the user in the previous Group(s).
—
If Move to Group or Add to Group is selected, the Categories and the Groups are displayed in the dropdown and a Group can be selected.
The example screenshot below shows the Red Group being selected.

—
Click the Save or Save & Close button and this will result in any users in the Silver level in WishList Member being moved to the Red Group within the WLP Audience/List in MailChimp if they are removed from the Silver level in WishList Member.

—
The screenshot example below shows this has been setup and is shown in the List Options column.

—
