Content Manager is part of the Content Control section in WishList Member.
The Content Manager feature allows for additional control over content by providing options to set specific pieces of content to delete, move to a different category, or re-post on a set date. The Content Manager feature can be used to help automate the ongoing management of content.
—
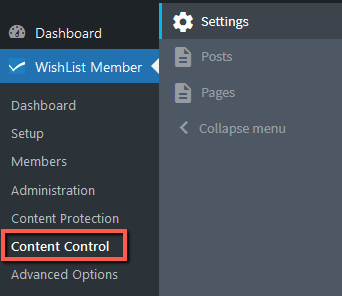
To get started, click on the Content Control menu option in WishList Member:
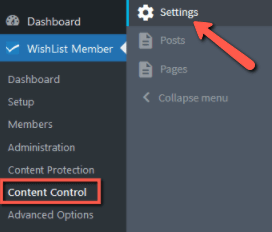
You’ll first need to make sure the Content Manager feature is enabled, so click on the “Settings” link:
Then click the toggle to the “Enable Content Manager”. Once enabled, the Content Manager features are available in WishList Member.

Note: Content Manager doesn't need a general Settings option because it gets applied directly to selected pieces of content and is not reliant on Levels.
You can now select the type of content you’d like to control. This is typically Posts or Pages. But if you (or another plugin you’re using) has created any custom post types for your site, those will be displayed here as well.

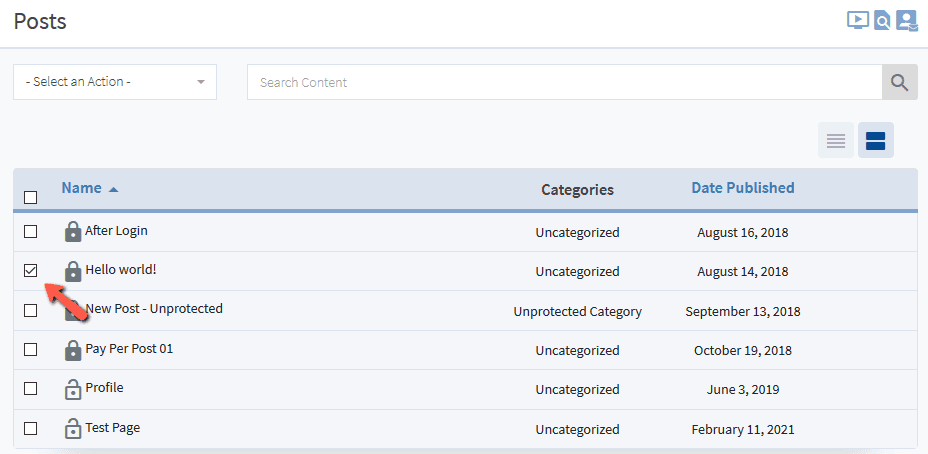
For this example, we’ll work with Posts. You’ll see a list of Posts and you can select the specific Post you’d like to work on:
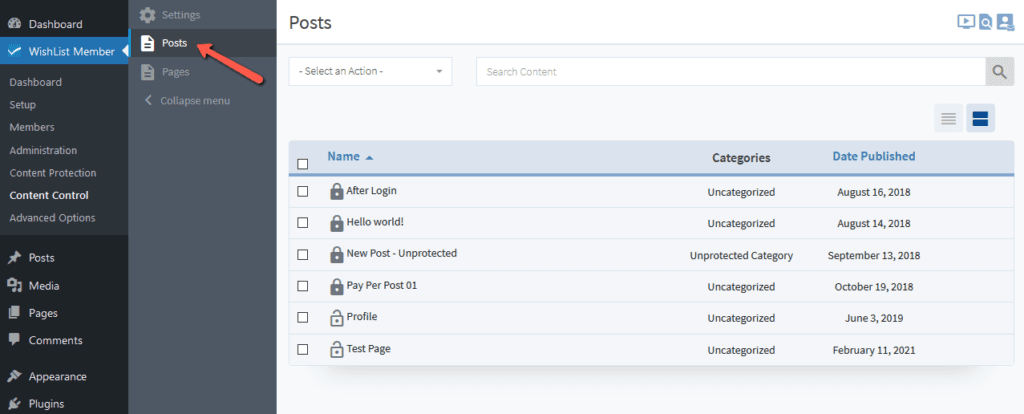
The Content Manager functionality can be applied to one or more Posts at a time. Click the check box beside the Post(s) you want to edit.
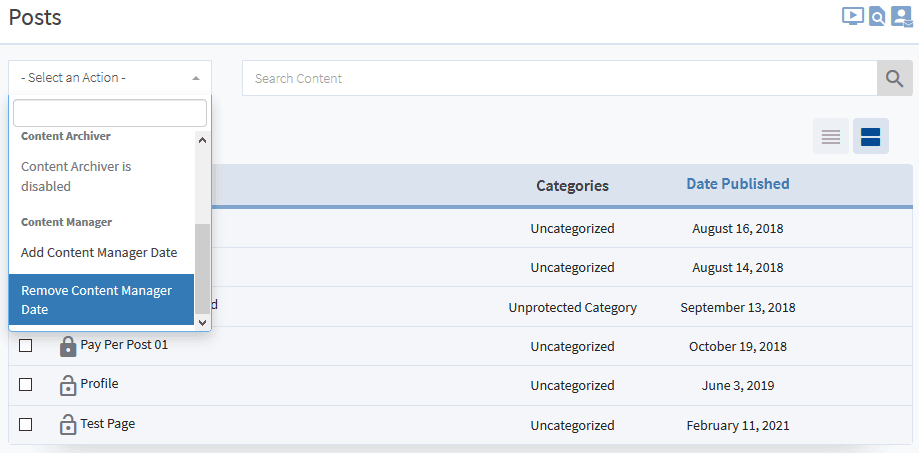
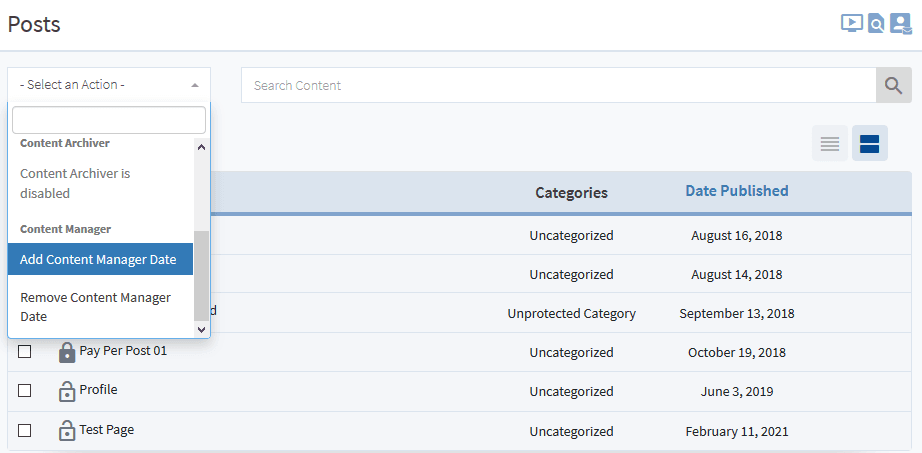
You can now select “Add Content Manager Date” from the Select an Action dropdown:
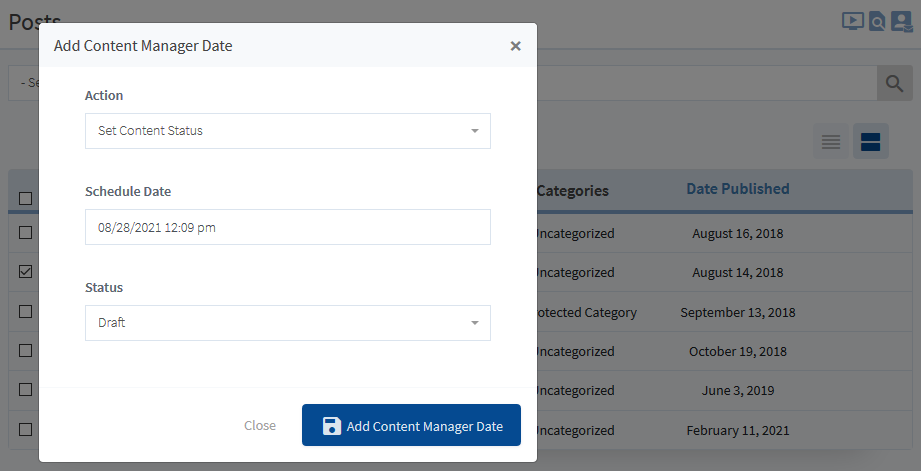
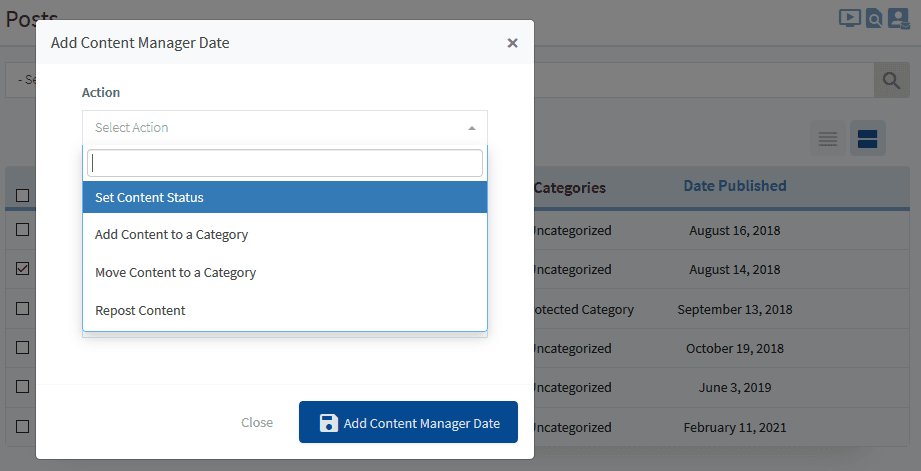
A pop up will appear. Select the Action you want to apply.
There are 4 Actions available:
Set Content Status
Add Content to a Category
Move Content to a Category
Repost Content
—
Set Content Status
- You can set the status of a piece of content to be changed on a specified date. Example: A Published Post can be scheduled to be set as a Draft. (Status Options: Published, Pending Review, Draft, Trash)
- The example Screenshot below shows a Post that is scheduled to be set as a Draft on August 28th. Clicking the “Add Content Manager Date” button will schedule the Action.

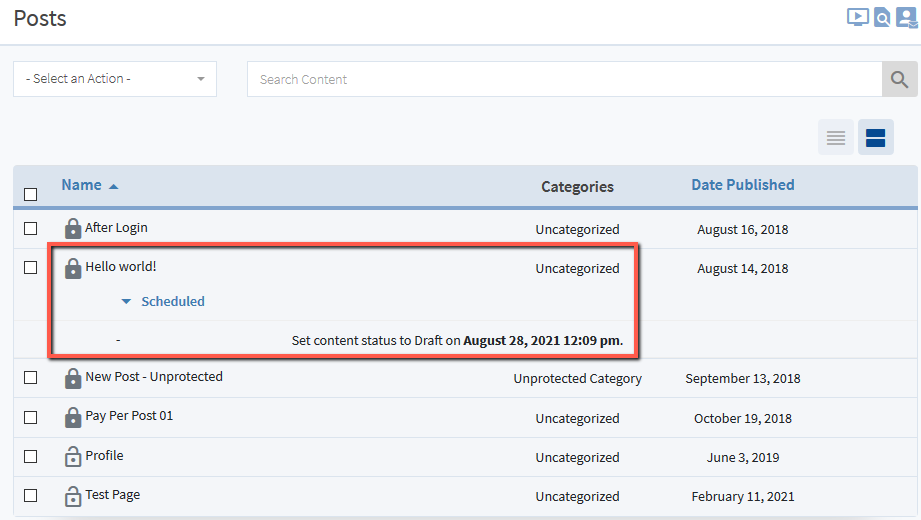
- The content is now scheduled. In this case, the Hello World! post will be set to Draft status on August 28th.

Note: You can edit or delete the set Action by clicking the icons that appear when hovering the mouse over the corresponding row.
—
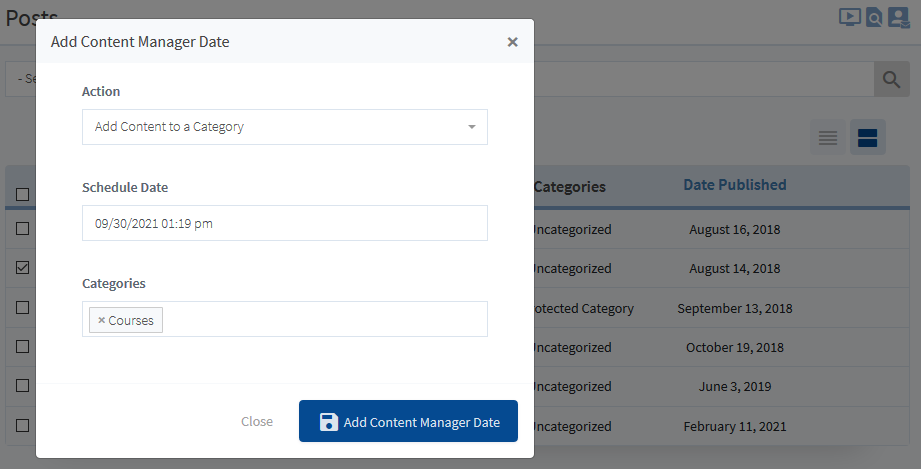
Add Content to a Category
- You can set a piece of content to be Added to a Category/Categories on a specified date. Note: Adding to a new Category also keeps the piece of content in any previous Category/Categories. (If you want to remove the piece of content from any previous Category/Categories, see the Move option).
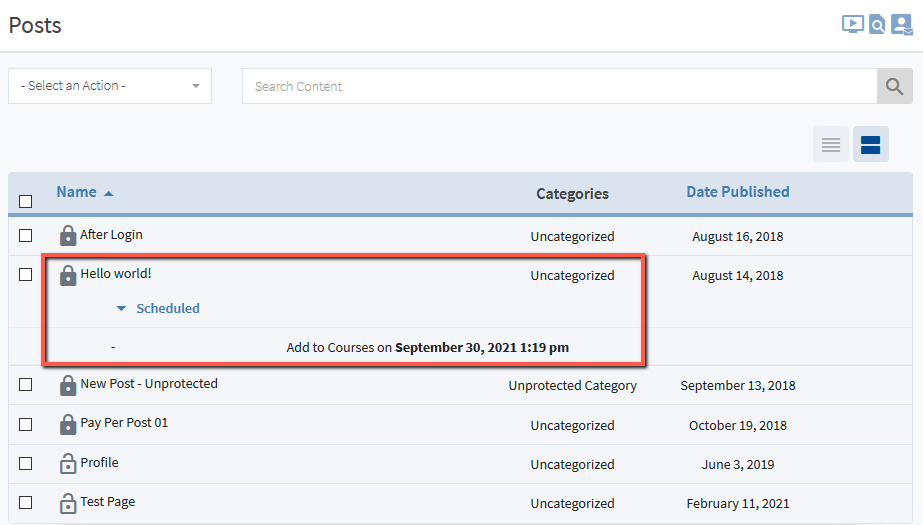
- The example Screenshot below shows a Post that is scheduled to be Added to the Courses Category on September 30th. Clicking the “Add Content Manager Date” button will schedule the Action.

- The content is now scheduled. In this case, the Hello World! post will be Added to the Courses Category on September 30th.

Note: You can edit or delete the set Action by clicking the icons that appear when hovering the mouse over the corresponding row.
—
Move Content to a Category
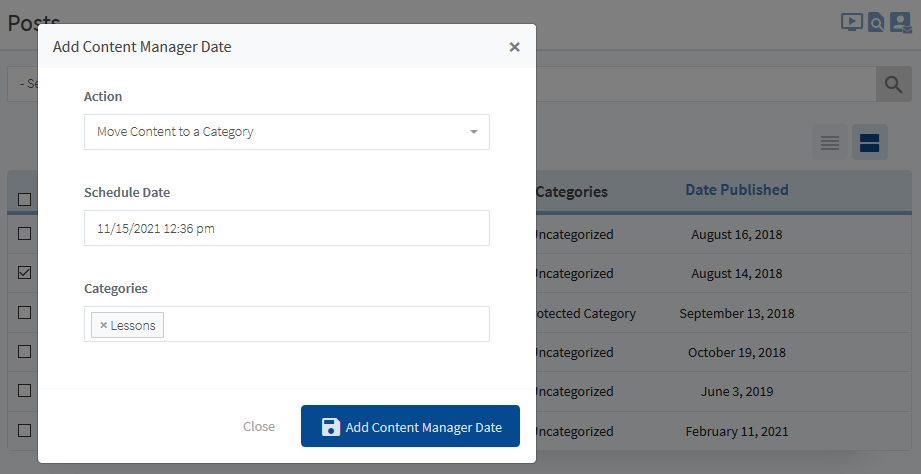
- You can set a piece of content to be Moved to a Category/Categories on a specified date. Note: Moving to a new Category will remove the piece of content from any previous Category/Categories. (If you want to keep the piece of content in any previous Category/Categories, see the Add option).
- The example Screenshot below shows a Post that is scheduled to be Moved to the Lessons Category on November 15th. Clicking the “Add Content Manager Date” button will schedule the Action.

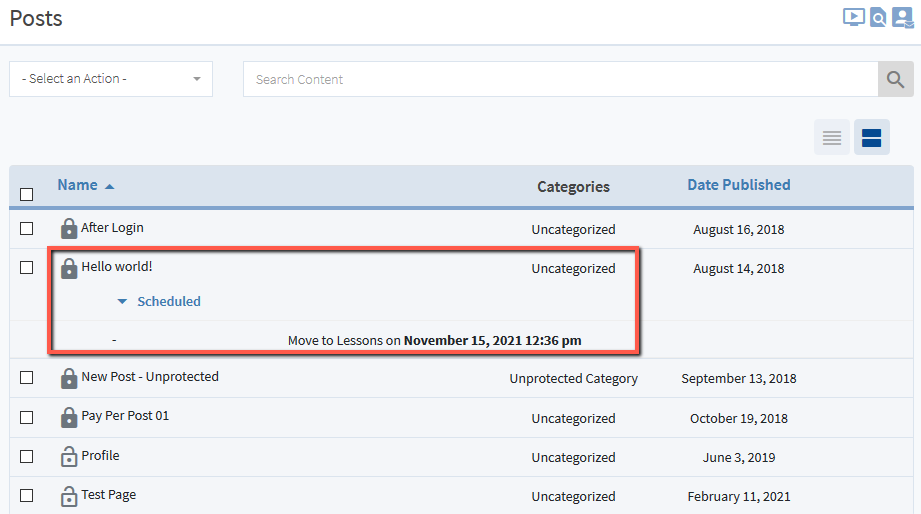
- The content is now scheduled. In this case, the Hello World! post will be Moved to the Lessons Category on November 15th.

Note: You can edit or delete the set Action by clicking the icons that appear when hovering the mouse over the corresponding row.
—
Repost Content
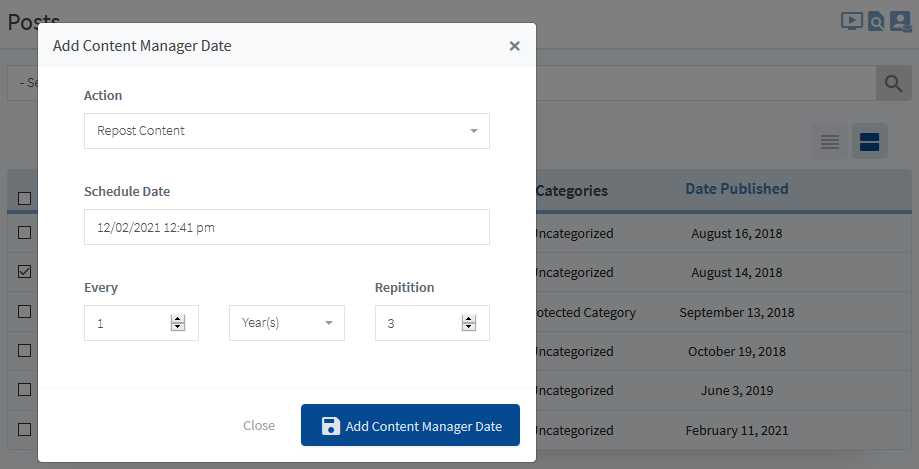
- You can set a piece of content to be reposted on a specified schedule. There is also an option to set the repetition frequency if you want a piece of content to be reposted every month, year, etc. A copy of the piece of content will be reposted based on the schedule set.
- The example Screenshot below shows a Post that is scheduled to be Reposted each year on December 2nd for a total of 3 years. This will result in a copy of the Post being published on December 2nd for the next 3 years. Clicking the “Add Content Manager Date” button will schedule the Action.

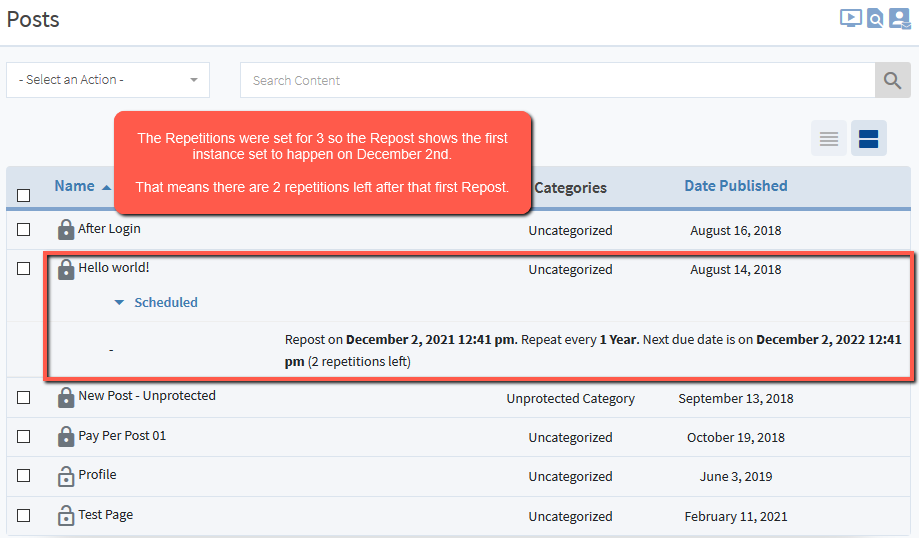
- The content is now scheduled. In this case, the Hello World! post will be Reposted on December 2nd.

- The Repetitions were set for 3 so the Repost shows the first instance set to happen on December 2nd. That means there are 2 repetitions left after that first Repost.
Note: You can edit or delete the set Action by clicking the icons that appear when hovering the mouse over the corresponding row.
—
There is also an option to bulk “Remove Content Manager Date” from selected pieces of content. This can be done by checking the boxes beside the pieces of content and using the Action dropdown.
