WishList Member includes an integration with AWeber. You can set specific automation to occur based on rules you set up.
This can include adding users to a new email list when they join a new Membership Level. Or removing them from an email list if they cancel their access. Tags can also be applied in AWeber based on set triggers. These are just a few examples. More details are explained below (including a Video Tutorial).
—
Enable AWeber Integration
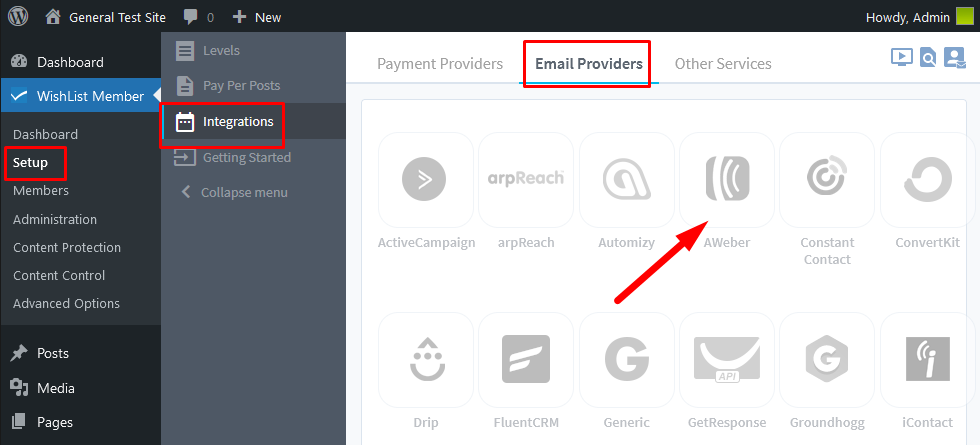
First, you can select and enable the AWeber option in the Integrations > Email Provides section of WishList Member.

—

—
The Settings tab will appear and the API Status will show as “Not Configured”. This is because WishList Member and AWeber need to be connected. This is a quick process (more details below).

—
Note regarding the following question in the Settings section:
“Do you have any other WishList Member sites currently connected to your AWeber account?”
All connections between WishList Member and the AWeber API must share the same API Authorization Key.
If you answer “No” (no other WishList Member sites connected to your AWeber account) you can use the blue “Connect WishList Member to AWeber” button.
If you were to setup a new connection to your AWeber account it would reset the API Authorization Key and disconnect any other existing WishList Member connections. The same API Authorization Key needs to be used for any WishList Member connections to your AWeber account.
If you answer “Yes” (there are other WishList Member sites connected to your AWeber account) you can paste your existing AWeber API Authorization Key into the available field. The AWeber API Authorization Key can be found in the Setup > Integrations > Email Providers > AWeber section of your other WishList Member site(s). Again, this is only if you have integrated WishList Member and AWeber on any other site(s).

—
Once WishList Member and AWeber are connect, the “API Status: Connected” message will appear.

—
The process of connecting WishList Member and AWeber is explained in more detail in the Tutorial Video below.
It also walks through the Next Steps in the process of adding users to email lists in AWeber based on actions like Added to a Level, Removed from a Level, Cancelled from a Level, etc. The available tagging options are explained as well.
Tutorial Video
—
For Reference (with Time Stamps)
0:01 Enabling the AWeber integration in the Setup > Integrations > Email Providers section of WishList Member.
0:15 Using the “Connect WishList Member to AWeber” button to connect the two systems.
Mailing Lists
0:44 The Mailing Lists tab is explained. This is how you can connect levels from WishList Member to mailing list in AWeber. You can set which list a user should be added to in AWeber when they join or are added to a level in WishList Member.
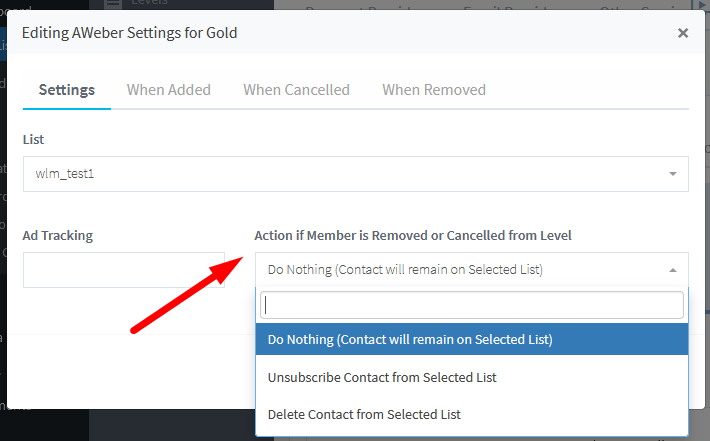
The List dropdown can be used to select the list from AWeber.

—
1:08 The “Action if Member is Removed or Cancelled from Level” dropdown. There are 3 options which could be applied.

—
Do Nothing (Contact will remain on Selected List). The contact will remain on the selected list in the AWeber account.
Unsubscribe Contact from Selected List. The contact will be unsubscribed from the list but will remain a contact in the AWeber account. (This means the contact will be counted in your total users in AWeber).
Delete Contact from Selected List. The contact will be deleted from the list and will no longer be a contact in the AWeber account. (This means the contact will not be counted in your total users in AWeber).
1:53 Editing AWeber tags for a specific level.

—
Tags
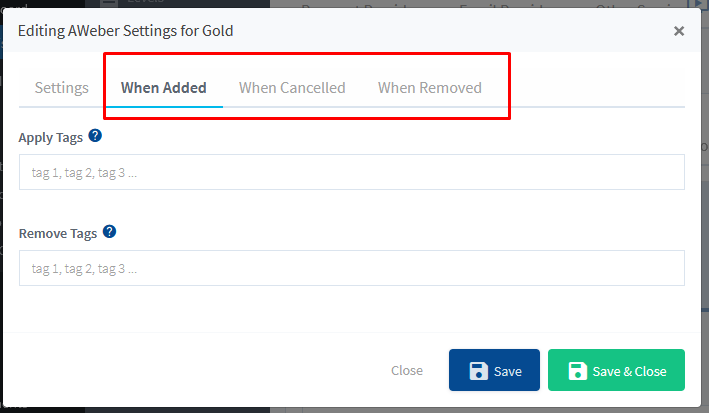
You can set if users should have a Tag Applied or a Tag Removed if any of the following happens:
When Added: Set if a user should have a Tag Applied or a Tag Removed when they are Added to this level.
When Cancelled: Set if a user should have a Tag Applied or a Tag Removed when they are Cancelled from this level.
When Removed: Set if a user should have a Tag Applied or a Tag Removed when they are Removed from this level.
—
The screenshot example below shows a configuration that will apply the gold and new tags while also removing the silver tag when users join or are added to the Gold level.

—
