WishList Member includes an integration with with Authorize.net – Automatic Recurring Billing (ARB).
Enable Authorize.net – Automatic Recurring Billing Integration
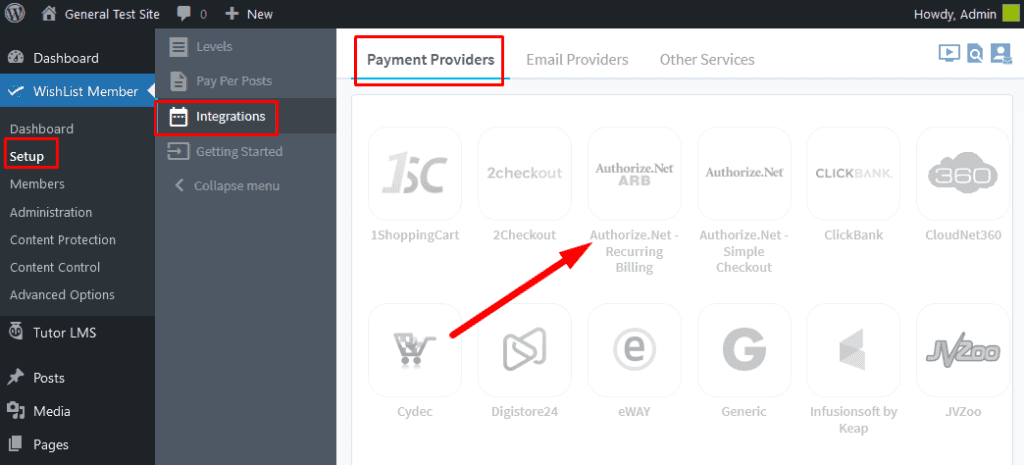
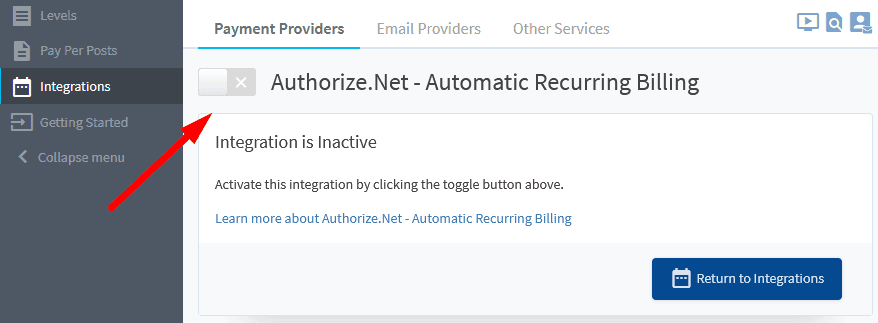
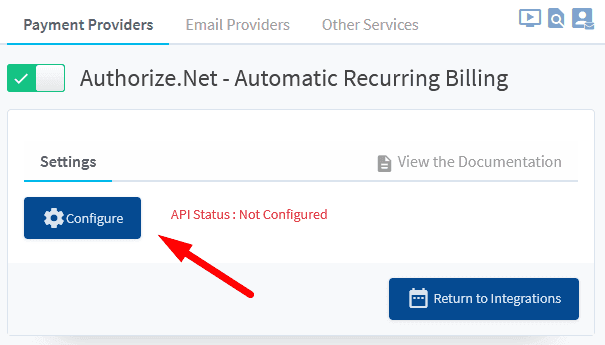
First, you can select and enable the Authorize.net – Recurring Billing option in the Setup > Integrations > Payment Providers section of WishList Member.
—
—
Integration Setup
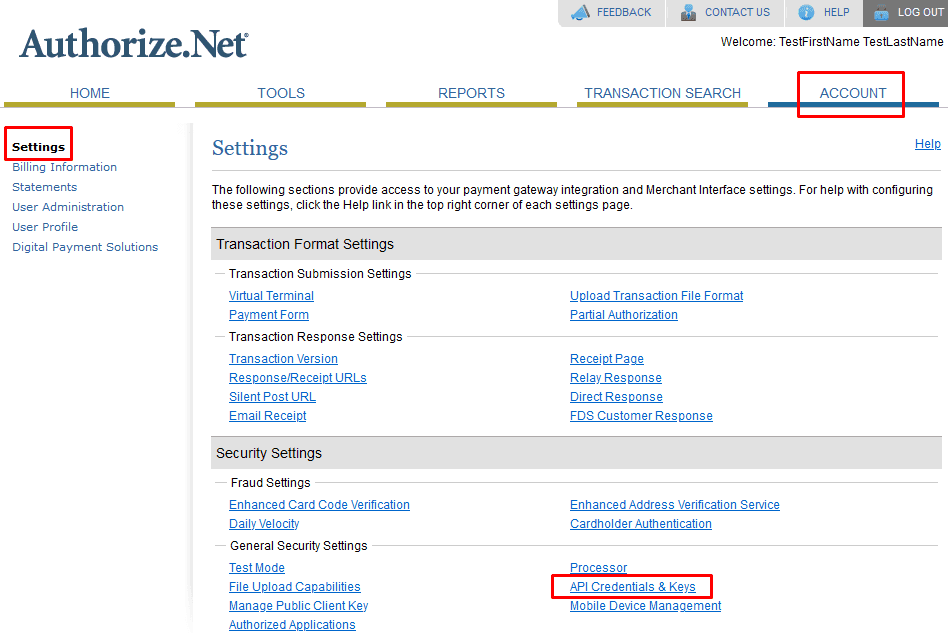
Next, log in to your Authorize.net account and select the Account page. Click the API Credentials and Transaction Key link.
—
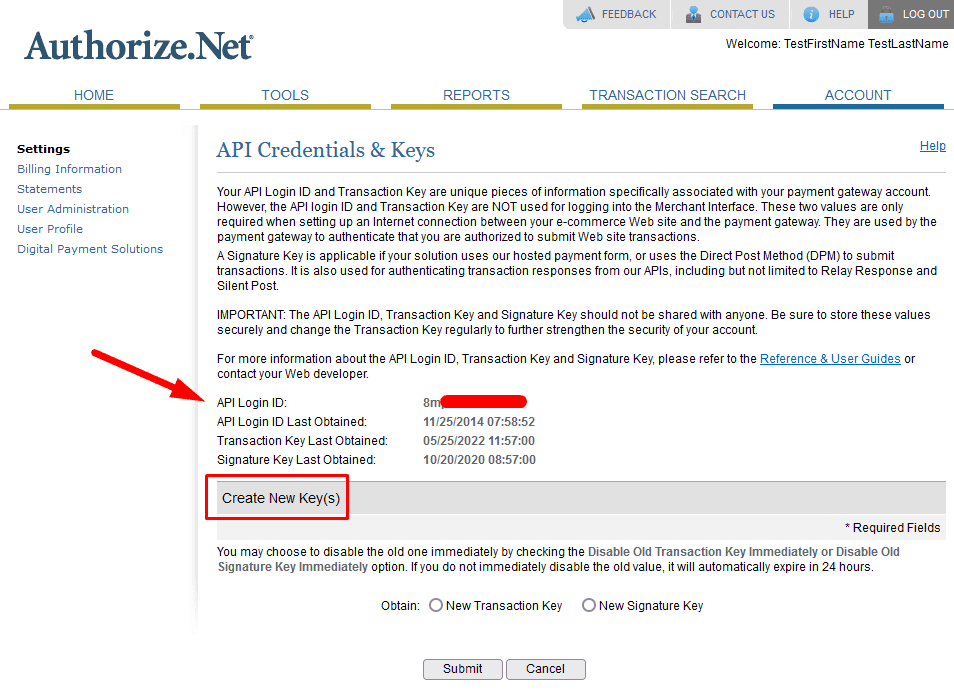
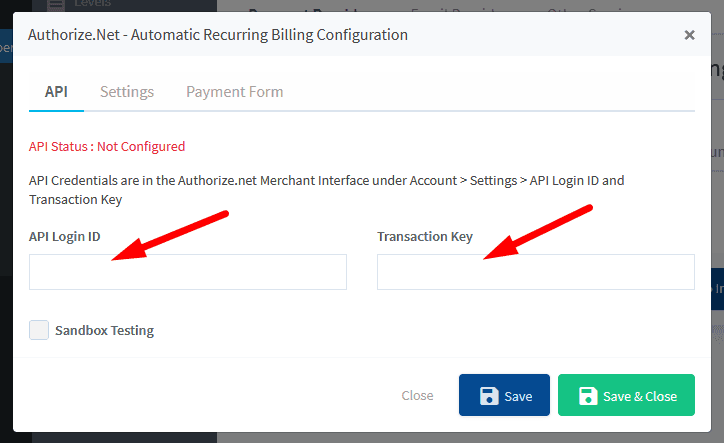
On this page, copy the API Login ID and paste that into the box provided inside WishList Member.
Head back to the API Login ID and Transaction Key section inside Authorize.net and either copy your current Transaction Key, or use this interface to create a new Transaction Key.
—
Once you have your Transaction Key, head back to WishList Member and paste that value in the field provided.
—
—
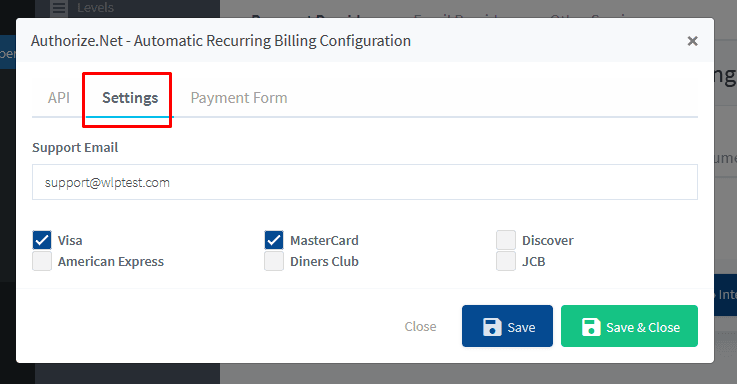
Next, click on the “Settings” tab. Verify the Support Email is what you'd like it to be and select the credit card types you'd like to accept on your site.
—
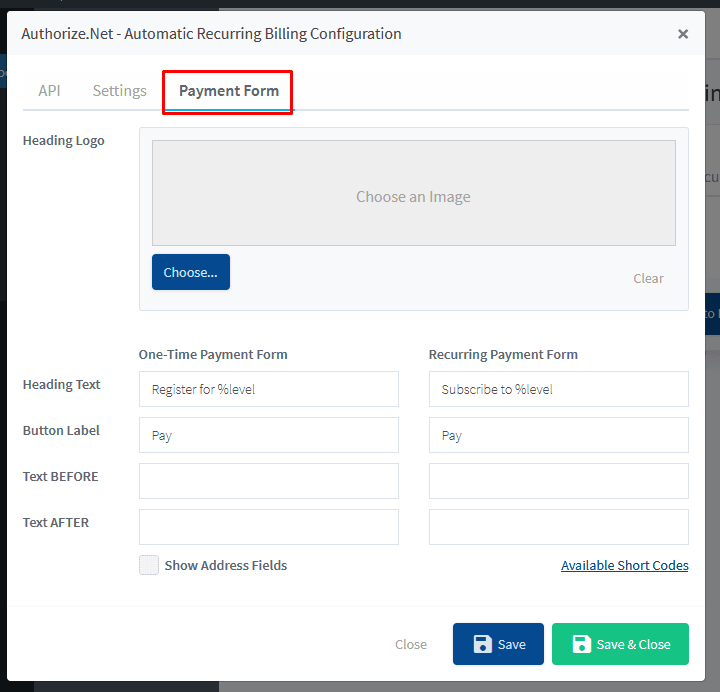
Next, click on the “Payment Form” tab. Here you can adjust the settings for how your payment form will look. Set these according to your preference.
Heading Logo. Select an image to be used as the logo on the heading of the payment form.
Heading Text. Set the text to appear on the top of the payment form. %level will display the name of the level in the text.
Button Label. Set the text to appear in the payment button.
Text BEFORE. Entered text will appear before the payment form.
Text AFTER. Entered text will appear after the payment form.
One-Time Payment Form. The available settings for the One-Time Payment Form.
Recurring Payment Form. The available settings for the Recurring Payment Form.
Show Address Fields. If enabled, address fields will be displayed on the payment form.
Available Shortcodes. The available short codes can be used in the heading text, button label, text before and text after sections. Each will display corresponding information.
—
Finally, click “Save and Close”
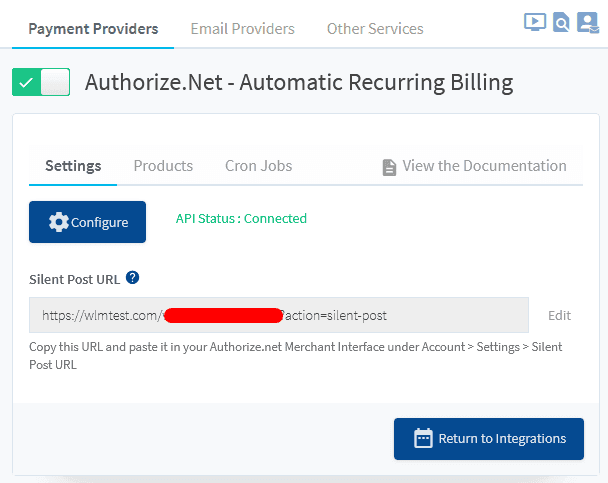
You'll now see a field named “Silent Post URL”.
—
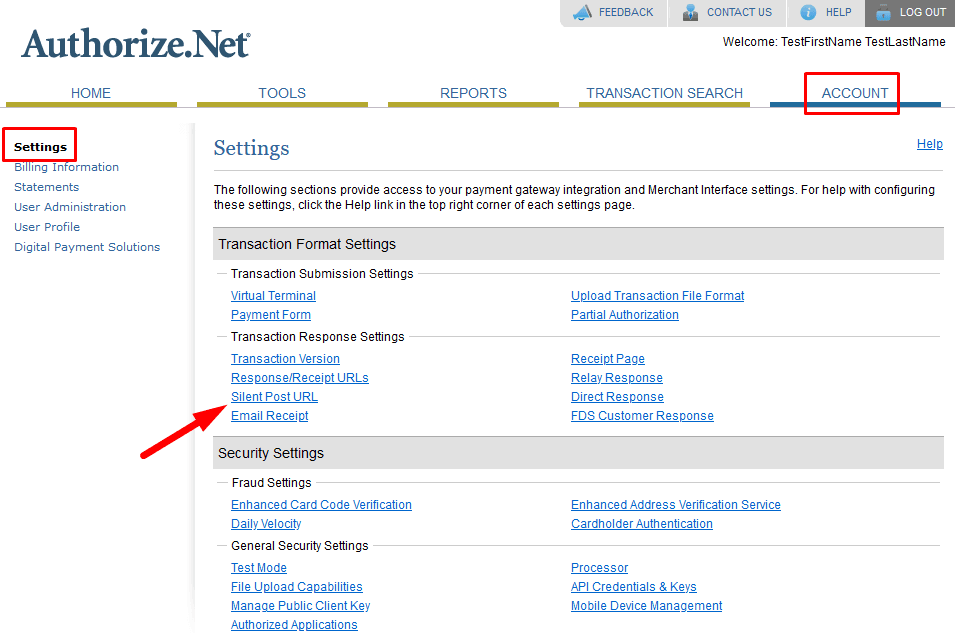
Copy the Silent Post URL and head back to Authorize.net. Again, under the “Account” tab, click on the “Silent Post URL” link.
—
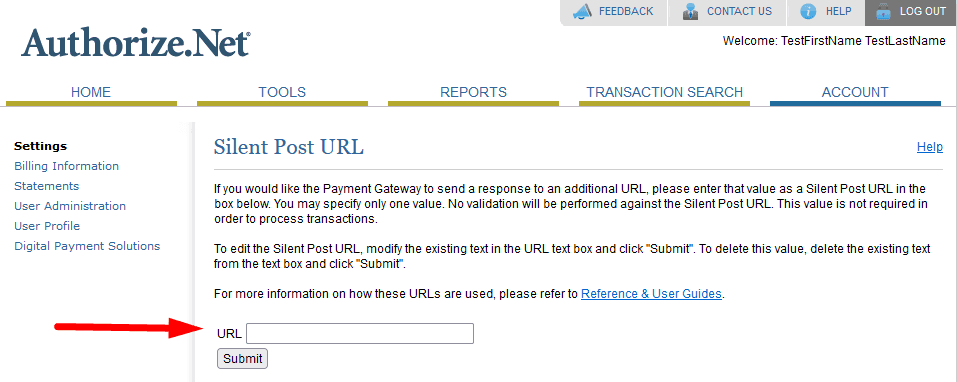
Paste the Silent Post URL you copied into the field provided and click “Submit”.
—
Insert Payment / Registration Link
At this point, Authorize.net Recurring Billing and WishList Member are fully configured to “talk” to one another. Now, you simply need to create your products and place your payment buttons on your sales pages.
To do that, select the “Products” tab and click the “Add New Product” button.

—
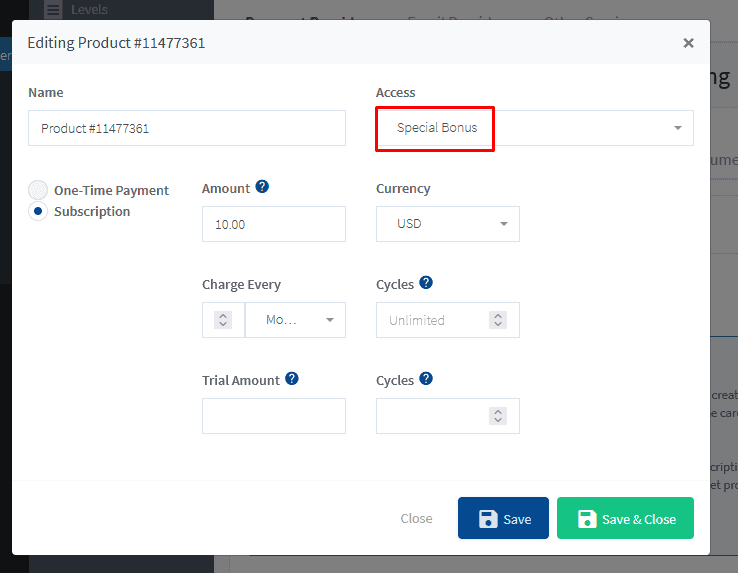
Here, you can give this product a name (usually will match your membership level name), select which level(s) your members get access to when they purchase this product (the “Access” setting), whether it's a one-time payment or subscription and all the details of the subscription (if you choose that option).
—
Once finished, click the “Save and Close” button.
—
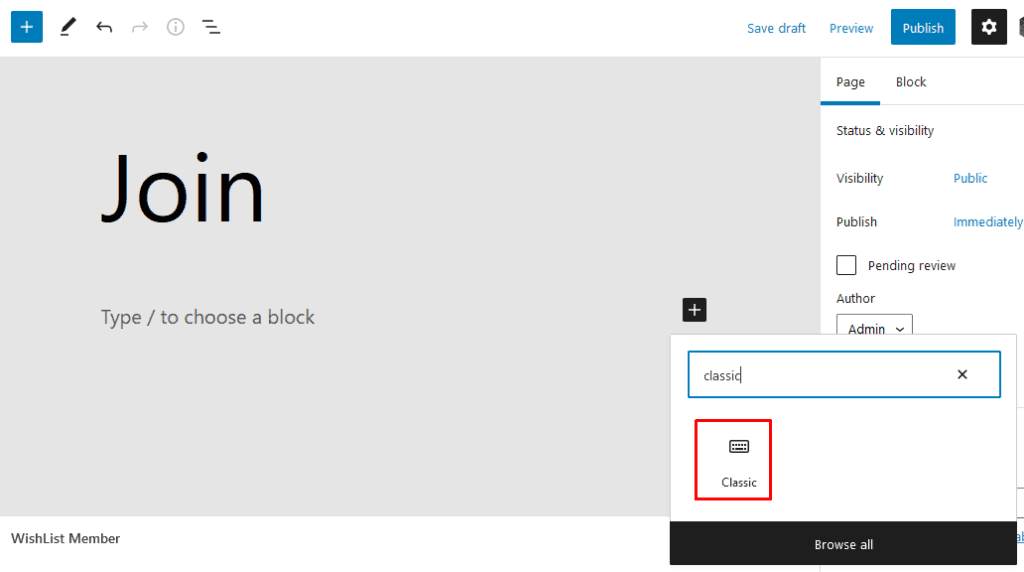
Next, head over to the page or post where you'd like to insert your purchase button for this product. Click the “Add New Block” button and enter “classic” in the search bar. Then, select the Classic Block from the list.
—
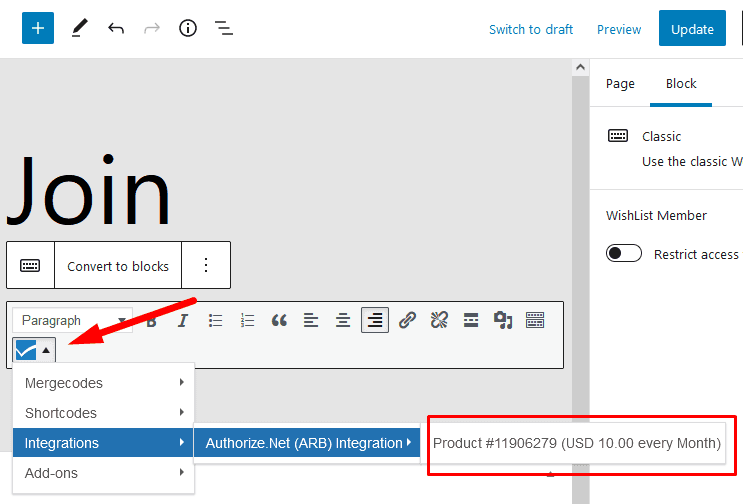
In the Classic Block, click on the blue WishList Member icon, then select Integrations > Authorize.net (ARB) Integration > Name of Your Product from the dropdown list.
—
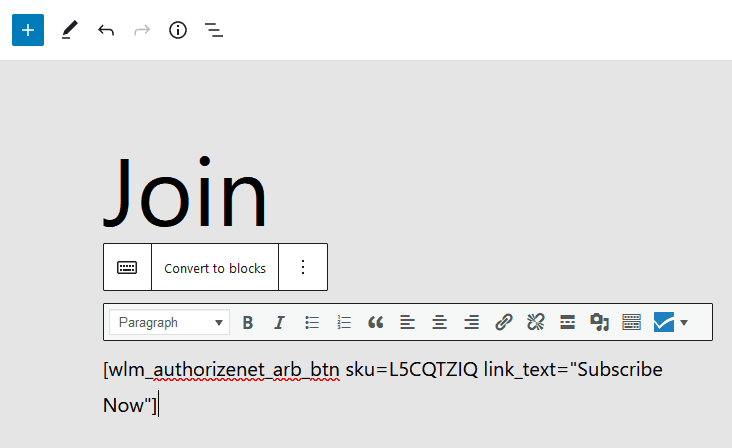
This will insert a shortcode into your page.
—
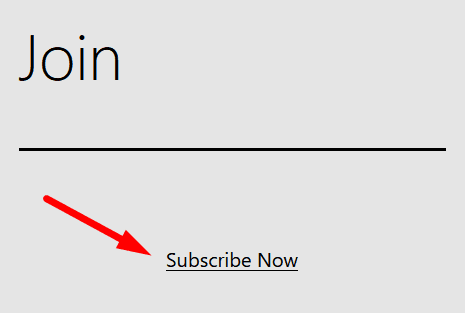
This will display a purchase link on your page.
—
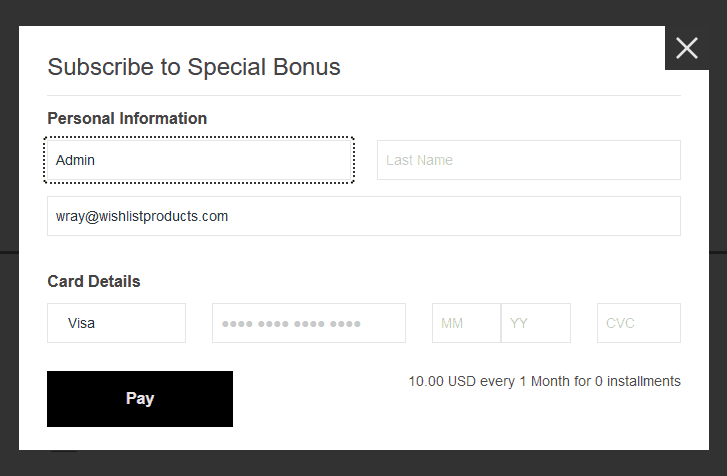
When clicked, a payment form will appear where new members can enter their payment information, buy this product and register to the selected membership level.
—
This completes the integration setup process.
