WishList Member includes an integration with Tutor LMS. You can set specific automation to occur for your users based on rules you set up.
This can include options like adding users to a new course in Tutor LMS when they join a new membership level through WishList Member. You might want to add users to a Tutor LMS course if they get added to a level in WishList Member. Or, you could remove them from a course if they cancel their access to your site. Course Actions and Membership Level Actions can also be applied to handle situations like adding a user to a membership level in WishList Member if they start (or complete) a course created in Tutor LMS. These are just a few samples of available options and more details are explained below (including examples and screenshots).
—
Enable Tutor LMS Integration
The first step is installing the Tutor LMS plugin. This can be done by searching for the Tutor LMS plugin in the Plugins > Add New section of WordPress.

—
Click the Install Now button and then click the Activate button when it appears.

—
The plugin is now installed and activated.

—
Create a Course in Tutor LMS
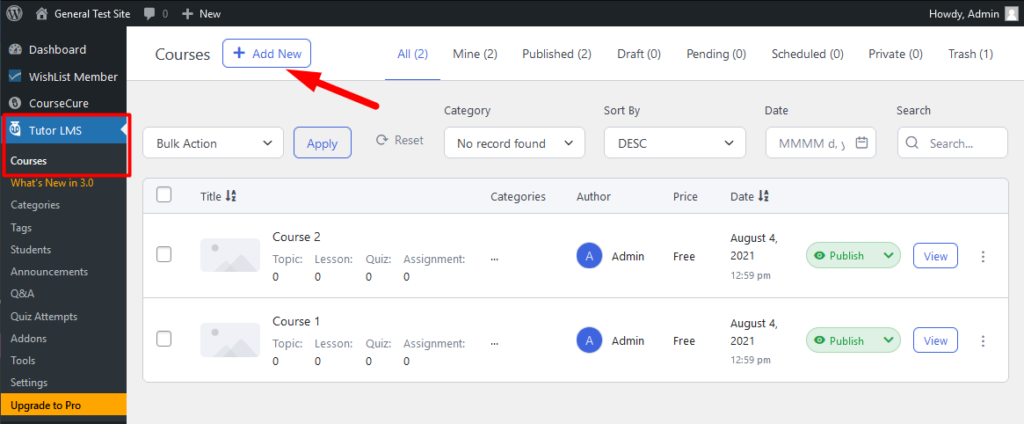
You can create a course in the Courses > Add New section of Tutor LMS. The configuration of the course is up to you and can be set up based on your preferences.
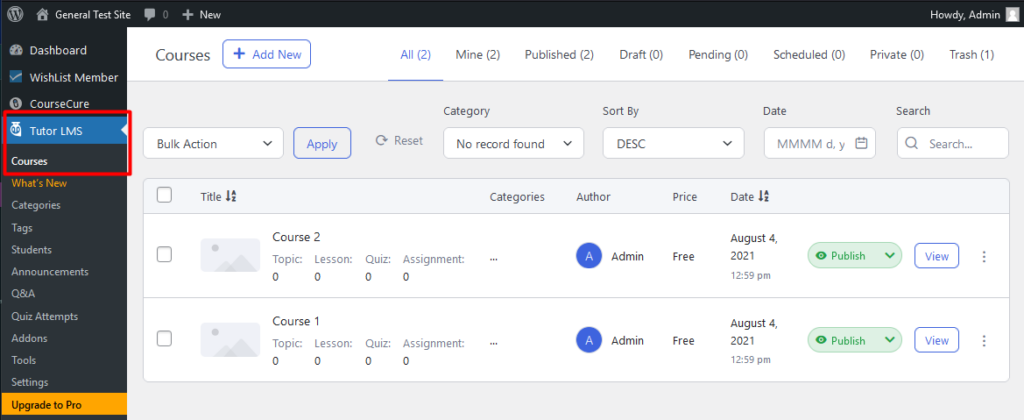
The screenshot example below shows two courses have been created in the Tutor LMS plugin.

—
Connecting WishList Member and Tutor LMS
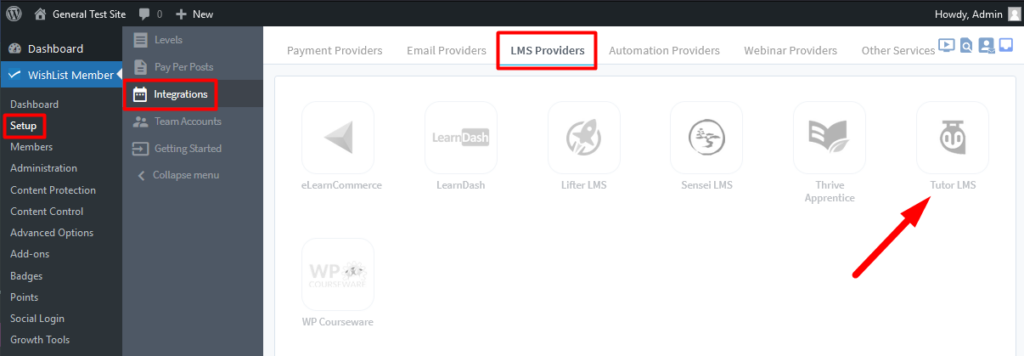
Next, you can select and enable the Tutor LMS option in the Setup > Integrations > LMS Providers section of WishList Member.

—

—
Creating the connection between WishList Member and Tutor LMS is now complete and you can continue the integration process.
—
Available Actions
Once enabled, you’ll see two primary options for handling Actions between WishList Member and Tutor LMS.

—
A brief overview of each option:
- Membership Level Actions. Actions that occur in WishList Member. For example, a member is added to a level or removed from a level, etc. These actions act as the “trigger” within WishList Member.
- Course Actions. Actions that occur in Tutor LMS. For example, a student is added to a course or completes a course. These actions act as the “trigger” within Tutor LMS.
Membership Level Actions
With the Tutor LMS integration enabled and connected, the Membership Level Actions section will appear and display the Membership Levels from WishList Member. You can click to edit any of the listed membership levels.

—
The Editing Tutor LMS Actions popup for the selected level will appear and the available options are displayed. The example below shows the Editing Tutor LMS Actions popup for a membership level named Gold.

—
The popup provides the option for you to set if users should be Enrolled in a Course created in Tutor LMS or be Removed from a Course created in Tutor LMS if any of the following happens in WishList Member.
Added. Set if a user should be Enrolled in a Course or Removed from a Course when they are Added to this Membership Level.
Removed. Set if a user should be Enrolled in a Course or Removed from a Course when they are Removed from this Membership Level.
Cancelled. Set if a user should be Enrolled in a Course or Removed from a Course when they are Cancelled from this Membership Level.
Uncancelled. Set if a user should be Enrolled in a Course or Removed from a Course when they are Uncancelled from a Membership Level.
—
The example screenshot below shows users will be enrolled in the course named “Course 1” when they are added to the Gold membership level. The Save or Save & Close button can be used to save the configured settings.

—
Enroll existing members. This option appears if a course is selected in the Enroll in Course field. If this option is enabled, any existing members in the membership level will also be enrolled in the selected course. You can leave this option disabled if you do not want to allow any existing users with the membership level to be enrolled in the course. In the example screenshot above, only new users who are added to the Gold membership level would be enrolled in the “Course 1” course.
In the example screenshot below, existing members in the Gold level would also be enrolled in the “Course 1” course.

—

—
Course Actions
You also have the option to create Course Actions based on a course in Tutor LMS. This means you can configure automations to occur when a user is enrolled in a course or if a user completes a course. You can click to edit any of the listed courses being pulled from the Tutor LMS plugin.

—
The Editing Tutor LMS Actions for Course popup for the selected course will appear and the available options are displayed. The example below shows the Editing Course Actions popup for a course named “Course 1”.

—
You can set if users should be Added to Level or Cancelled from Level or Removed from Level in WishList Member if any of the following happens in Tutor LMS.
When Enrolled in this Course. Set if a user should be Added to Level or Cancelled from Level or Removed from Level when they are Enrolled in this Course.
When Course is Complete. Set if a user should be Added to Level or Cancelled from Level or Removed from Level when they Complete this Course.
—
The example screenshot below shows users will be automatically added to the Gold and Platinum levels and cancelled from the Bronze level when they are Enrolled in the “Course 1” course. The Save or Save & Close button can be used to save the configured settings.

—
The WishList Member integration with Tutor LMS allows you to setup automations to deliver content to your members in a variety of ways. You can set users to be added or removed from levels when they complete a course. Or, you can set users to be cancelled from a previous membership level when they start a new courses. You can even use Course Actions to trigger what happens to users on your site. These are only a small sample of what you can do with this integration. You're invited to check it out for yourself inside WishList Member.
