WishList Member includes an integration with WP Courseware. You can set specific automation to occur based on rules you set up.
This can include adding members to a new Course when they join a new Membership Level. Or removing them from a Course if they cancel their access. You can also add a member to a Course when they join a new Membership Level. These are just a few examples. More details are explained below.
—
The first step is installing the WP Courseware plugin. This can be done in the Plugins > Add New > Upload Plugin section of WordPress.
Note: You will need to have downloaded the WP Courseware plugin to your computer first.

—
Once you have installed and activated the WP Courseware plugin, you can proceed to the next steps.

—
Create Course(s) in WP Courseware
You can create your Course(s) in the WP Courseware plugin. The WP Courseware integration with WishList Member requires at least one Course.
Courses can be created in the Courses section of WP Courseware.

—
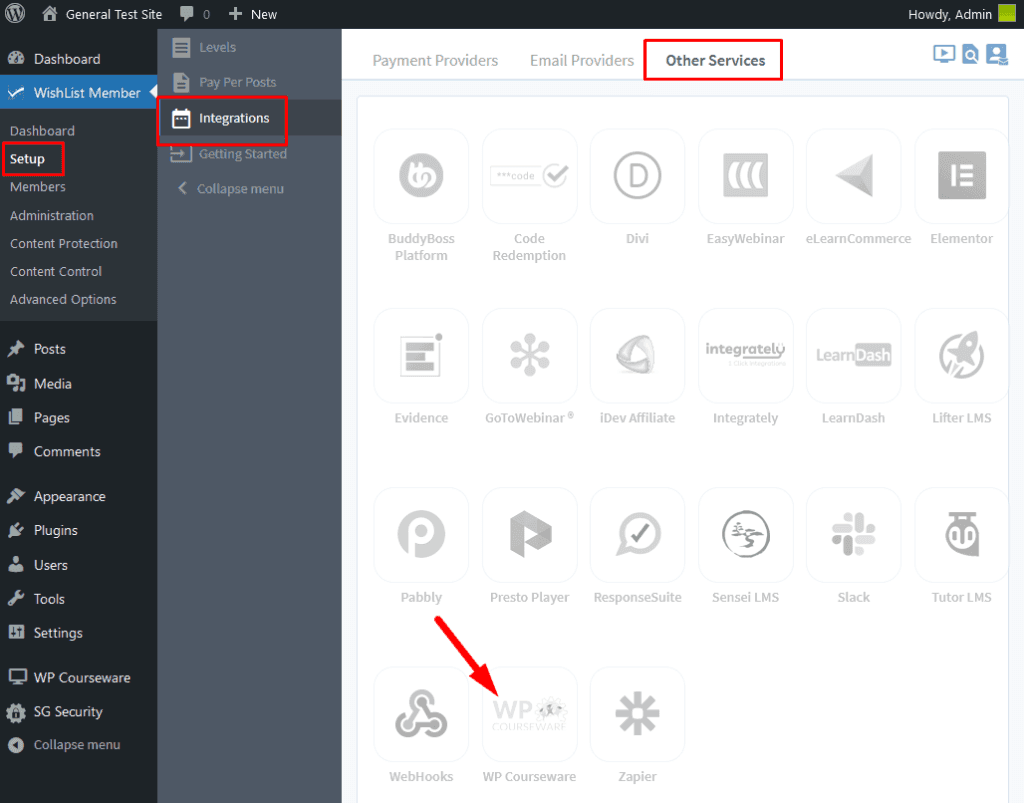
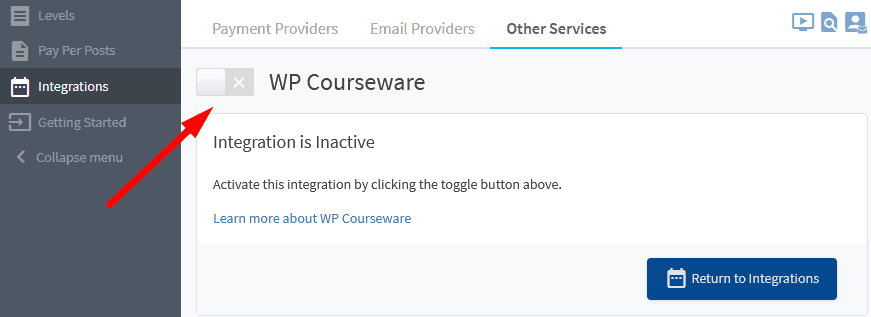
Once your Course is created, you can select and enable the WP Courseware option in the Setup > Integrations > Other Services section of WishList Member.
—
—
Actions
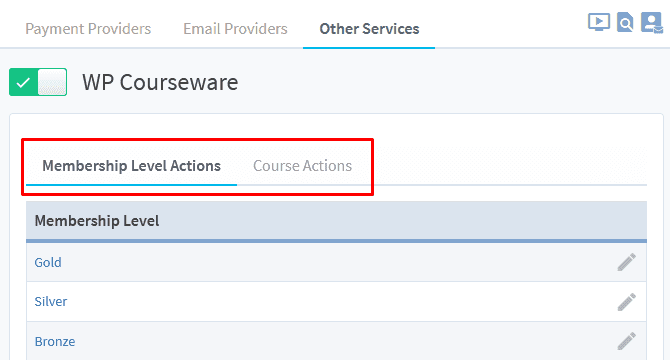
Once enabled, two primary options for handling “Actions” between WishList Member and WP Courseware will be displayed. Each with it's own tab.
—
- Membership Level Actions. Actions that occur in WishList Member. For example, a member is added to a level or removed from a level, etc. Under this tab, these actions act as the “trigger”.
- Course Actions. Actions that occur in WP Courseware. For example, a student is added to a course or completes a course. Under this tab, these actions act as the “trigger”.
Membership Level Actions
To specify Membership Level Actions for a particular membership level, click on the name of the desired level. The Editing WP Courseware Actions popup will appear.

Here you have four “Triggers” you can apply actions to:
- Added. When a member is added to the membership level, this trigger will “fire”.
- Removed. Removal is different from cancellation or expiration. In those scenarios, the member still technically “belongs” to the level, they just have a status of cancelled or expired. Removal is removing them from the level completely. This trigger will “fire” when that happens for the level.
- Cancelled. When a member is cancelled from the membership level, this trigger will “fire”.
- Uncancelled. When a member is uncancelled the level, this trigger will “fire”. Uncancellation can happen if a member is cancelled from the level and they rejoin that same level.
And you have two “actions” you can apply to the four “triggers” noted above (When Added, When Cancelled, When Removed or When Re-Registered).
- Enroll In Course. This will enroll a member in the course specified.
- Remove From Course. This will remove a member from the course specified.

—
Select the tab you would like to use as a trigger: Added, Removed, Cancelled, or Uncancelled.
Next, decide which action you’d like to occur: Enroll in Course or Remove from Course.
Finally, select the Course you’d like members enrolled in or removed from.
—
Below is a Screenshot example set to the following:
When a member is added to the Gold level, they will be enrolled in the “Course 2” course and also removed from the “Course 1” course in WP Courseware.
Note: The “Enroll existing members” option is also selected. This means any existing members in the Gold level will be enrolled in the “Course 2” course.

—
Course Actions
Course actions are essentially the reverse of Membership Level Actions. In this case, actions that occur in WP Courseware are used as the “trigger” and specify actions to occur in WishList Member when those triggers fire.
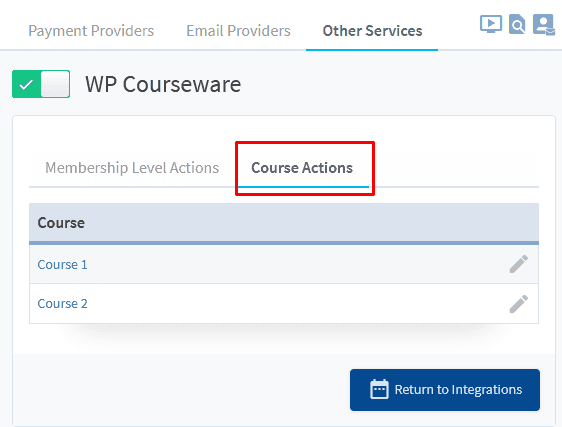
Start by selecting the Course Actions tab. A list of the courses created in WP Courseware will be displayed.
—
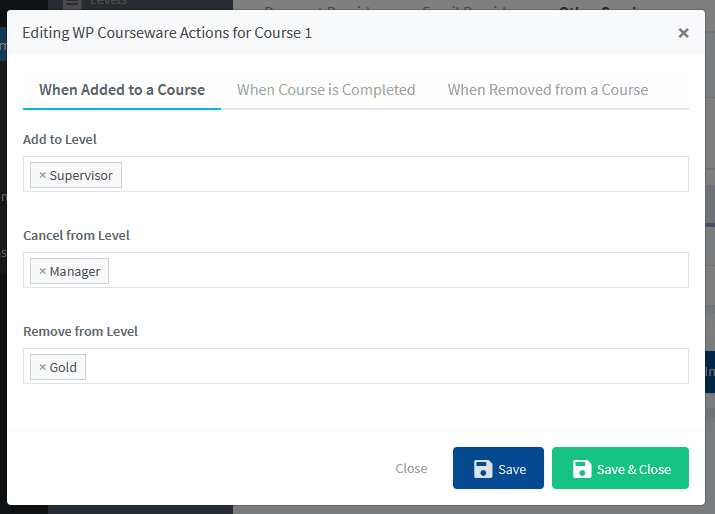
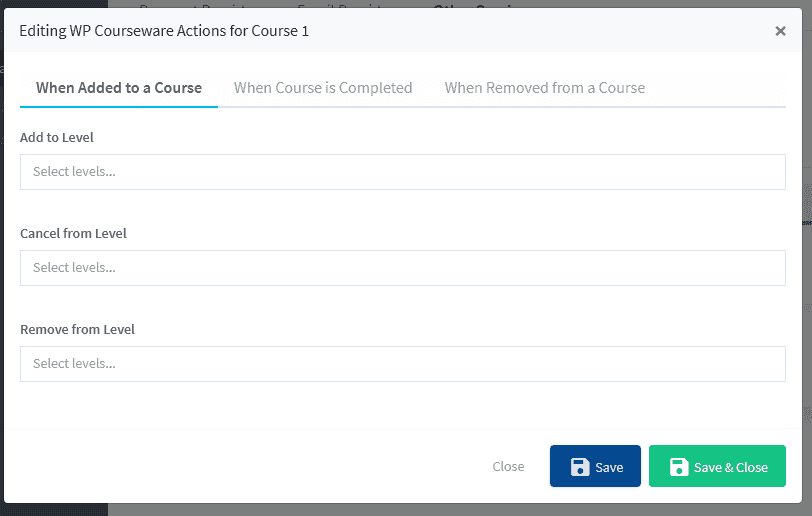
To specify Course Actions for a particular course, click on the name of the desired course. The Editing WP Courseware Actions popup will appear.
—
Here you have three “Triggers” you can apply actions to:
- When Added to a Course. This trigger will “fire” when a member is added to the course.
- When Course is Completed. This trigger will “fire” when a member completes the course.
- When Removed from a Course. This trigger will “fire” when a member is removed from the course.
Each trigger has three actions you can you can specify:
- Add to Level. Add members to the level(s) specified.
- Cancel From Level. Cancel members from the level(s) specified.
- Remove From Level. Remove members from the level(s) specified.
Select the tab you would like to use as a trigger: When Added to a Course, When Course is Completed, or When Removed from a Course.
Next, decide which action you would like to occur: Add To Level, Cancel from Level or Remove From Level.
Finally, select the Level you would like members added to, canceled from or removed from.
—
Below is a Screenshot example set to the following:
When a member is added to the “Course 1” course in WP Courseware, they will be added to the Supervisor level, cancelled from the Manager level and also removed from the Gold level.
