You may find there are times when you want to connect a member with a payment.
This could be due to manually adding a member or you may be importing a number of new members with existing subscriptions in a payment provider.
That being said, if you have integrated with a payment provider in the Setup > Integrations > Payment Providers section of WishList Member (or use the generic integration process), the Transaction ID will be automatically applied during the purchase / registration process. That is handled automatically when using the full or generic integration methods.
This connects the member to that payment. As an example, that connection powered by the Transaction ID is used to handle the back and forth of information if a member cancels their payment.
—
As mentioned, there are times when you may want to manually add or edit the Transaction ID.
A Transaction ID is assigned to a member during account creation / registration. The format of the Transaction ID will be based on the integrated payment provider. In many cases, the Transaction ID connects the member to a payment in the payment provider.
Note: If no integration with a payment provider is set up, the Transaction ID format will be the standard WishList Member format. In that case, there isn't a connection between WishList Member and the payment provider.
Standard WishList Member Transaction ID Example: WL-0-0000000000
—
If you have manually created an account in WishList Member and want to connect that account to a payment in your payment provider, you can paste the Transaction ID from the payment into the member account in WishList Member.
Note: As mentioned, anyone who has purchased through a full or generic integrated payment provider will have the Transaction ID already applied.
—
Manually Add / Edit a Transaction ID
You can add a Transaction ID to a member account by clicking the username of the member in the Members > Manage Members section of WishList Member.

—
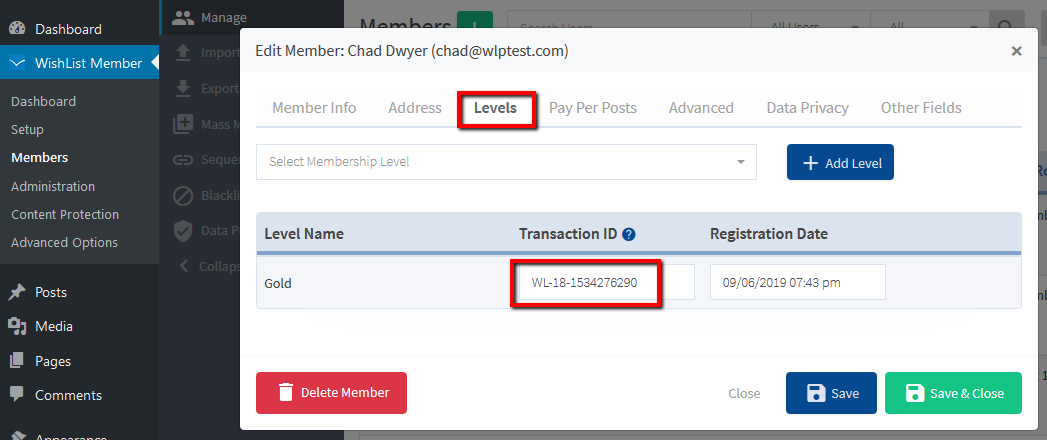
The Edit Member popup appears and the Transaction ID for the membership level can be viewed / edited in the corresponding field in the Levels tab.

—
Enter the the Transaction ID and click the Save button and you're all set.
—
Transaction ID Format Examples
Note: The Transaction ID in the above screenshot is just an example. The Transaction ID will look different depending on the payment provider you use.
We have included some Transaction ID format examples below. (The x's would be replaced with the corresponding data).
- 1ShoppingCart Format Example: 1SC-Order ID
1SC-xxxxxxxx - Infusionsoft by Keap Format Example: Invoice ID
IFS:xxxxxx - Stripe Format Example: customerID-priceID
cus_xxxxxxxxxxxxxx-price_xxxxxxxxxxxxxx - WooCommerce Example: Order ID-Subscription ID
WooCommerce#xxxxx-xxxxx
Please feel free to contact our support team if you are looking for a specific Transaction ID format.
—
If you paste the Transaction ID from the payment provider into the Transaction ID field, it will connect the WishList Member account with the payment in the payment provider.
