WishList Member includes an integration with Kit (formerly ConvertKit). You can set specific automation to occur based on rules you set up.
This can include adding users to a new Email List when they join a new Level. Or removing them from an Email List if they cancel their access. You can also apply Tags based on similar actions. These are just a few examples. More details are explained below (including a Tutorial Video).
—
Enable Kit Integration
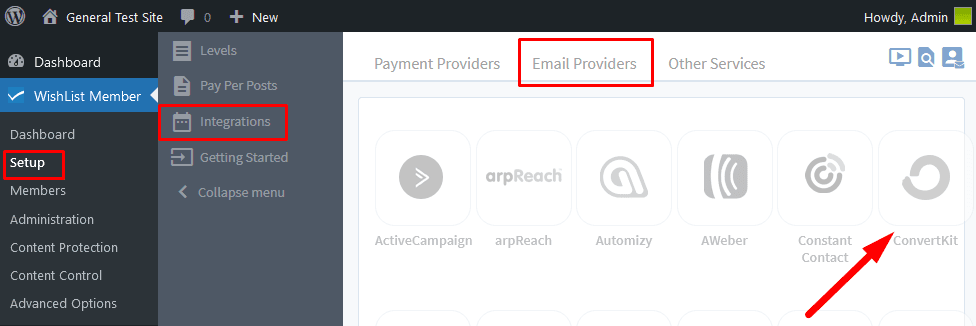
First, you can select and enable the Kit option in the Setup > Integrations > Email Providers section of WishList Member.

—

—
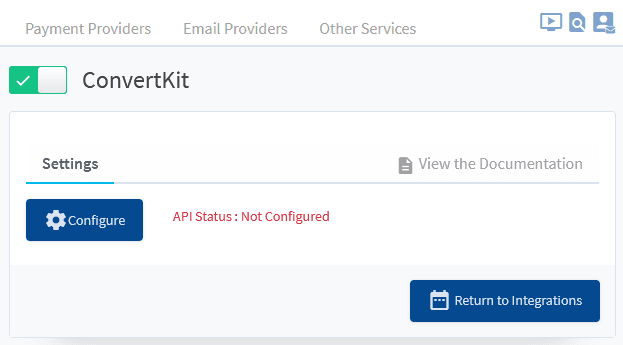
The Settings tab will appear and the API Status will show as “Not Configured”. This is because WishList Member and Kit need to be connected using the API Secret from Kit. This is a quick process (more details below).

—
Click the blue Configure button and the Kit Configuration popup will appear.

—
You will need to be logged into your account in the Kit site when you click the “Copy the API Secret” link in order to authenticate the connection. You can be logged into Kit in another tab of the same browser.
If you are not logged into the Kit site when you click the “Copy API Secret” link, you will be directed to the login page and you can fill in the form.
Note: You will need the API Secret (NOT the API Key) from Kit.
The API Secret is located in the Settings > Advanced > API section of the Kit site. Click the “Show” button to copy the API Secret.

—
Paste the API Secret into the corresponding field in WishList Member and click “Save & Close”.

—
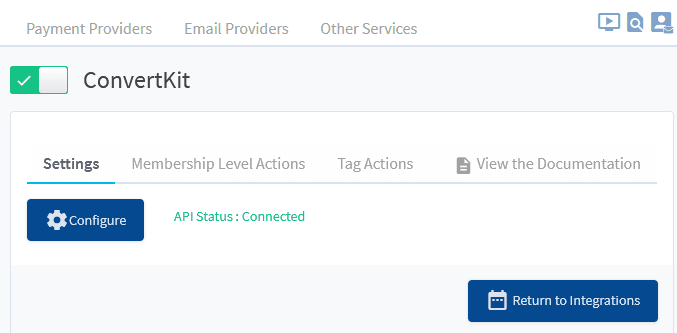
The Settings tab in the WishList Member Integrations shows a message stating the API Status is Connected.

—
The process of connecting the WishList Member plugin and Kit is explained in more detail in the Tutorial Video below.
It also walks through the Next Steps in the process of adding users to Forms in Kit based on actions like Added to a Level, Removed from a Level, Cancelled from a Level, etc. It also shows how to use Tag Actions to add users to Levels, Remove from Levels, etc. when Tags are applied in Kit.
—
Video Tutorial
—
For Reference
The following is explained in the Tutorial Video above and is included here for quick reference.
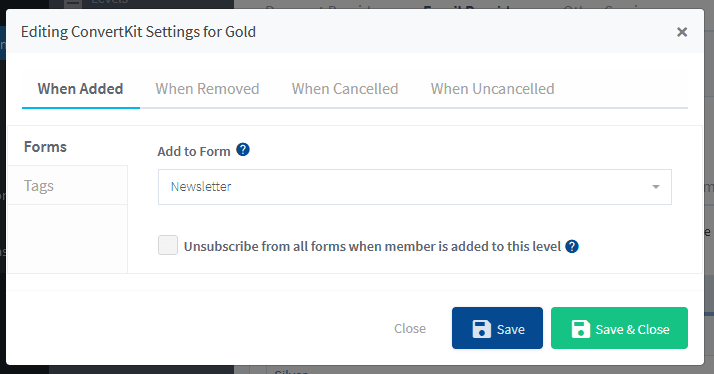
Add to Form/Remove from Form (Levels Action)
You can set if users should be Added to a Form or be Removed from a Form if any of the following happens:
When Added: Set if a user should be Added to a Form or be Removed from a Form when they are Added to this Membership Level.
When Removed: Set if a user should be Added to a Form or be Removed from a Form when they are Removed from this Membership Level.
When Cancelled: Set if a user should be Added to a Form or be Removed from a Form when they are Cancelled from this Membership Level.
When Uncancelled: Set if a user should be Added to a Form or be Removed from a Form when they are Uncancelled from a Membership Level.
Note: The same can be set for Tags.
There is also a checkbox in each tab (When Added, When Removed, When Cancelled, When Uncancelled) for “Unsubscribe from the selected form when a member is added to this level”.
If enabled, this will remove the user from ALL Forms when the specified action occurs (When Added, When Removed, When Cancelled, When Uncancelled). Users cannot be removed from individual Forms. They can only be removed from ALL Forms. Only select this option if you want Users removed from ALL Forms when the specified action occurs.

—
Apply a Membership Level (Tag Actions)
You can set if users should be Added to a Level or Removed from a Level or Cancelled from a Level or Uncancelled from a Level if any of the following happens:
When this Tag is Applied: Set if a user should be Added to a Level or Removed from a Level or Cancelled from a Level or Uncancelled from a Level when the Tag is Applied.
When this Tag is Removed: Set if a user should be Added to a Level or Removed from a Level or Cancelled from a Level or Uncancelled from a Level when the Tag is Removed.
Note: The same can be set for Pay Per Posts.

—
