
WishList Member includes an integration with Elementor. This allows you to set protection and access for elements (sections, inner sections, containers, widgets, etc.). You can customize any page by setting which elements can be seen by selected users ranging from logged in members, users who aren't logged in, members in specific membership levels, and more.
This means you can easily protect individual elements or larger sections and containers so only the users you choose can gain access. More details are explained below (including a Tutorial Video).
—
Installing Elementor
The first step is installing the Elementor plugin. This can be done in the Plugins > Add New > Upload Plugin section of WordPress.
Once you have downloaded the Elementor plugin, you can upload and activate it on your site.

—

—
Once you have completed the installation and activation process, Elementor will appear in your WordPress menu.

—
Enable Elementor Integration
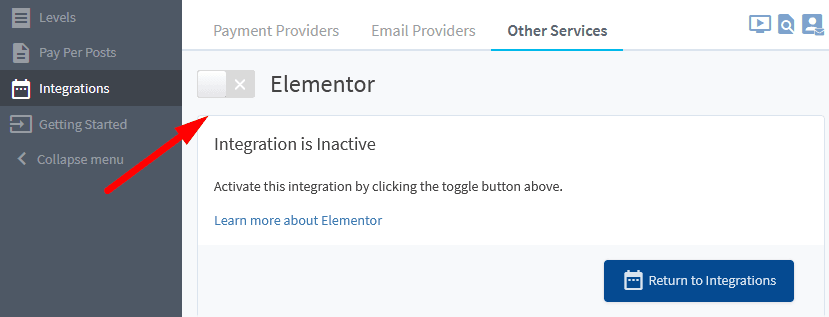
You can select and enable the Elementor option in the Setup > Integrations > Other Services section of WishList Member.

—
—
The integration simply needs to be enabled in order to be used.

“Additional configuration is not required within this integration section. The integration is either enabled or disabled.
While this integration is enabled, WishList Member will add settings within Elementor related to the display of elements (sections, inner sections, widgets, etc.).
The settings are available in the Advanced > WishList Member section within an element in Elementor.”
—
Setting Protection and Access for Elements
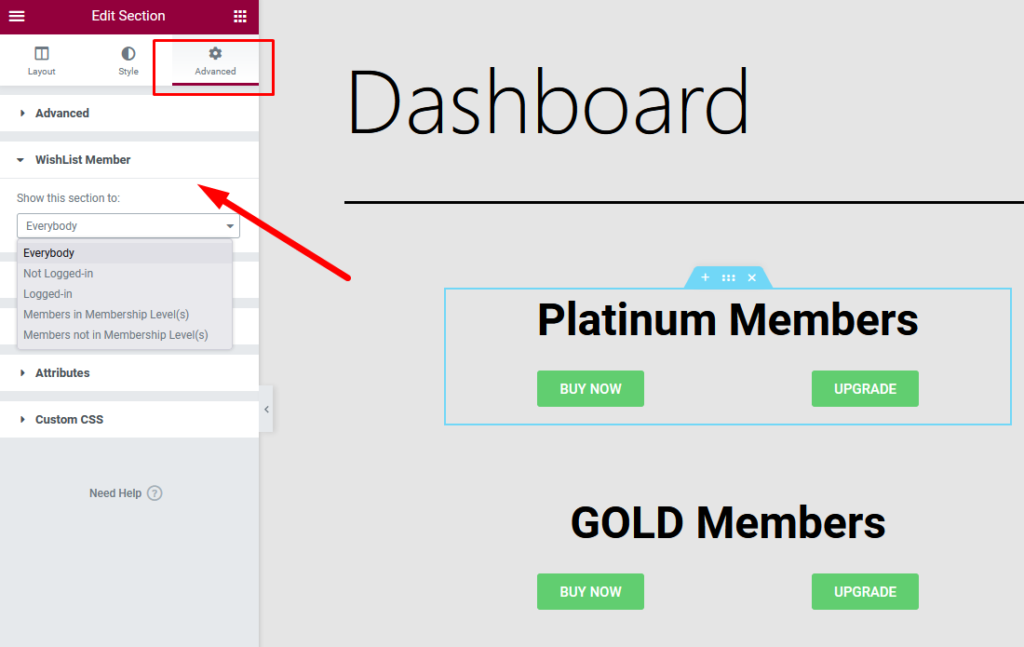
The WishList Member options appear in the Advanced section of the element in Elementor.
This includes sections, inner sections, widgets, containers, etc. You can select which elements are protected or unprotected and who can access them.
You can use the “edit with Elementor” button to set protection and access for elements using WishList Member.

—
The WishList Member options appear in the Advanced section of the element.
—
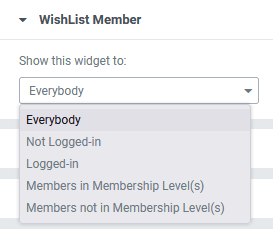
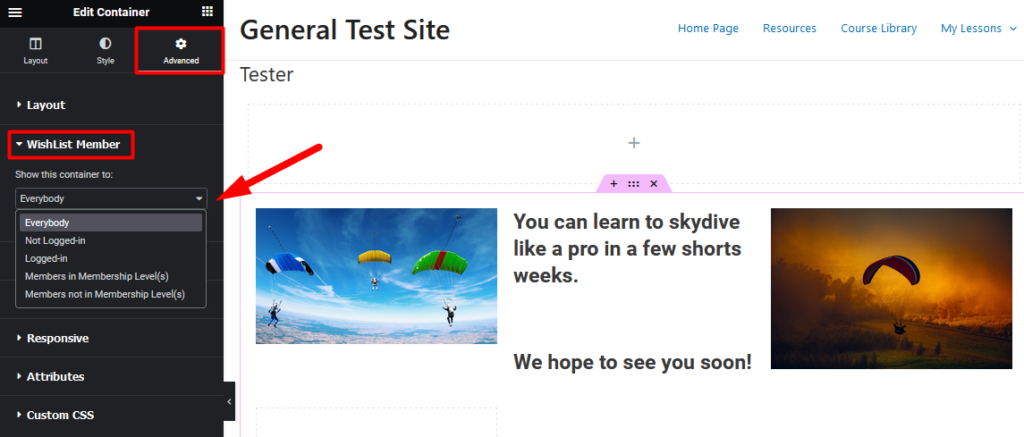
WishList Member can be used to set who can view specific elements. There are five options you can apply. The screenshot below is an example of an Elementor widget showing that list of options.
—
Everybody. The element will be shown to all users regardless of membership status or logged in status.
Not Logged-in. The element will only be displayed to users who are not logged-in.
Logged-in. The element will only be displayed to users who are logged-in.
Members in Membership Level(s). The element will only be displayed to users who are logged-in and belong to the set membership level(s).
Members not in Membership Level(s). The element will only be displayed to users who are logged-in and do not belong to the set membership level(s).
—
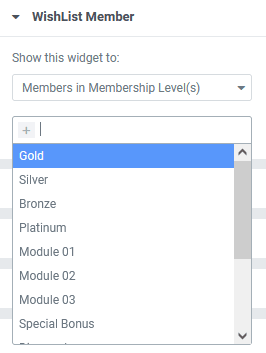
Below is a Screenshot example set to the following:
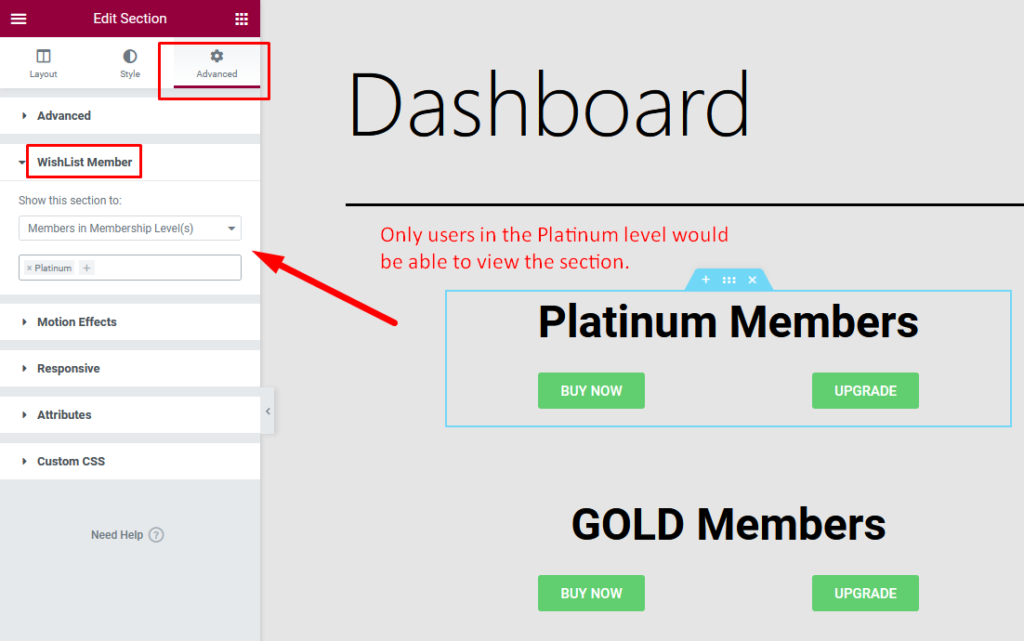
When a user visits the Dashboard page, they will only be able to view the “Platinum Members” section if they are a member of the Platinum level. This is because the “Show this section to” option is set to “Members in Membership Level(s)” and the Platinum level is selected.
Only users in the Platinum level would be able to view the section.

—
—
Setting Protection and Access for Elementor Containers
WishList Member can be used to set protection and access for Elementor containers. This means you can control what your members can access within a page by setting if they can (or cannot) access everything withing a container.
As an example, you might have a page with various elements within a container. You could set the individual protection and access for each element within that container as that is an effective way to show different pieces of information to different members within the same page. But, if you want to apply the same protection and access settings for all the elements within a container, you can simply apply those protection and access setting to the container.
The screenshot example below shows the Layout section of a container with three elements within it. The container includes two image elements on either side of a text element.

—
You can set the protection and access settings in the Advanced > WishList Member section of that container and it will cover the three elements within that container.
—
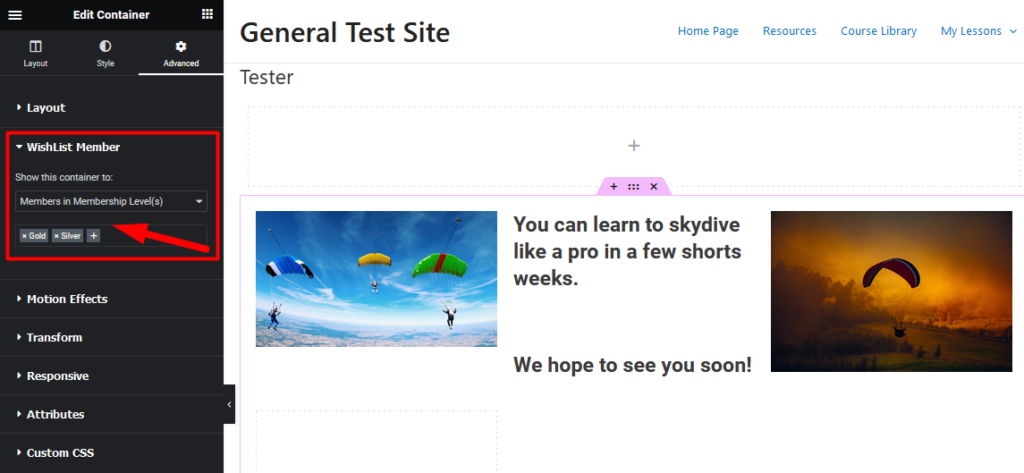
In this case, the container has been set to only show the content within that container to members in the Gold and Silver membership levels. This means only those members can view the contents of that container on the site.
—
Tutorial Video
—
For Reference (with Time Stamps)
0:01 Brief WishList Member setup Overview. Includes running through the WishList Member Getting Started Wizard (Typically only needed for those who haven't configured their site yet).
7:12 Editing a Dashboard page using Elementor
7:56 Creating a layout on the page to apply protection settings.
10:01 Enabling the Elementor integration in WishList Member.
10:48 Applying WishList Member settings to elements. Creating two sections on a Dashboard page and configuring different WishList member settings for each section.
12:22 Using the Advanced > WishList Member settings in sections. Using the Members in Membership Level(s) setting to show specific content to specific users.
13:25 An example of how this appears to a user on the live site.
14:12 An example of editing another type of element (an image).
